Rock candy on a string
A very sugary syrup is left undisturbed for a week with a 'seeded' string inside: the excess sugar settles neatly onto the string and grows crystals of 5–15 mm that you can see, measure and eat.
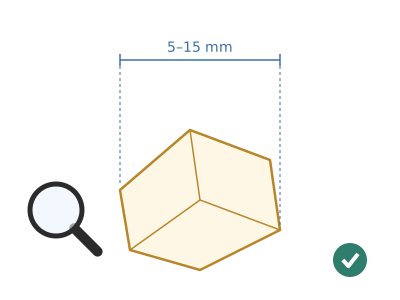
What they will learn
- That hot water dissolves much more sugar than cold water (≈ 2 kg per litre at 20 °C and almost 5 kg at 100 °C).
- What saturated and supersaturated solutions are, and that the excess sugar comes out as crystals when the liquid cools and evaporates.
- That crystals need a 'seed' to start growing on (nucleation).
- To measure and record a slow process: millimetres per day, photos and a graph.
- That identical molecules line up in an orderly way and form flat faces and straight edges.
Prepare beforehand
- Print the template page at 100 % and check that scale B measures 100 mm from 0 to 100.
- Wash the jars in very hot water and rinse well: traces of soap or dust make lots of small crystals form on the bottom instead of on the string.
- Choose now where they will spend the week: stable, free of vibrations (away from the washing machine and fridge), at room temperature and out of reach of younger siblings.
- If you can, seed the strings the night before (steps 1–4) so the seeds are completely dry.
Materials and tools
- White sugar — 600 g for the syrup + 2 tablespoons for seeding
ordinary granulated sugar (sucrose); weigh it, as '3 cups' varies a lot - Water — 250 ml
tap or filtered - Glass jars — 2
370–400 ml, 6–8 cm mouth and about 11 cm tall, clean and washed in hot water (no soap residue) - Thick cotton string — 2 pieces of 20 cm
kitchen string or cotton twine, 1–2 mm; no nylon or waxed thread (the crystals won't grip) - Pencils or sticks — 2
longer than the mouth of the jar (≥ 10 cm) - Metal paperclips — 2
small (28 mm), clean, as a weight on the end of the string - Card — 1 A4 sheet
200 gsm, for the 2 centring lids A (scale B goes on ordinary paper, which follows the curve of the jar better) - Food colouring — 3–4 drops (optional)
liquid, for the second jar - Kitchen paper — 2 sheets
to cover the card lid (against dust and insects) and to dry the string - Clear sticky tape — 20 cm
to stick the scale to the jar
Tools
- Medium saucepan and wooden spoon — making the syrup adult
- Kitchen scales and measuring jug — weighing 600 g of sugar and measuring 250 ml of water
- Kitchen thermometer (optional) — pouring the syrup at 40–50 °C adult
- Scissors and an awl or sharp pencil — cutting out lid A and making its central hole
- Oven gloves — pouring the hot syrup adult
- Phone or camera — one photo a day from the same spot for the timelapse
Pieces and templates
- A · Centring lid ×2 — card 200 gsm
- B · Growth scale ×2 — paper
- C · Seeded string ×2 — cotton string 1–2 mm
Step by step
Seed the string
In a glass, mix 2 tablespoons of sugar with 1 tablespoon of hot water. Dip the last 3.5 cm of each string C in this syrup and roll them on a plate with 2 tablespoons of dry sugar.
1 Mix 2 tablespoons of sugar with 1 of hot water 2 Dip the last 3.5 cm of each string C in that syrup 3 Roll them on a plate with 2 tablespoons of dry sugar Tip: Roll the string over the sugar with your fingers: the more grains that stick, the more starting points the crystals will have.Let the seeds dry
Hang the 2 strings straight (with a peg on a glass) without them touching and leave them to dry for at least 1 hour; overnight is better. Those stuck-on grains are the seeds.
1 Hang the 2 strings from a glass with a peg, not touching 2 Leave them to dry for at least 1 hour; overnight is better 3 When you move it, the string is stiff and the grains stay on Check: The string should feel dry and stiff, with grains that don't fall off when you move it.Cut out the centring lids
Cut out the 2 card lids A (Ø 100 mm). Pierce the 3 mm central hole and the 4 air vents with a sharp pencil, and cut the radial line from the edge to the centre with scissors.
1 Cut out the 2 lids A, Ø 100 mm, along the line 2 Pierce the centre (3 mm) and the 4 air vents with a pencil 3 Cut the line from the edge to the central hole Prepare the string set-up
Tie a paperclip to the seeded end of each string. Slide the string through the cut in lid A to the central hole and tie the other end to the pencil. Wind string round the pencil until the paperclip is 2.5 cm from the bottom of the jar.
1 Tie a paperclip to the seeded end of each string 2 Slide the string through the cut in lid A to the centre 3 Tie the string to the pencil and wind it until the clip is at 2.5 cm Check: Try the set-up on the empty jar: the paperclip should be centred, 2–3 cm from the bottom and 1.5 cm or more from the sides, and the end of the seeded part about 9 cm from the bottom (2.5 cm + 3 cm of paperclip + 3.5 cm seeded), below where the syrup will reach (1.5 cm under the rim). If your jar is less than 11 cm tall, seed less string.Heat the water adult
The adult puts 250 ml of water in the saucepan over a medium heat. When it starts to steam, add the 600 g of sugar in 6 batches of 100 g, stirring until each batch dissolves before adding the next.
1 Weigh 600 g of sugar and measure 250 ml of water 2 When it steams, add the sugar in batches of 100 g 3 Stir until each batch dissolves before adding the next Tip: Weighing is far more reliable than measuring in cups: a cup of sugar can weigh anything from 180 to 220 g.Boil until clear adult
Once all the sugar is in, turn up the heat until it boils and keep it boiling for 1 minute, stirring. The syrup must be completely clear, without a single grain on the bottom.
1 Bring it to the boil and keep it there for 1 minute, stirring all the time 2 Look at the bottom against the light: not a single grain must remain Check: Tilt the pan and look at the bottom against the light: if you see grains, keep heating and stirring until they disappear.Let it cool down adult
Turn off the heat and leave the pan covered for 30–40 minutes, until it is about 40–50 °C. Meanwhile, tell the children why it can't go in hot: it would dissolve the seeds.
1 Turn off the heat and leave the pan covered for 30–40 minutes 2 It is ready at 40–50 °C: you can touch the pan without getting burnt 3 If it is very hot, it would dissolve the seeds on the string Check: The syrup is ready when you can touch the outside of the pan for a few seconds without burning yourself (or the thermometer reads 40–50 °C).Fill the jars adult
The adult shares the syrup between the 2 jars up to 1.5 cm below the rim (≈ 300 ml each). If you want a coloured jar, add 3–4 drops of colouring to that one and stir with a clean teaspoon.
1 Pour the syrup into the jars, standing on a cloth 2 Fill them to 1.5 cm from the rim: about 300 ml in each 3 If you want colour, add 3–4 drops to one jar and stir Hang the string
Rest lid A on the mouth of the jar with the pencil on top, so that the string hangs straight down through the central hole. Check that the paperclip doesn't touch the bottom or the sides. Cover with a sheet of kitchen paper.
1 Lower the string into the jar and rest lid A on the mouth 2 The string hangs straight and centred, not touching the bottom or sides 3 Cover with a sheet of kitchen paper Check: The string hangs vertical and still; the 3.5 cm of seeded string are fully submerged, with at least half a centimetre of syrup above them.Stick on the scale
Stick scale B vertically on the outside of the jar, with the word BOTTOM at the base, touching the table, and cover it with clear tape. If it sticks out at the top, trim off the excess flush with the rim of the jar. The numbers count downwards from the rim. Take the first photo (day 0) from a fixed spot, with the scale visible.
1 Tape scale B to the outside, with 'BOTTOM' at the base 2 Take the first photo (day 0), always from the same spot Wait without moving it
Don't move the jars for 7 days. Every day, at the same time, take a photo and note down the thickness of the cluster and which numbers on scale B the crystals reach at the top and bottom.
1 Don't move the jars: the crystals grow day by day 2 Every day at the same time, take a photo and note the measurements 3 Measure the cluster's thickness and which mark on B it reaches Tip: The first visible crystals usually appear between 24 and 48 hours.Break the crust
If a hard layer of sugar forms on the surface, every 2 days lift the pencil slightly and slide lid A out sideways, passing the string through its cut; rest the pencil on the rim of the jar again so the string keeps hanging in the centre. Carefully break the crust with the tip of a table knife, away from the string, remove the pieces with a teaspoon and slide lid A back in through the cut.
1 Slide lid A out sideways through its cut; the pencil stays on the rim 2 Break it with the tip of a table knife, without touching the string 3 Remove the pieces with a teaspoon; repeat every 2 days Take out and dry the crystals
On day 7 (or when they stop growing), pull the string straight up; if it is stuck to the crust, break the crust first. Hang it over an empty glass for 2 hours so it drains and dries.
1 On day 7, pull the string slowly upwards 2 Hang it over an empty glass for 2 hours to drain 3 Look at a crystal with a magnifier: flat faces and straight edges Check: Crystals of 5–15 mm, transparent, with flat faces and straight edges: look at one with a magnifying glass.
Does it work? The test
Each day, measure the crystal cluster with scale B (the height it covers and its thickness) and take the daily photo. On day 7, take it out, dry it and weigh the string on the scales (if they are precise).
What should happen: After 24–48 h, crystals of 1–2 mm appear on the seeds. After 7 days the cluster is 1.5–3 cm thick, with individual crystals of 5–15 mm, and weighs about 20–60 g. Crystals always grow on the bottom and sides too: that is normal.
If something goes wrong
- 3 days go by and nothing grows — Syrup not concentrated enough (the sugar wasn't weighed) or the room is very warm. Solution: Reheat the syrup, adding another 100 g of sugar, let it cool and try again with a newly seeded string.
- The seeds on the string have disappeared — The syrup was too hot when poured and dissolved them. Solution: Take out the string, seed it again and wait until the syrup is at 40–50 °C before hanging it back in.
- The whole bottom fills with sugar and hardly any grows on the string — Some sugar was left undissolved, the jar was dirty or the jar has been moved. Solution: Reheat until completely clear, use very clean jars and don't move the jar. A wooden skewer instead of string gives more surface.
- The crystals have stuck to the side of the jar — The string wasn't centred or it moved. Solution: Use lid A and the paperclip weight; leave at least 1.5 cm between the string and the glass.
- The syrup has turned into one solid mass — Too much sugar, cooling too fast or a knock. Solution: Add 50 ml of water, reheat until it dissolves and start again.
- There is mould or there are insects — Jar left uncovered or in a warm, damp place. Solution: Always cover with lid A and kitchen paper, and move it somewhere cooler. Throw away mouldy syrup.
Safety
- The syrup reaches 103–105 °C and sticks to skin: it burns far worse than boiling water. Only an adult heats and pours it, wearing oven gloves, and the children stay 1 m away from the hob.
- Stand the jar on a cloth when pouring: cold glass can crack if very hot syrup is poured into it (another reason to let it cool down).
- The crystals are only edible if everything was clean and there was no mould; the paperclip must never be sucked or eaten.
- They are pure sugar: treat them as an occasional sweet and brush your teeth.
- Paperclips and bits of crystal are small: keep them out of reach of children under 3.
The science behind it
For children
Hot water is like a stretchy rucksack: it can hold loads of grains of sugar. When it cools down, the rucksack shrinks and can't carry as much any more, so the extra sugar has to come out. And it comes out looking for somewhere to hold on to: the little seeds we stuck to the string. There, the sugar molecules line up very neatly, like bricks in a wall, one on top of another. That's why the crystals grow with smooth faces and straight corners.
For the adult
The solubility of sucrose rises sharply with temperature: ≈ 200 g per 100 ml of water at 20 °C and ≈ 480 g at 100 °C. Our recipe (600 g in 250 ml, i.e. 240 g/100 ml) is saturated at about 35–40 °C and becomes supersaturated as it cools to room temperature; in addition, slow evaporation through the air vents concentrates the solution even further. A supersaturated solution is metastable: the excess only precipitates if there are nuclei to start from (heterogeneous nucleation). The seeds on the string, rough and already crystalline, offer the lowest-energy surface, which is why the crystals grow there: the molecules join one by one at the positions of sucrose's monoclinic lattice, which gives crystals with flat faces. If cooling is fast, or there is dust, undissolved grains or vibration, many nuclei appear and you get lots of small crystals instead of a few large ones. Pouring the syrup at 40–50 °C is a compromise: above the saturation temperature the seeds redissolve; well below it, the supersaturation is so high that it crystallises en masse on the bottom.
- dissolve: when a solid mixes with a liquid and disappears from sight, like sugar in water.
- saturated solution: water that can't dissolve any more sugar at that temperature.
- supersaturated: water with more sugar than it should be able to hold; it is just waiting to let it go.
- crystal: a solid whose molecules are arranged in a geometric pattern, with flat faces.
- seed (nucleus): a small grain where a crystal starts to grow.
- evaporation: when water slowly turns into vapour and goes off into the air.
By age
- 5–7 years: The adult does everything in the kitchen. The child seeds the string, fits the paperclip and lid A and takes the daily photo. Instead of measuring in mm, they compare each photo with the one before: 'Is it fatter?'.
- 8–10 years: They weigh the sugar and measure the water, set up the string and the scale, and fill in the table every day. Introduce the words dissolve, saturated and crystal.
- 11–12 years: They work out the concentration (g per 100 ml) and compare it with the solubility curve. They draw the growth graph and make the timelapse from the photos. Challenge: try different pouring temperatures and explain the result.
In a group or in class
Teams of 3–4 with 1 jar and 1 string per team. At home or in the school kitchen, the adult prepares a large pan with 3 kg of sugar and 1.25 l of water (5 times the recipe, for 10 jars) and serves it lukewarm in the classroom. Before the session: seed the strings (this can be done in the previous session, 15 min) and cut out lids A. A 40-minute session on day 1 and 5 minutes of measuring a day for a week; at the end, comparison and a shared graph on the board.
Challenges
- Get the biggest single crystal you can: choose the best one on day 7, tie it to a fine thread and put it in fresh syrup (the seed crystal technique).
- Make a 7-day timelapse from the daily photos.
- Try a wooden skewer, cotton string and a pipe cleaner: where do they grow best?
- Grow crystals of salt, sugar and bicarbonate of soda and compare their shapes with a magnifying glass.
- Work out how many grams of sugar have gone onto the string by weighing it before and after.
More free projects
- Bouncy egg without a shell
- Coloured carnations
- Fizzy drink and sweets fountain
- Foaming volcano
- Giant yeast foam
- Hidden colours in ink
- Homemade stretchy slime
- Moving colours in milk
- Oil bubble lamp
- Raisins that rise and sink
- Red cabbage acid indicator
- Secret messages with lemon juice
- Self-inflating ghosts
- Cubic salt crystals