Foaming volcano
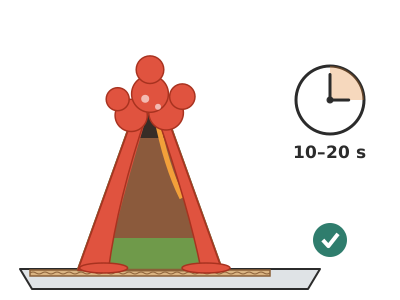
A 20 cm tall volcano made from a card cone and papier-mâché around a 330 ml bottle. When you pour vinegar onto bicarbonate of soda mixed with washing-up liquid and colouring, red foam “lava” pours out of the crater for 10–20 seconds.
What they will learn
- That mixing an acid (vinegar) with a base (bicarbonate of soda) forms a new substance: a gas, carbon dioxide.
- That the gas takes up far more space than the powders and liquids it comes from: 10 g of bicarbonate of soda makes about 3 litres of gas.
- That washing-up liquid traps the gas in bubbles and turns the fizzing into a foam that rises and overflows.
- That the reaction stops when one of the ingredients runs out (the limiting reactant), and can be started again by adding more.
- To measure quantities (spoonfuls, millilitres) and repeat an experiment changing just one thing.
Prepare beforehand
- Print the cone on A3 at 100 % (or draw the two halves with a 266 mm piece of string tied to a pencil), and the funnel and ruler on A4.
- Wash the bottle and remove the label. Keep the cap: you will use it to close the mouth while you apply the papier-mâché.
- Tear the newspaper into 3 × 15 cm strips (about 80) before you start.
- Make the flour paste: 60 g of flour in 250 ml of cold water, stir until there are no lumps and heat over a medium heat, stirring for 3–5 minutes until it is as thick as yoghurt. Leave it to cool for 15 minutes.
- On eruption day: choose somewhere outdoors or a large tray, and have a cloth, a bucket of water and goggles for each child.
Materials and tools
- 330 ml plastic bottle — 1
water bottle, about Ø 60 × 200 mm, mouth Ø 21 mm inside, cap off for the eruption - Card or thin card — 2 A3 sheets (or a large cereal box opened out)
250–350 gsm, for the two halves of the cone - Corrugated cardboard — 1 sheet, 30 × 30 cm
volcano base - Newspaper — 4–5 sheets
torn into 3 × 15 cm strips - Wheat flour (flour paste) — 60 g (½ cup)
with 250 ml of water - Bicarbonate of soda (sodium bicarbonate) — 2 level tablespoons (≈ 20 g) for every 2 eruptions
kitchen bicarbonate of soda (NaHCO₃) - White vinegar — 150 ml per eruption (300 ml in total)
distilled or white wine vinegar, 5–6 % acidity - Washing-up liquid — 1 teaspoon (5 ml) per eruption
any hand dishwashing detergent - Poster paint or food colouring — 1 teaspoon of red poster paint (or 10 drops of colouring) per eruption
red, plus a little yellow for an orange tone - Brown, green and black poster paint — as needed
to paint the volcano - PVA glue — 50 ml
diluted with 50 ml of water, as a protective varnish - Modelling clay — 1 ball, 30 g
to hold the bottle on the base without gluing it - Masking tape — 1 roll
to close the cone and fix it to the base
Tools
- Scissors — cut out the cone and the funnel
- Craft knife and ruler — cut the cardboard base adult
- Saucepan and wooden spoon — cook the flour paste adult
- Tablespoon and teaspoon — measure the bicarbonate of soda and washing-up liquid
- Measuring jug or a glass marked at 150 ml — measure the vinegar and pour it in one go
- Safety goggles (or swimming goggles) — protect eyes from vinegar splashes
- Large baking tray or washing-up bowl — catch the foam
- Stopwatch (mobile phone) — time how long the eruption lasts
- Small glass — mix the warm water, washing-up liquid and poster paint before pouring them into the bottle
Pieces and templates
- A · Half cone ×2 — card 250–350 gsm
- B · Base ×1 — corrugated cardboard 3–4 mm
- C · Paper funnel ×1 — paper or thin card
- D · Foam ruler ×1 — card
Step by step
Prepare the base adult
Cut base B to 30 × 30 cm and, from its centre, draw a Ø 180 mm circle (edge of the volcano) and a Ø 60 mm circle (bottle). If you can, put it inside a baking tray.
1 The adult cuts base B to 30 × 30 cm with a ruler and craft knife 2 From the centre, draw a Ø 180 mm circle and a Ø 60 mm circle 3 If you can, put the base inside a baking tray Cut out the cone halves
Cut out the two halves A from thick card, following the outer arc (r 266 mm), the inner arc (r 59 mm) and the two straight edges. Each half has 3° extra for overlapping: about 14 mm at the bottom and 3 mm at the top.
1 Draw half A: arcs of r 266 and r 59 mm opened to 64° 2 Cut along both arcs and the straight edges 3 Cut out two identical halves A Form the cone
Join the two halves with masking tape, overlapping their straight edges (14 mm at the bottom, 3 mm at the top), inside and out. You will get a cone with no point, 195 mm tall, with a Ø 40 mm hole at the top.
1 Overlap two straight edges (14 mm at the bottom, 3 mm at the top) and tape them 2 Roll it up and join the other edge the same way, outside and inside 3 Cone with no point: 195 mm tall, Ø 180 at the bottom and Ø 40 at the top Check: The bottom edge matches the Ø 180 mm circle on the base.Fix the bottle
Put the ball of modelling clay on the Ø 60 mm circle and press the empty bottle down on it, straight. Screw on its cap so no paper or paste gets in.
1 Put the ball of modelling clay on the Ø 60 mm circle 2 Press the bottle down on top, nice and straight 3 Screw on the cap and check it is upright from the front and the side Check: Look at the bottle from the front and from the side: it is upright.Place the cone
Lower the cone over the bottle until it rests on the base over its circle. The neck should stick out of the crater by 5–10 mm (the bottle is 200 mm, the cone 195 mm and the modelling clay lifts it a little more). Tape the bottom edge to the base with 6 pieces of tape and cover the gap between the crater and the neck with 2 turns of tape.
1 Lower the cone over the bottle down to the base 2 Tape the bottom edge to the base with 6 pieces of tape 3 Cover the gap between the crater and the neck with 2 turns of tape Check: The cone rests on the base all the way round its edge, does not touch the bottle except at the neck, and the neck sticks out of the crater by 5–10 mm.Apply the papier-mâché
Dip each newspaper strip in the paste, squeeze off the excess between two fingers and stick it on the cone from the bottom up, overlapping by 1 cm. Make 3 layers, crossing the direction of the strips. Scrunch some paper balls under the last layer to make rocks.
1 Dip each strip in the paste and squeeze off the excess between two fingers 2 Stick them on from the bottom up, overlapping by 1 cm 3 Make 3 crossed layers and tuck in paper balls to make rocks Tip: Do not take the paper above the rim of the neck: if you cover the mouth, the lava will not come out cleanly.Leave to dry
Leave the volcano for 24 hours somewhere airy (or 4–6 hours near a radiator, never on it). Take the cap off the bottle when it is dry.
1 Leave it to dry for 24 hours somewhere airy 2 Near a radiator, yes; on it, never 3 If it sounds hollow and hard, take the cap off Check: When you knock on it with your knuckle it sounds hollow and hard, with no soft or cold patches.Paint
Paint it all brown with poster paint, add patches of green at the bottom and black near the crater, and streaks of red and orange running down the slope. Leave to dry for 1 hour.
1 Paint the whole volcano brown 2 Add green at the bottom, black at the top and red streaks; dry for 1 hour Protect with glue
Mix 50 ml of PVA glue with 50 ml of water and brush a coat over the whole volcano. Once dry (1–2 hours) it is shiny and survives several eruptions without falling apart.
1 Mix 50 ml of PVA glue with 50 ml of water 2 Brush a coat over the whole volcano 3 Leave to dry for 1–2 hours: it turns shiny Load the volcano
Using funnel C, put 1 level tablespoon of bicarbonate of soda (≈ 10 g) into the bottle. Separately, in a glass, mix 50 ml of warm water, 1 teaspoon of washing-up liquid and 1 teaspoon of red poster paint with the teaspoon. Pour the mixture through the funnel: as it lands on the powder it stirs it by itself, so there is no need to move the volcano.
1 Using funnel C, put in 1 level tablespoon of bicarbonate of soda 2 In a glass, mix 50 ml of warm water, 1 teaspoon of washing-up liquid and another of poster paint 3 Pour the mixture through the funnel without moving the volcano: 2 cm of red liquid Check: Inside there is a cloudy red liquid with some white powder at the bottom, about 2 cm deep.Prepare the vinegar
Measure 150 ml of vinegar into a jug with a spout. Put on your goggles and place the volcano on the tray, with ruler D standing next to it if you want to measure.
1 Measure 150 ml of vinegar into a jug with a spout 2 Put on your goggles and place the volcano on the tray with ruler D Eruption!
Pour the 150 ml of vinegar into the crater in a quick, steady stream, over about 3–5 seconds, and move your hand away. The red foam rises straight away and overflows down the slope; if it starts coming out before you have finished, pour in the rest anyway: whatever spills lands in the tray. Time it from when you pour until the foam stops coming out.
1 Pour the 150 ml of vinegar into the crater in a quick stream 2 Move your hand away: the red foam rises and comes out of the crater 3 Time it: foam comes out for 10–20 s and runs down to the base Check: Foam comes out for 10–20 seconds and runs down the slope to the base.Second eruption
When it stops, add 1 more tablespoon of bicarbonate of soda with the funnel and another 150 ml of vinegar. Compare the height and duration with the first one.
1 When it stops, add another tablespoon of bicarbonate of soda with the funnel 2 Pour in another 150 ml and compare the height with the first one Clean up
The bottle stays fixed inside the volcano and does not come out. Carry the volcano on its tray to the sink, turn it upside down to empty the bottle and run plenty of water; fill it through the crater with tap water and turn it over again to rinse it. Dry the foam off the volcano with kitchen roll. The leftovers (water, sodium acetate, soap and poster paint) can go down the drain.
1 The bottle does not come out: turn the whole volcano over in the sink and run water 2 Dry the foam off the volcano with kitchen roll
Does it work? The test
With 10 g of bicarbonate of soda, 5 ml of washing-up liquid, 50 ml of warm water and 150 ml of vinegar poured in one go, measure the height of the foam above the crater with the ruler and time the eruption.
What should happen: The foam appears at the crater within 1–2 seconds, rises 2–4 cm above it, overflows and runs down the slope for 10–20 seconds, reaching the base. Without washing-up liquid, the liquid just fizzes and barely leaves the bottle.
If something goes wrong
- It fizzes inside but nothing comes out — No washing-up liquid, or too little bicarbonate of soda. Solution: Add 1 teaspoon of washing-up liquid and use at least 1 tablespoon of bicarbonate of soda. Pour the vinegar in one go, not little by little.
- The eruption lasts a second and stops — The vinegar has run out: there is more bicarbonate of soda than can react. Solution: Add another 100–150 ml of vinegar: foam will come out again.
- The bicarbonate of soda sticks in the neck — The bottle was wet when you put the powder in. Solution: Use the funnel with a dry bottle, or first dissolve the bicarbonate of soda in the 50 ml of water in a glass and pour it in.
- The volcano goes soft — Papier-mâché not dry enough or no coat of glue. Solution: Leave it to dry for another 24 h and apply the coat of diluted glue before the next eruption.
- The cone will not fit or sits crooked — A thicker bottle, or the cone closed with too much overlap. Solution: Open the cone by peeling off the tape and overlap less; or use the recommended 330 ml bottle.
- The foam comes out pale pink — Too little poster paint, or paint diluted by the foam. Solution: Use 2 teaspoons of poster paint or gel food colouring, and a touch of yellow for orange.
Safety
- Wear goggles: vinegar splashed in the eyes stings. If it gets in, rinse with plenty of water for 10 minutes.
- Never put the cap back on the bottle after pouring in the vinegar: the gas builds up pressure and the cap can shoot off.
- The flour paste is cooked on the hob: an adult does it and lets it cool before the children touch it.
- Do not mix in any other cleaning products (bleach, ammonia): only the ones in this recipe.
- Do not drink or taste the mixture, even though the ingredients come from the kitchen.
- A floor with foam on it is slippery: do it over a tray and wipe up straight away.
The science behind it
For children
Vinegar is a little bit acidic (that is why it stings your tongue) and bicarbonate of soda is the opposite. When they come together, they turn into new things, and one of them is an invisible gas, the same one that makes the bubbles in fizzy drinks. That gas needs loads more space than the powders, so it pushes upwards. The soap traps the gas in millions of bubbles, like when you blow into a glass of soapy water, and that is why a foam comes out and spills over like lava.
For the adult
It is an acid-base reaction that gives off a gas: NaHCO₃ + CH₃COOH → CH₃COONa + H₂O + CO₂. 5 % vinegar contains ≈ 0.83 mol/L of acetic acid; 150 ml provides ≈ 0.125 mol, which reacts with ≈ 10.5 g of bicarbonate of soda (M = 84 g/mol) and releases ≈ 0.125 mol of CO₂, about 3 L at room temperature. As there are 10 g of bicarbonate per eruption, the two reactants are almost in proportion; if there is excess bicarbonate, the vinegar is the limiting reactant and simply adding more vinegar restarts the reaction. The surfactant in the washing-up liquid lowers the surface tension and stabilises the bubbles, so the gas forms a large volume of foam that rises up the narrow neck (which speeds up the flow) and overflows. Warm water speeds up dissolving and the reaction rate. The reaction is slightly endothermic: the bottle feels a little colder. The products (sodium acetate in aqueous solution) are harmless and can be poured down the drain with water.
- chemical reaction: a change in which some substances turn into different ones.
- acid: a sour-tasting substance, like vinegar or lemon.
- base: a substance that neutralises acids, like bicarbonate of soda.
- carbon dioxide: an invisible gas given off in this reaction and found in the bubbles in fizzy drinks.
- effervescence: gas bubbles coming out of a liquid.
By age
- 5–7 years: The adult cuts the cone and makes the flour paste; the child sticks on newspaper strips, paints and does the eruption, measuring with spoons. Focus on “they mix and a gas comes out”.
- 8–10 years: They build the whole volcano themselves. Have them fill in the record table and try changing just one variable at a time.
- 11–12 years: Have them write the chemical equation, work out how much vinegar is needed for 10 g of bicarbonate of soda and check it by finding the ratio that leaves the bottle with no white powder at the bottom.
In a group or in class
Groups of 4, one volcano per group. Session 1 (60 min): cones pre-cut by the adult, bottle, papier-mâché; leave to dry in the classroom until the next day. Session 2 (45 min): painting and varnish at the start, eruptions at the end in the playground or over trays. Per group: 2 tablespoons of bicarbonate of soda, 300 ml of vinegar, 10 ml of washing-up liquid, poster paint, goggles for everyone. An eruption table with a bucket of water, a cloth and a sponge cloth.
Challenges
- Get the foam to reach the edge of the base (about 20 cm of slope and 6 cm more of base).
- Make the eruption last more than 30 seconds (hint: add the vinegar in two batches).
- Design a volcano with two craters using a bottle with two straws.
- Find the exact ratio of bicarbonate of soda to vinegar that leaves no powder at the bottom.
- Make a “slow” eruption that lasts a minute using baking powder instead of bicarbonate of soda.