Four-blade pinwheel
A 15 cm card pinwheel mounted on a 25 cm stick that spins fast when you blow on it, in front of a fan or in the breeze, thanks to a pin axle with beads that barely rubs.
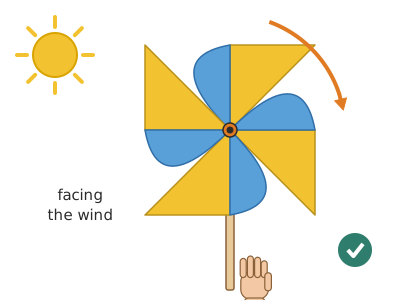
What they will learn
- That the wind pushes, and that a curved shape turns that push into spinning.
- That a good axle needs some play and little friction: parts that spin must not be squeezed tight.
- That the stronger the wind, the faster the pinwheel spins, and that turns can be counted and compared.
- That colours mix in the eye when they spin very fast.
- That symmetry (4 identical blades) makes it spin in balance.
Prepare beforehand
- Print the template at 100 % and check with the ruler that the square measures 150 mm.
- If you are going to use poster paint, paint the card first (on both sides) and leave it to dry for 20 minutes.
- Check that the pin goes into the stick: if the wood is hard, make a pilot hole with the pin itself and a few light taps, or glue the rubber onto the tip.
- Keep a fan or hairdryer (on cold) handy for testing indoors.
Materials and tools
- Card — 1 square of 15 × 15 cm (+ 1 of 10 × 10 cm for the experiment)
160–200 gsm, ideally two-coloured (a different colour on each side) or with wrapping paper glued on - Chopstick or wooden dowel — 1
Ø 6–7 mm at the tip, 22–30 cm long, straight - Ball-head pin — 1
32–38 mm long, ball head. At least 32 mm: bead, blades, bead, straw and play take up ≈ 22–28 mm of the pin, and it still has to go 5 mm into the stick - Necklace beads — 2
Ø 4–6 mm, 1–2 mm hole (bigger than the pin) - Straw — 1 piece, 10 mm long
spacer between the blades and the stick - Rubber (eraser) — 1 piece, 15 × 15 mm
optional: glued to the tip of the stick so the pin goes in easily - Glue stick or PVA glue — a little
for the reinforcing disc - Poster paints or felt-tip pens — as you like
decorate BEFORE bending (with poster paint, leave to dry for 20 min)
Tools
- Scissors — cutting out the square and the 4 diagonal cuts
- Ruler and pencil — drawing the diagonals if you do not print the template
- Fine awl or thick needle — making the 5 holes of Ø 2 mm
- Small pliers or thimble — pushing the pin into the wood adult
Pieces and templates
- A · Blades (15 cm square) ×1 — card 160–200 gsm
- B · Small blades (experiment, 10 cm) ×1 — card 160–200 gsm
- C · Central reinforcing disc ×1 — card 160–200 gsm
- D · Spacer (straw) ×1 — straw Ø 6 mm
- E · Stick ×1 — chopstick or dowel Ø 6 mm
Step by step
Decorate the card
Paint or colour both sides of the 15 × 15 cm square before cutting. If you use poster paint, leave it to dry for 20 minutes. A different colour on each side looks great once bent.
1 Paint one side of the 15 × 15 cm square 2 Turn it over and paint the other side another colour 3 With poster paint, leave to dry 20 minutes before cutting Tip: Paint half of each blade blue and half yellow for the colour-mixing experiment.Glue on the template or draw the diagonals
Cut out template A and stick it onto the card with a glue stick, or use a ruler to draw the 2 diagonals of the square and a 50 mm diameter circle in the centre.
1 Stick template A on top with a glue stick 2 Or draw the 2 diagonals with a ruler and pencil 3 They cross in the centre; draw a 50 mm circle Check: The diagonals cross exactly in the centre (75 mm from each side).Cut the 4 diagonals
With scissors, cut from each corner towards the centre along the diagonal, and STOP at the red dot, 25 mm from the centre. You are left with 4 triangular blades joined at the centre.
1 Cut the red lines only as far as the red dot 2 Cut with scissors from each corner and stop at the dot 3 You get 4 blades joined by a centre of about 35 mm Check: The uncut centre is about 35 mm across: if you have gone too far, reinforce it with tape on the back.Make the holes
With the awl or needle, make 5 holes of Ø 2 mm: the centre one and one in each of the 4 numbered tips, about 5 mm from the edge. Twist the awl so the hole ends up round and loose.
1 Mark 5 holes: centre and tips 1–4, 5 mm from the edge 2 Pierce with the awl and twist it so the hole is round 3 The pin must go in and out without catching Check: The pin goes in and out of each hole without catching.Glue on the reinforcement
Cut out the 30 mm disc C, make its centre hole and glue it to the back of the centre of the blades, with the holes lined up (push the pin through to line them up while you glue).
1 Cut out disc C, make its hole and put glue on it 2 Glue it to the back of the centre, using the pin to line up 3 The disc's hole matches the centre hole Get the pin ready
Thread onto the pin, in this order: a bead and then tip 1. Without letting go, curve tip 2 towards the centre and thread it on, then 3 and 4. Do not bend the card into a sharp crease: just curve it.
1 Slide a bead onto the pin until it is near the head 2 Thread on tip 1 and curve 2, 3 and 4 towards the centre 3 Curve them gently, without making a crease Tip: Hold the tips you have already threaded against the pin head with your thumb while you curve the next one.Go through the centre
Push the pin through the centre hole (and the reinforcing disc's hole). Then thread on the second bead and the 10 mm piece of straw D.
1 Push the pin through the centre of the blades and disc C 2 Add the second bead and the 10 mm piece of straw D 3 The 4 blades, curved the same and facing the same way Check: All 4 blades are curved the same, like 4 identical spoons facing the same way.Push it into the stick adult
With everything threaded on, the point of the pin sticks out about 5–10 mm behind the straw. Hold the stick upright on the table and rest that point in the middle of its side, 10 mm below the top end, with the pin straight (at right angles to the stick). Push the head with a thimble or squeeze it with the pliers until the pin goes about 5 mm into the wood. The parts must be able to move 1–2 mm along the pin: that play between the head and the first bead is what lets it spin.
1 Put the pin's point on the stick, 10 mm below its end 2 With a thimble, push the pin 5 mm into the wood 3 Leave 1–2 mm under the head; the point must not poke out Check: The point of the pin does not come out the other side of the stick. If it does, bend it downwards with the pliers or cover it with a little ball of modelling clay (or push it into the rubber glued to the tip, which is thicker).Check that it spins freely
Flick one blade with your finger. The pinwheel should turn several times on its own and slow down gently. If it stops straight away, move the blades a little further from the stick or loosen the pin by 1 mm.
1 Flick one blade with your finger 2 It should turn several times on its own and slow gradually 3 If it stops straight away, loosen the pin 1 mm Check: With a strong blow from 20 cm, it spins so fast you cannot make out the blades.Test it in the wind
Blow from the front, on the side with the curved tips, from about 20–30 cm. Then go outside and point the stick into the wind, or stand 1 m in front of a fan.
1 Blow from the front, on the side with the curved tips 2 Stand 1 m from a fan, facing the airflow 3 Outside, point it into the wind and watch it spin Tip: If it spins the opposite way to what you expected, that is fine: the direction depends on which way you curved the tips.
Does it work? The test
Stand 1 m from a fan on low and then high speed, with the pinwheel facing the airflow. Mark one blade with a black felt-tip dot and count the turns in 10 seconds (or film it in slow motion).
What should happen: It starts straight away when you blow. With the fan on low it makes around 5–10 turns per second: too many to count by eye, so it is best to film it in slow motion or use a gentle breeze. It should spin without stopping or wobbling.
If something goes wrong
- It does not spin or stops straight away — The pin presses the blades against the stick, or the holes are too small. Solution: Widen the holes to 2 mm, fit the straw spacer and leave 1–2 mm of play under the pin head.
- It spins jerkily and wobbles — The 4 tips are not curved the same, or the centre hole is off-centre. Solution: Make the curve of all 4 blades the same and check that the pin goes exactly through the centre.
- The blades rub on the stick — The spacer is missing or the card has been squashed. Solution: Fit a longer straw (15 mm) or a second bead between the blades and the stick.
- A tip comes off the pin — The hole is too close to the edge and has torn. Solution: Put a small piece of sticky tape on both sides of the tip and pierce it again 6–7 mm from the edge.
- The pin will not go into the stick — Hard wood or a stick that is too thin. Solution: Glue a piece of rubber or a cork onto the tip of the stick and push the pin into that.
Safety
- The pin is sharp: an adult pushes it into the wood and checks that the point does not stick out. If it does, bend it over or cover it with modelling clay.
- Do not run with the pinwheel in front of your face: the stick and the pin can hurt your eyes.
- The beads and the pin are small parts: keep them out of reach of children under 3.
- With the fan or hairdryer, keep fingers away from the grilles; always use the hairdryer on cold.
The science behind it
For children
Wind is moving air, and it pushes everything in its way, like when it messes up your hair. The blades of the pinwheel are like open spoons that catch the air. Because they all face the same way, the air pushes them all in the same direction and the pinwheel goes round. The harder it blows, the faster it spins. The giant wind turbines you see on hills do the same thing and, as they turn, they make electricity.
For the adult
Moving air has kinetic energy (proportional to v²; the power passing through the rotor grows with v³). Each curved blade deflects the flow: changing the direction of the air produces a reaction force on the card, with a tangential component that creates a torque about the axle. Because the four blades are symmetrical about the centre, their components add up in the same direction of rotation. This pinwheel is a low-efficiency rotor that works mainly by drag, and its blade tips move at roughly the wind speed (tip speed ratio ≈ 1): at 3 m/s and Ø 15 cm, that is around 6 turns per second. The starting torque is small, so friction at the axle decides whether it spins: hence loose holes, beads acting as point-contact bearings and a spacer that keeps the blades off the stick. Real wind turbines use aerofoil sections (lift) and their tips move much faster than the wind; their theoretical maximum power is 59 % of the wind's (Betz limit).
- wind energy: energy obtained from the wind.
- axle: the part something turns around (here, the pin).
- friction: a force that slows things down when two surfaces rub together.
- wind turbine: a modern windmill that turns spinning into electricity.
- symmetry: when a shape has identical parts arranged in an orderly way.
By age
- 5–7 years: The adult cuts the diagonals up to the dot and pushes in the pin. The child decorates, makes the holes with a sharp pencil (with help), threads the tips on in the order 1-2-3-4 and tests it by blowing.
- 8–10 years: They do it on their own except for pushing in the pin. Have them count turns with slow-motion video and compare sizes.
- 11–12 years: Have them design blades of a different shape (6 blades, flat blades angled at 30° in a bottle cap) and measure which spins most. Challenge: make the pinwheel wind up a thread and lift a paperclip.
In a group or in class
Individual (each child makes their own pinwheel), at tables of 4 sharing scissors and awls. Before the session: print 25 templates, cut the card squares and push each pin into its stick once to make the pilot hole. 45-minute session: 10 decorating, 20 assembling, 15 at a «wind station» with 2 fans where children take turns counting turns. Have sticky tape ready to repair torn tips.
Challenges
- Make your pinwheel lift a paperclip: stick a piece of straw onto the pin behind the blades, tie on 30 cm of thread and let it wind up as it spins.
- Make a 6-blade pinwheel from a hexagon and compare its speed.
- Put the pinwheel on a weathervane (a card tail behind it) so it turns into the wind by itself.
- Make a row of 5 pinwheels and find out which direction the wind comes from in the playground.