Crank-operated flapping bat
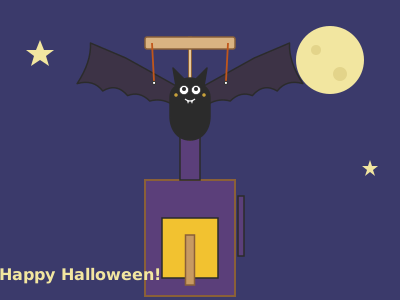
A cardboard automaton: when you turn the crank, an eccentric cam hidden inside a box pushes a rod up and down, and the rod pulls two threads that make the bat raise and lower its wings by about 57° on every turn.
What they will learn
- What an eccentric cam is: a disc that turns around a point that is not its centre and converts rotation into an up-and-down movement.
- That the cam's stroke (how far it raises the rod) is twice the eccentricity: 2 × 12 mm = 24 mm.
- How a flat-faced follower and two guides keep the rod straight, and why gravity brings it back down.
- That the same stroke moves the wing more or less depending on how close to the pivot the thread is tied (lever arm).
- How automata and crank toys work: an input movement (turning) is transformed into an output movement (flapping).
Prepare beforehand
- Print the templates at 100 % (without «fit to page») and check with a ruler that the red line in the header measures 50 mm.
- Cut the skewers before the session: 1 of 110 mm (axle), 1 of 170 mm (follower rod) and 1 of 35 mm (handle). Remove the sharp points.
- Cut a 60 mm length (guide) and a 25 mm length (handle sleeve) from the straw and check that the skewer slides freely inside.
- Paint the thin card for the wings and the cardboard for the body black before cutting them out: that way they dry while you build the box.
- For young children, have the window in wall C already cut and all the holes already pierced.
Materials and tools
- Corrugated cardboard — about 30 × 40 cm in total (for example, 2 sheets of 30 × 20 cm)
single-wall, 3 mm, flat and uncreased (from a delivery box or a thick shoebox) - Thin card — 1 piece of 25 × 10 cm
from a cereal or biscuit box (≈ 0.5 mm), for the wings - Wooden skewers — 3
bamboo, Ø 3 mm and 25–30 cm, straight (roll them on the table to check they are not bent) - Straw — 1
straight, Ø 6 mm (you need 60 mm for the guide and 25 mm for the handle) - Split pins — 2 (+1 spare)
with a round 6–8 mm head and 15–20 mm legs (the school stationery kind) - Thread — 2 lengths of 15 cm
0.3 mm clear fishing line (almost invisible) or doubled black sewing thread - Glue — 1 hot glue stick or 1 bottle of PVA glue
hot glue (quick, used by an adult) or PVA glue (30 min drying time) - Glue stick — 1
to stick the paper templates onto the cardboard - Sticky tape — 1 roll
clear, to reinforce the holes in the wings and hold the threads - Black paint or felt-tip pen — 1
black poster paint or acrylic, or a thick permanent marker, for the bat - White paper and red felt-tip pen — a small piece
for the eyes and the fangs - 5-cent coin — 1 (only if needed)
≈ 4 g; glued onto the follower foot if the rod is slow to drop
Tools
- Scissors — cutting out the pieces, the wings and the straw
- Craft knife with metal ruler and cutting mat — cutting the window in the front wall and the long straight pieces adult
- Awl or pointed skewer — piercing the 2–5 mm holes (axle, pivots, guide, cam) adult
- Hot glue gun — gluing the cam to the axle, the box, the mast and the rod adult
- Ruler and pencil — measuring and checking the marks
- Empty ballpoint pen — scoring the folds of the guide
- Paintbrush — painting the bat
Pieces and templates
- A · Base ×1 — corrugated cardboard 3 mm
- B · Side (with axle hole) ×2 — corrugated cardboard 3 mm
- C · Front wall with window ×1 — corrugated cardboard 3 mm
- D · Lid ×1 — corrugated cardboard 3 mm
- G · Rod guide (bridge) ×1 — corrugated cardboard 3 mm
- L · Eccentric cam (3 layers) ×3 — corrugated cardboard 3 mm
- K · Crank (2 layers) ×2 — corrugated cardboard 3 mm
- W · Axle washer ×2 — corrugated cardboard 3 mm
- H · Follower foot (2 layers) ×2 — corrugated cardboard 3 mm
- M · Mast ×1 — corrugated cardboard 3 mm
- N · Gusset (mast bracket) ×2 — corrugated cardboard 3 mm
- E · Bat body ×1 — corrugated cardboard 3 mm
- F · Wing (right; the left one with the template flipped over) ×2 — thin card (cereal box)
- T · Thread crossbar ×1 — corrugated cardboard 3 mm
- P · Guide straw ×1 — straw
- X · Axle ×1 — wooden skewer
- V · Follower rod ×1 — wooden skewer
- J · Crank handle ×1 — wooden skewer
- Q · Wing threads ×2 — thread
Step by step
Cut out the cardboard pieces
Stick the templates onto the corrugated cardboard with a glue stick, with the flutes as each arrow shows, and cut out the 13 thick pieces: base A, sides B (2), front C, lid D, guide G, cam L (3 discs of 50 mm), crank K (2), washers W (2), foot H (2), mast M, gussets N (2), body E and crossbar T.
1 Spread glue stick on the cardboard and stick on the templates 2 Cut out each piece along the solid line, like disc L 3 Keep the box, cam and foot pieces to hand Check: The 3 cam discs measure 50 mm and the 2 sides B, 90 × 110 mm.Tip: Cut out the big pieces first and keep the small ones (cam, washers, foot) in a cup so you don't lose them.Cut the window and pierce the holes adult
Using a craft knife and ruler, cut the 56 × 60 mm window in wall C. With the awl, pierce the 4 mm axle hole in each side B, the 5 mm hole in lid D and in guide G, and the 3 mm off-centre hole in each cam disc L.
1 Cut the 56 × 60 mm window with a craft knife and ruler 2 Pierce the holes by twisting the awl over an eraser 3 In the cam, the skewer fits tightly through the hole Check: The skewer turns freely in the holes in B and fits tightly in the holes in the cam.Tip: Rest the cardboard on a large eraser or a piece of cork and twist the awl until the skewer fits snugly (cam) or loosely (sides).Build the box adult
Glue the two sides B standing on the left and right edges of base A (90 × 90 mm) and wall C between them on the front edge. The back stays open so you can see the mechanism. Check with a set square that the walls are at 90°.
1 Put hot glue on the edges of the base and stick on a side B 2 Glue wall C at the front, between the sides, at 90° 3 The two holes face each other, 45 mm above the base Check: The axle holes in the two sides are at the same height (45 mm above the base) and facing each other: a skewer passes straight through both.Glue in the rod guide adult
Score the two folds of guide G with the empty ballpoint pen and fold the 15 mm tabs down. Slide the guide in through the back of the box and glue the tabs on the marks on the sides, with the top face 95 mm above the base and the hole centred.
1 Score the two folds of G 15 mm from each end 2 Glue the tabs to the inside of the sides, at 95 mm 3 From above, the hole in G is in the centre Check: Looking from above, the hole in G is in the centre of the box (45 mm from each side and from the front).Make the cam
Thread the 3 discs L onto a piece of skewer through their off-centre holes, line up the edges and the mark on all three layers and glue them together with PVA glue or hot glue. Take the skewer out before it is completely dry. You get a cam 50 mm across and 9 mm thick.
1 Thread the 3 discs through their hole and glue them lined up 2 Check: 13 mm on the short side and 37 mm on the long side Check: Measure from the hole to the edge: 13 mm on the short side and 37 mm on the long side (the difference, 24 mm, is how far the rod will rise).Tip: Squeeze the three discs together with clothes pegs while the glue dries.Fit the axle with the cam adult
Push the 110 mm skewer through the hole in the left side, thread the cam on inside the box and bring the skewer out through the right side, leaving 12 mm sticking out on the right and 8 mm on the left. Centre the cam (37.5 mm from each side, inside) and glue it to the axle with hot glue.
1 Push the axle through one side, thread on the cam and out the other 2 Centre the cam between the sides and hot-glue it to the axle 3 Turn the axle: the cam doesn't touch the floor or the wall Check: When you turn the axle with your fingers, the cam goes round without touching the floor (8 mm clearance) or the front wall (5 mm).Tip: If the cam wobbles on the skewer, wrap a turn of sticky tape round the stick before threading it and then add the hot glue.Fit the crank and the washers adult
Glue the 2 layers of crank K together. Push the 35 mm skewer into its outer hole, glue it and slip the 25 mm straw sleeve over it. Glue a washer W onto the axle on the outside of each side, leaving 1 mm of play, and glue the crank onto the axle outside the right-hand washer.
1 Glue the 2 layers of K and handle J with its straw sleeve 2 Glue washer W with a paper spacer and the crank outside it 3 The crank turns freely and the axle doesn't slide sideways Check: The crank turns with one finger, the axle doesn't slide sideways and the handle sleeve turns freely.Tip: Put a folded strip of paper between the washer and the side while it dries: when you remove it, you are left with just the right amount of play.Close the lid and glue on the mast adult
Glue lid D onto the walls, with the edge marked FRONT over wall C. Glue mast M standing on its mark, the two gussets N in front and, behind the mast, the 60 mm guide straw P, upright directly above the hole in the lid.
1 Glue lid D onto the walls, with FRONT over C 2 Glue on mast M and, behind it, straw P over the hole 3 A skewer goes straight down the straw, lid and guide Check: A skewer pushed into the straw goes straight down through the hole in the lid and the hole in guide G without rubbing.Insert the rod and glue on the foot adult
Turn the crank until the cam has its short side at the top. Insert the 170 mm rod V from above through the straw, the lid and the guide. Glue the 2 layers of foot H together and, through the opening at the back, fit the foot onto the bottom end of the rod with a drop of hot glue.
1 With the cam down, insert the 170 mm rod V from above 2 Fit foot H on the bottom end with a drop of hot glue 3 Turn the crank: the rod rises and falls 24 mm Check: With the cam down, the tip of the rod sticks out about 59 mm above the mast; when you turn the crank it rises and falls 24 mm.Tip: Glue the foot at right angles to the rod: if it is crooked, one edge will rub on the cam.Make the bat
Cut the 2 wings F out of the black-painted thin card (one with the template face up and the other with it flipped over) and paint body E. Stick on the white paper eyes and draw the mouth and fangs. Reinforce the holes in the wings with tape and pierce them: 3 mm for the pivot and 2 mm for the thread.
1 Paint the thin card for the wings and the body black 2 Cut out the 2 wings: one with the template face up, one flipped 3 Add eyes and fangs and pierce the tape-reinforced holes Check: The two wings are symmetrical and each has its two holes along the top edge, 25 mm apart.Tip: For a friendlier bat, make the eyes big (Ø 9 mm) with the pupils looking up.Attach the wings with split pins
Place each wing behind the body, with its pivot hole over the shoulder hole. Push a split pin through from the front, open the legs at the back upwards and downwards, and leave 1 mm of play so the wing drops on its own under its weight.
1 Put the wing behind the shoulder and push the split pin in from the front 2 At the back, open the legs up and down, without squeezing 3 Lift the wing and let go: it must drop on its own Check: Lift a wing with your finger and let go: it must drop on its own until it hangs down. If it stays up, loosen the legs.Tip: Put a strip of card between the head of the split pin and the body while you bend the legs; then remove it.Glue the body onto the mast adult
Glue body E onto the front of the mast, centred, with the bottom 20 mm of the body overlapping the top of the mast. The wings must be free behind the body, without touching the mast or the rod.
1 Put glue on the top 20 mm of the mast and stick the body in front 2 The shoulders are 25 mm above the mast and the wings are free Check: The shoulders (split pins) are 25 mm above the top of the mast and the wings go up and down by hand without rubbing.Fit the crossbar and the threads
Glue the 90 mm crossbar T onto the front of the tip of the rod, centred and horizontal. Tie a 15 cm thread to the hole at each end of the crossbar and the other end to the 2 mm hole in its wing, leaving about 40 mm of thread between hole and hole.
1 Glue crossbar T centred and horizontal on the tip of the rod 2 Tie the thread to the wing and fix its length on the crossbar with tape Check: With the cam down, both threads are taut and the wings hang equally low.Tip: Tie the thread to the wing first with a double knot and fix the length at the crossbar with a small piece of tape: that way you can adjust it.Adjust and test
With the cam down, adjust each thread until the wing tip is about 5 cm below the shoulder. Turn the crank slowly: on each turn the wings should rise to about 5 cm above the shoulder and drop back down. When it works, fix the threads with a knot.
1 With the cam down, the wing tip is 5 cm below the shoulder 2 Turn the crank: the wings rise 5 cm above the shoulder 3 Decorate the box as a haunted tower and off it flies Check: At one turn per second, the bat flaps once per second, with both wings together and without the rod jamming.Tip: To set the scene, paint the box dark purple with stars and a moon, and stick a wool cobweb in one corner.
Does it work? The test
Hold the box on the table with one hand and turn the crank at different speeds: 1 turn every 2 seconds, 1 turn per second and as fast as you can. Measure with a ruler how far the tip of one wing rises.
What should happen: On each turn of the crank the rod rises and falls 24 mm and the wings go from about 29° below horizontal to about 29° above (57° in total): the wing tip travels about 10 cm. Up to about 2–3 turns per second (estimate) the wings keep up; any faster, the rod and wings don't have time to drop and the flapping becomes short and erratic.
If something goes wrong
- The wings go up but don't come back down — Split pins too tight: the friction is stronger than the weight of the wing. Solution: Open the legs of the split pin a little and enlarge the hole in the wing to 4 mm. The wing must drop on its own when you let go.
- The rod stays up or drops in jerks — It rubs in the straw, the lid or the guide (holes out of line or a bent rod), or it is too light. Solution: Enlarge the hole that rubs to 5 mm, swap the skewer for a straight one and, if needed, glue a 5-cent coin onto foot H.
- The cam turns but the rod doesn't rise — The cam has come unstuck and slips on the axle, or the hole was made in the centre of the disc. Solution: Glue the cam again with hot glue. Check that the hole is 12 mm from the centre (13 mm from the nearest edge).
- One wing rises higher than the other — The threads are different lengths or the crossbar is crooked. Solution: With the cam down, even up the two threads until both tips are at the same height, and straighten the crossbar.
- The crank is hard to turn or the axle shifts to one side — Washers glued tight against the sides, or the cam rubbing on the floor or the front wall. Solution: Unstick a washer and glue it again with 1 mm of play. Check that the cam is centred and 45 mm high.
- The box moves when you turn the crank — It is very light and the crank drags it along. Solution: Hold it with your other hand or put a couple of coins or a lump of modelling clay inside, on the base, behind the cam.
- The foot catches on the edge of the cam — Foot crooked or glued off centre, so the cam touches its edge. Solution: Unstick it and glue it again flat and centred: the 36 mm foot leaves a 6 mm margin on each side of the contact point.
Safety
- The craft knife for the window and the awl are used by an adult, on a cutting mat and with the other hand away from the point.
- The hot glue gun burns: it is used by an adult, and let each drop cool for 1 minute before touching it.
- Cut the points off the skewers before giving them to children: the axle and the rod have no points.
- Split pins and washers are small parts: keep them away from children under 3.
- Don't put your face near the rod while you turn the crank: it shoots up 24 mm.
The science behind it
For children
The cam is a disc with its hole away from the centre. As it turns, sometimes the edge is close to the axle and sometimes far away, like a wheel with a bump on it. The rod rests on top: when the long side comes round to the top, it pushes the rod up, and when the short side comes round, the rod drops under its own weight. The rod pulls two threads that lift the wings, and the wings drop on their own because they have weight. That way, a turn of your hand becomes a flap.
For the adult
This is a cam-follower mechanism with an eccentric cam (a disc of R = 25 mm turning about a point e = 12 mm from its centre) and a flat-faced translating follower (foot H, Ø 36 mm). With a flat follower, the lift is exactly s(φ) = e·(1 − cos φ): simple harmonic motion with a stroke of 2e = 24 mm, with no dwells, for each turn of the crank. The height of the cam's top point above the axle varies between R − e = 13 mm and R + e = 37 mm; with the axle 45 mm above the base, the cam leaves 8 mm of clearance below and the foot (6 mm) reaches at most 88 mm, below guide G (92 mm). The contact point moves sideways by e·sin φ, up to ±12 mm, which is why the foot is 36 mm across (6 mm margin). With a flat face, the pressure angle is 0°: the force from the cam is always vertical (apart from friction), so the rod doesn't tend to jam in its guides, which are guide G, lid D and the 60 mm straw. The return is by gravity: the rod with foot and crossbar weighs about 3 g and each thin-card wing ≈ 1.5 g with its centre of mass about 45 mm from the pivot; the torque of each wing (1.5 g × 45 mm) is transmitted to the thread, tied at r = 25 mm from the pivot, as a tension of ≈ 2.7 g, so the cam lifts about 9 g in total (estimated figures). At the wings, the almost vertical thread converts the stroke into rotation: 25·(sin θmax − sin θmin) = 24 mm → sin θ = ±0.48 → θ = ±29°, about 57° per flap; the tip, 100 mm from the pivot, rises and falls ±48 mm. Tying the thread closer to the pivot (smaller r) gives more angle with the same stroke, but needs more force, and below r = 12 mm the wing would flip over. Speed limit (estimate): the rod falls the 24 mm in t = √(2h/g) ≈ 0.07 s and the wing, which behaves like a physical pendulum with a period of about 0.5 s, takes ≈ 0.15 s to drop; as long as the downward half-turn lasts longer than that (≲ 3 turns/s), the follower doesn't lift off the cam. The torque needed at the crank is very small: F·e·sin φ ≈ 0.09 N × 12 mm ≈ 1 mN·m, about 2–3 g of force on the handle at 44 mm; almost all the real effort is friction in the axle and the guides.
- cam: a part that turns and, because of its shape, pushes another part up and down.
- eccentric: turning around a point that is not its centre.
- follower: the rod with a foot that rests on the cam and copies its movement.
- stroke: the distance between the lowest and the highest point the follower reaches (here, 24 mm).
- pivot: the point a part turns around; here, the split pin at the shoulder.
- automaton: a figure that moves by itself thanks to a hidden mechanism.
By age
- 5–7 years: The adult cuts out all the pieces, cuts the window, pierces the holes, builds the box and glues on the cam and the mast. The child paints the bat, adds its eyes, fits the split pins with help and turns the crank to discover the mechanism through the window.
- 8–10 years: Full build with an adult for the craft knife, the awl and the hot glue. Let them measure the cam themselves (13 and 37 mm) before fitting it and adjust the threads until both wings rise equally.
- 11–12 years: Have them calculate the stroke (2 × eccentricity) and the wing angle before testing, and check it with a protractor. Challenge: design a second cam so the bat also turns its head or opens its mouth.
In a group or in class
In pairs (one holds, the other glues), 12 automata for a class of 24. Beforehand: print and cut out the box pieces, cut the windows, pierce all the holes, cut the skewers (110, 170 and 35 mm) and the straws (60 and 25 mm), and paint the wing sheets black the day before. Session of 2 × 60 min: the first for the box, cam and axle (with 2 hot glue stations supervised by adults); the second for the mast, rod, bat and adjusting the threads. Finish with a bat parade and the question of what would happen with a centred cam.
Challenges
- Swap the cam for one with 6 mm of eccentricity and another with 15 mm and compare how much each one makes it flap.
- Add a second cam on the same axle, turned 90°, that makes a pumpkin or a moon rise and fall next to the bat.
- Decorate the box as a haunted tower: paint it purple, cut out yellow windows and stick a card moon behind the bat.
- Make a colony of 3 bats on a longer box, with 3 cams turned 120° from each other so they flap one after another.
- Fit a geared motor (3–6 V) instead of the crank so it flaps by itself, at no more than 2 turns per second.