Single-drop microscope
A drop of water on a piece of stiff clear plastic, held a few millimetres above a printed sheet, behaves like a convex lens and magnifies the letters 2 to 10 times. Small, round drops magnify more than large, flat ones.
What they will learn
- That light bends (refraction) as it passes from air into water, and that a curved surface makes the rays converge: a convex lens.
- That the more curved a lens is (small radius), the shorter its focal length and the more it magnifies.
- That a magnifying glass only enlarges if the object is closer than the focal length; further away, the image blurs and turns upside down.
- How to estimate magnification by counting the millimetres of a grid seen through the drop.
Prepare beforehand
- Print test card B at 100 % and check that the ruler measures 100 mm.
- Wash the plastic with water (without soap, or rinsing it very well) and dry it.
- Cut the plastic with scissors, leaving smooth edges (if it comes from a blister pack, the adult removes any sharp-edged parts).
- Find a table with good light: from the side, not from behind.
Materials and tools
- Stiff clear plastic — 1 piece ≈ 100 × 80 mm
smooth and unscratched, 0.3–1.5 mm: CD case lid, blister pack window, tub lid or rigid sleeve - Straw — 1
for picking up large drops - Toothpick — 1
for small drops (the wet tip leaves drops of Ø 2–4 mm) - Water — 1 small glass
clean tap water - Sheet with small print — 1
printable test card (piece B) or a newspaper - Corrugated cardboard — 1 piece 130 × 80 mm
3 mm, for 8 spacers of 15 × 80 mm - Kitchen paper — 2 sheets
to dry and clean the plastic between tests - Cooking oil — 1 drop (optional)
to rub on the plastic so the drops stay rounder; and for the oil experiment
Tools
- Scissors — cut the plastic and the spacers
- Ruler — measure the size of the drops and the height
- Torch or desk lamp — light the sheet from one side
Pieces and templates
- A · Height spacer ×8 — corrugated cardboard 3 mm
- B · Test card ×1 — paper
Step by step
Cut out the spacers
Cut out 8 cardboard spacers of 15 × 80 mm (template A). Each one is 3 mm thick; if your cardboard is a different thickness, measure it with the ruler and note it down.
1 Mark 8 strips 15 mm wide on a 130 × 80 mm piece of cardboard 2 Cut along the lines, one at a time 3 You have 8 spacers A; each one adds 3 mm Set up the magnifier stand
Lay test card B on the table. Place a stack of 2 spacers on each side, 60 mm apart, and rest the plastic on top like a bridge over the card. The plastic is now 6 mm above the paper.
1 Place a stack of 2 spacers on each side of the card, 60 mm apart 2 Rest the plastic on top, like a bridge over the card 3 The plastic sits 6 mm above the paper and doesn't wobble Check: The plastic must not touch the paper or wobble.Prepare the plastic
Put a drop of oil on a piece of kitchen paper, rub it over the top face of the plastic and go over it with dry paper until no grease can be seen. This keeps the drops rounder.
1 Put a drop of oil on a piece of kitchen paper 2 Rub the top face of the plastic with the paper 3 Go over it with dry paper: this keeps the drops round Tip: If you'd rather not use oil, it's enough for the plastic to be clean and completely dry.Place a small drop
Dip 5 mm of the toothpick tip in the water and touch the plastic, right above the 1 mm letter, without dragging. This leaves a drop about 3–4 mm across.
1 Dip 5 mm of the toothpick tip in the water 2 Touch the plastic above the 1 mm letter, without dragging 3 Look from the side: it should look like half a pearl, not a puddle Check: Look at it from the side at table level: it should look like half a pearl, not a flat little puddle.Look and adjust the height
Bring one eye 5–10 cm from the drop and close the other. If the letter looks big and sharp, perfect. If it looks blurred or upside down, remove one spacer from each side (3 mm); if it barely magnifies, add one.
1 Look with one eye at 5–10 cm: the letter should look big and sharp 2 If it looks blurred or upside down, remove a spacer from each side 3 If it barely magnifies, add a spacer to each side Tip: The best height is the highest one at which the letter still looks upright and sharp.Place a large drop
Dip the straw 2 cm into the water, cover the top end with your finger, lift it out and let a large drop fall onto another letter (about 8–10 mm across). Compare it with the small one at the same height.
1 Dip the straw 2 cm into the water and cover the end with your finger 2 Let a large drop fall onto another letter 3 The large one shows more letters, but magnifies them less Check: The large drop shows more letters but magnifies them less.Measure the magnification
Use the ruler on the card to measure the diameter of the small drop (for example, 4 mm). Without moving the plastic or the spacers, slowly slide the card underneath until the grid is right below the drop (with the card centred, a spacer covers it). Count how many 1 mm squares you can see from side to side inside the drop (for example, 1). Divide: 4 ÷ 1 = the drop magnifies about 4 times.
1 Measure the drop's diameter with the ruler on the card 2 Slide the card until the grid is below the drop and count the squares 3 Divide: 4 mm by 1 square, the drop magnifies 4 times Tip: Slide the card by pulling one edge with two fingers: if you touch the plastic, the drop moves or runs.Explore real objects
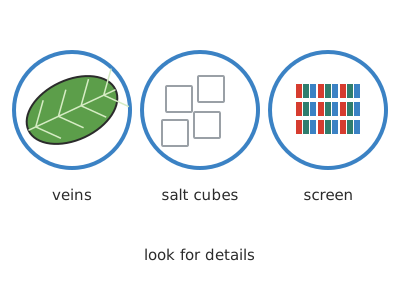
Take the card away and put a plant leaf, a hair, salt, sugar or a switched-on phone screen underneath. Look for the details: the leaf's veins, cube-shaped salt crystals, the tiny coloured dots on the screen.
1 Take the card away and put a leaf, a hair or salt underneath 2 Look for the leaf veins, the salt cubes and the colour dots Clean up
Dry the plastic with kitchen paper and keep it in an envelope so it doesn't get scratched. On scratched plastic the drops lose their shape and the image is worse.
1 Dry the plastic well with kitchen paper 2 Keep it in an envelope so it doesn't get scratched
Does it work? The test
With the plastic at 6 mm, compare a 3–4 mm drop (toothpick) and an 8–10 mm drop (straw) over the 1 mm grid.
What should happen: The small drop magnifies about 4–8 times (across 4 mm of drop you see less than 1 mm of grid); the large one, about 1.5–2.5 times. The 0.7 mm letters are easy to read through the small drop. With the plastic lying directly on the paper, the magnification drops to ≈ 1.2 times.
If something goes wrong
- The drop spreads out like a puddle — Plastic with soap residue or very absorbent. Solution: Rinse well with water, dry and rub with a touch of oil; try a different plastic (CD case lids work very well).
- It looks blurred or upside down — The plastic is further from the sheet than the drop's focal length. Solution: Remove spacers until the letter looks upright, or use a larger drop.
- It hardly magnifies — Plastic lying on the paper, or the drop is too large and flat. Solution: Raise the plastic 3–6 mm and use small toothpick drops.
- The letters look distorted at the edges — The drop isn't a perfect lens: only the centre gives a good image. Solution: Look through the centre of the drop and bring your eye closer; this is normal with very curved lenses.
- The drop moves or runs — The plastic is tilted or moves when touched. Solution: Check that the spacers are the same on both sides and don't touch the plastic while looking.
Safety
- The edges of blister packs and cut plastic can be sharp: the adult cuts them and rounds off the corners.
- Never look at the sun through a drop or a magnifying glass, and don't leave magnifiers or drops in the sun on paper: they concentrate the light and can start a fire.
- If you use glass, an adult handles it and it always rests on the table.
- Wipe up any spilt water near sockets, lamps or phones.
The science behind it
For children
Light travels in straight lines, but when it goes into water it bends a little, like a car going from tarmac onto sand. A drop is rounded on top, so it bends all the rays towards the middle, just like a glass magnifier. Your eye thinks the rays are coming from a much bigger letter, so it looks giant. Tiny drops are rounder and bend the light more: that's why they magnify more.
For the adult
Passing from air (n = 1) into water (n = 1.33), light is refracted according to Snell's law. A drop resting on a sheet is a plano-convex lens whose radius of curvature R depends on the drop's size and contact angle: for a base of radius a and height h, R = (a² + h²)/(2h). Its focal length is f = R/(n − 1) ≈ 3R. A toothpick drop (base 4 mm, h ≈ 1.2 mm) has R ≈ 2.3 mm and f ≈ 7 mm; a straw drop (base 9 mm, flattened by gravity, h ≈ 2.3 mm) has R ≈ 5.6 mm and f ≈ 17 mm. As a magnifier, the object must be within the focal length (d < f): an upright, enlarged virtual image is formed, with lateral magnification m = f/(f − d). The maximum angular magnification of a magnifier is ≈ 250 mm/f, giving up to ×35 in theory for the small drop, although aberrations (the drop is not spherical but flattened) and the tiny field limit it to a useful ×5–10. If d > f the image is real and inverted, and seen up close it looks blurred or upside down. Leeuwenhoek reached ×270 in the 17th century with glass spheres of ≈ 1 mm: the same principle. Oil (n ≈ 1.47) refracts more than water, but it wets the plastic more and forms flatter drops, so the result depends on the surface.
- refraction: the change in direction of light as it passes from one material into another.
- convex lens: a lens that is thicker in the middle than at the edges; it brings rays of light together.
- focal length: the distance at which a lens brings the rays together; to use it as a magnifier, the object must be closer than that.
- virtual image: an image the eye can see but that cannot be projected onto a screen.
- magnification: how many times bigger something looks through a lens.
By age
- 5–7 years: The adult sets up the stand and places the large drops with the straw; the child places drops with the toothpick and looks for the "giant" letter. Talk about "round drop / squashed drop" without numbers.
- 8–10 years: They do all the steps, try the heights with the spacers and work out the magnification with the grid.
- 11–12 years: Have them measure the drop's diameter and height (from the side with a ruler and a phone), calculate R and f with the formulas and check at what height the letter turns upside down. Challenge: the paperclip magnifier.
In a group or in class
Individually or in pairs: one piece of plastic, 8 spacers and one card per child (you can print 3 cards per A4 sheet). Put glasses of water and shared toothpicks in the middle of each table, and plenty of kitchen paper. 30-min session: 5 min demonstration, 15 min exploring with the card, 10 min "detail hunting" with leaves, salt and hairs brought from home. Pool the measured magnifications by drop size on the board.
Challenges
- Make the drop that magnifies most in the class and prove it with the grid.
- Build a drop microscope: a strip of plastic holding the drop above a bottle cap, with a torch underneath pointing upwards.
- Take a photo through the drop by bringing your phone camera close and compare it with the photo without the drop.
- Find the exact height at which the letter turns upside down for each drop: that is its focal length.