Light spectrum viewing box
A black 16 × 8 × 9 cm box with a 1 mm slit and a quarter of a CD inside: point it at a lamp, look through the side viewer and you will see the light split into a band of colours, different for each type of bulb.
What they will learn
- That white light is a mixture of colours and that a grating of very fine grooves (1.6 µm on a CD) separates it by diffraction.
- That every light source has its own spectrum: continuous (sun, incandescent bulb, candle), in lines (fluorescent tube, street lamps) or in two “humps” (white LED).
- Why a narrow slit gives sharp colours and a wide one blurs them.
- To observe, draw and compare results in an orderly way, as an astronomer does with the stars.
Prepare beforehand
- Print the templates at 100 % and check with a ruler that the floor (A) measures 160 mm.
- Cut the CD into quarters before the session: warm the scissors in hot water for a minute, or the CD with a hairdryer, and cut in one go so it does not splinter. If the silver layer peels off, that quarter is no good.
- If you are going to paint the inside, do it the day before or use black paper stuck on with a glue stick (no waiting).
- Have at least two different light sources ready: an LED bulb, a fluorescent tube or energy-saving bulb and, if you can, a candle or an incandescent bulb.
Materials and tools
- Corrugated cardboard — 1 sheet of 35 × 35 cm (or a box of at least 15 × 7.5 × 8.5 cm)
single-wall, 3 mm; if you use a ready-made box (tea, small trainers, biscuits) you only need the paper templates for marking - Old CD — 1 (a quarter is enough)
a recordable or music CD you no longer need; shiny side free of scratches in the middle part of the radius - Black card — 1 piece of 10 × 10 cm
200 gsm, for the two slit jaws - Black electrical tape or black duct tape — 1 roll (about 2 m)
opaque; for sealing all the joints - Matt black paint or black paper — black poster paint (about 30 ml) or 2 black A4 sheets
for the inside: prevents stray reflections - PVA glue or hot glue sticks — a little
for the CD stand and joining panels - A4 sheets and glue stick — 2 A4 sheets
for printing the templates at 100 % - White pencil or chalk — 1
to redraw the lines on floor A if the paint covers them
Tools
- Strong scissors — cutting the CD into quarters and the card pieces adult
- Craft knife, metal ruler and cutting mat — cutting the slit window and the viewer hole adult
- Ruler and pencil — marking lines and checking the 1 mm slit
- Protractor — checking that the stand is at 30° to the axis
- Hot glue gun (optional) — fixing the CD stand to the floor of the box adult
- Paintbrush — painting the inside black
Pieces and templates
- A · Floor (with placement plan) ×1 — corrugated cardboard 3 mm
- B · Viewer side wall ×1 — corrugated cardboard 3 mm
- C · Blank side wall ×1 — corrugated cardboard 3 mm
- D · Front wall (slit) ×1 — corrugated cardboard 3 mm
- E · Back wall ×1 — corrugated cardboard 3 mm
- F · Lid ×1 — corrugated cardboard 3 mm
- G · Slit jaws ×2 — black card 200 gsm
- H · CD stand ×1 — corrugated cardboard 3 mm
Step by step
Cut the panels
Stick templates A to F onto the cardboard with a glue stick and cut out the six panels: floor 160 × 80 mm, two sides of 160 × 90 mm, front and back of 80 × 90 mm and lid of 166 × 86 mm.
1 Stick each template onto the cardboard with a glue stick 2 Cut along the template line 3 Have all six panels: A, B, C, D, E and lid F Tip: If you have a box of a similar size, use it and just stick on the paper templates to mark the window, the viewer and the stand line.Open the window and the viewer adult
Stick template D on the inner face of the wall (from inside, B on your right). With a craft knife and ruler, cut the 5 × 40 mm window in wall D and the 15 mm diameter viewer hole in wall B (centre 115 mm from the front edge and 45 mm from the floor).
1 The adult cuts a 5 × 40 mm window in D 2 Open the 15 mm viewer: centre 115 mm from the front edge 3 Check: clean window in D and round viewer in B Check: The viewer must be at mid-height and the centre of the window 45 mm from the viewer wall.Make the 1 mm slit
Cut the two black card jaws G with a really straight long edge. Glue them on the outside over the window, facing each other, leaving a 1 mm gap between the straight edges, centred over the 5 × 40 mm window. Hold each jaw in place with two strips of black tape along its outer edges.
1 Cut the two jaws G with a really straight long edge 2 Glue them on the outside, facing each other, with a card between the edges 3 Hold each jaw with two strips of tape: a line of light is left Check: Look at a lamp through the slit: you should see a thin, straight line of light, the same width from top to bottom.Tip: Put a business card folded in half between the jaws while you glue them and take it out afterwards: it leaves an even gap.Paint the inside black
Paint the inner face of all six panels matt black (or stick on black paper). On floor A, paint around the three drawn lines, leaving a 2–3 mm strip unpainted, or paint it all and, once dry, redraw them with a ruler and white pencil: you need them in steps 5 and 8. Leave to dry for 20 minutes. Without the black, the light bounces off the walls and the spectrum looks washed out.
1 Paint the inner face of all six panels matt black 2 Leave to dry for 20 minutes before assembling Check: On the painted floor A you should see the light line, the line of sight and the slanted stand line.Assemble the box without the lid
Place the four walls around floor A (painted face inwards) and join them on the outside with strips of black tape on the four vertical corners and along the base. Wall B (viewer) goes on the top side of the floor template.
1 Stand the walls up around A; B goes on the viewer side 2 Join the corners and the base on the outside with black tape 3 The box is open at the top, with a black inside Check: The light line drawn on the floor should point at the centre of the slit.Prepare the CD quarter adult
Take a CD quarter cut by the adult. If it has a label or sticker on the back, leave it; do not scratch the silver layer. Clean the shiny side with a dry cloth, without touching it with your fingers.
1 The adult cuts the CD into four pieces 2 Clean the shiny side with a dry cloth 3 Hold it by the edges, without touching the shiny side Tip: To cut the CD, the adult warms it for 1 minute with the hairdryer and cuts it with strong scissors: it splinters much less.Glue the CD onto the stand
Cut out stand H (65 × 100 mm) and mark the fold at 85 mm. Glue the CD quarter shiny side out following the drawing: the corner of the CD (the centre of the disc) on the left edge, 42.5 mm from the top edge.
1 Cut out H and mark the fold at 85 mm 2 Apply glue and bring the CD quarter in, shiny side out 3 The corner on the edge, at mid-height: vertical tracks Check: Looking at the red dot (“light here”), the CD tracks (fine circular lines you can see against the light) should run from top to bottom.Fit the stand at 30° adult
Fold the 15 mm tab backwards and glue the stand upright on the slanted line on the floor, with the CD facing the slit and the viewer wall. The edge with the CD corner goes towards the back, next to wall B.
1 Fold the 15 mm tab backwards along the fold 2 Glue the tab onto the slanted line on the floor 3 The CD faces the slit and the viewer; its corner at the back next to B Check: With the protractor, the stand is at 30° to the light line. The red dot sits where the light line and the line of sight cross.First look with the box open
Point the slit at a lit bulb 30–50 cm away and look through the viewer with the lid still off (cover the top with your hand). You should see a band of colours on the CD.
1 Point the slit at a bulb and look through the viewer 2 You should see a band of colours on the CD Check: If you only see a white reflection, turn the holder slightly, 5–10°, so the CD faces the slit more; if you see nothing, turn it a little towards the viewer.Tip: This is the moment to adjust: once the lid is on, you can no longer do it.Close the box
Put on lid F and hold it with two strips of black tape acting as a hinge. Cover with tape every gap where light gets in, except the 1 mm slit and the viewer.
1 Put lid F on top of the walls 2 Hold it with two strips of black tape acting as a hinge 3 Tape over every gap, except the slit and the viewer Check: In a lit room, looking through the viewer with your finger over the slit, the inside should look completely black.Observe and compare
Point the slit at different lamps (LED, energy-saving, incandescent) and at the blue sky through the window, never at the sun. Look through the viewer, turning the box slightly until the band of colours is brightest.
1 Point the slit at different lamps 2 Turn the box slightly until the colours are brightest 3 Try the blue sky through the window, never the sun Draw the spectra
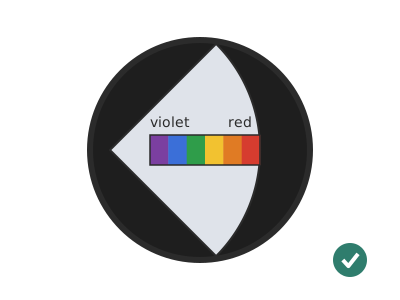
For each light, draw a 10 cm band with coloured pencils: violet on the left, red on the right. Mark the bright lines you see and note which lamp it is.
1 Draw a 10 cm band: violet on the left, red on the right 2 Mark the bright lines and note which lamp it is
Does it work? The test
In a dimly lit room, point the slit at an energy-saving fluorescent bulb about 40 cm away and look through the viewer.
What should happen: You should see a band of colours from violet to red on the CD (it covers about 12–15° of your view, like the width of a hand at arm's length). With the fluorescent bulb you can make out lines: a violet one, a very bright green one (546 nm, from mercury) and an orange-red one; with an incandescent bulb or a candle, the band is continuous; with a white LED, lots of blue and a wide yellow-green area.
If something goes wrong
- I only see a white reflection — The CD is turned too far towards the viewer (for example, at 45°): the mirror reflection is reaching it. Solution: Open the lid and turn the stand about 5–10° so the CD faces more towards the slit; check the 30° with the protractor.
- I see no colour at all — The CD tracks are not parallel to the slit, or the light is not reaching the CD. Solution: Check that the CD corner is at mid-height on the edge of the stand and that the light line on the floor passes through the red dot. Look through the slit from outside with the lid open to see where the light falls.
- The colours are blurry with no lines — Slit too wide (more than 1.5 mm) or uneven edges. Solution: Move the jaws closer until the gap is 0.5–1 mm. If the edges are fuzzy, cut new jaws with a craft knife.
- The spectrum looks very faint and grey — Light is getting in through the joints or the inside is not black. Solution: Seal all the joints with black tape and paint or line the inside black. Look while shading the rest of your eye with your hand.
- The spectrum is crooked or curved — The tracks are tilted relative to the slit. Solution: A slight curve is normal. If it is very crooked, unstick the CD and turn it until the corner is exactly level with the light spot.
- The CD has splintered or split into layers — It was cut cold or with small scissors. Solution: Use another quarter. Warm the CD for 1 minute with a hairdryer and cut in a single go with strong scissors.
Safety
- Never point the slit at the sun or look at the sun: it can damage the retina without hurting. For the solar spectrum, point it at the blue sky away from the sun or at a sunlit white sheet of paper.
- The edges of the cut CD are as sharp as glass: the adult cuts it and runs fine sandpaper or tape along the edge.
- The craft knife is used by an adult with a metal ruler and cutting mat.
- Do not bring the box closer than 10 cm to halogen or incandescent bulbs: they heat the cardboard.
- If you use a candle, always with an adult and away from the cardboard (at least 30 cm).
The science behind it
For children
The white light from a lamp looks like a single colour, but it is really a mixture of lots of colours together, like alphabet soup. The CD has grooves so fine that you cannot see them, and when the light bounces off them each colour goes off in a slightly different direction. That is why the colours separate and a rainbow appears. Every lamp has its own recipe of colours: some have them all, others only a few, as if it were their fingerprint.
For the adult
A CD has a spiral track with a pitch of 1.6 µm (≈ 625 lines per mm), so its recorded side acts as a reflection diffraction grating. The grating equation is sin θm = sin θi + m·λ/d: each wavelength leaves at a different angle. With the light arriving at 60° from the normal, the first order (m = −1) leaves at ≈ 82° from the beam for violet (400 nm), 88° for green (550 nm) and 95° for red (700 nm), i.e. almost perpendicular, towards the viewer; the zero order (specular, white reflection) leaves at 60° and does not reach the eye. With the CD at 45° the specular reflection goes straight into the viewer and the spectrum is shifted by 18–30°. The narrow slit makes each point on the CD receive light from a single direction: the narrower it is, the better the resolution (but the less bright). Thermal sources (sun, incandescent bulb, candle) give a continuous spectrum; excited gases (mercury in fluorescent lamps, sodium in street lamps) emit lines at fixed wavelengths, specific to each element; a white LED is a blue LED (≈ 450 nm) with a yellow phosphor, hence its two humps. This is how stars are analysed: their absorption lines reveal which elements they are made of.
- spectrum: the band of colours that make up a light, in order from violet to red.
- diffraction: the bending of light as it passes through or bounces off very fine grooves; each colour bends differently.
- diffraction grating: a surface with thousands of identical parallel grooves, like the tracks of a CD.
- slit: a very narrow opening that lets through a thin thread of light.
- wavelength: the “size” of the light wave; each colour has its own (violet short, red long).
By age
- 5–7 years: The adult builds the box and cuts the CD. The child paints the inside, sticks on the tape and, above all, looks and draws: “what colours does this light have?”. Use a candle and a fluorescent so the difference is very clear.
- 8–10 years: They build the box following the templates; the adult cuts the CD, window and viewer. Let them adjust the angle of the stand themselves until they see the colours, and draw the spectrum of three lamps.
- 11–12 years: Challenge: calibrate the scale. Using the green line of the fluorescent (546 nm) and the blue one (436 nm), draw a wavelength ruler on a piece of paper stuck inside and estimate where red is. Use the grating equation to calculate the angles for a CD and a DVD.
In a group or in class
Pairs, one box per pair (12 boxes for 24 children). Beforehand: cut the CDs (3 CDs give 12 quarters), pre-cut panels or collect tea boxes of the same size, print templates and set up 3 light stations in the dimmed classroom: LED, fluorescent and a window with sky. 75-min session: 10 min demonstration, 40 min assembly, 25 min rotating round the stations drawing spectra. Compare the drawings on the board.
Challenges
- Add a translucent paper scale inside, next to the CD, with marks from 400 to 700 nm calibrated with the fluorescent lines.
- Photograph the spectrum by holding your phone camera right against the viewer.
- Discover the spectrum of a street lamp at night (sodium ones give an intense yellow line).
- Build a pocket version with a kitchen roll tube and a piece of DVD split into layers (transmission grating).