Halloween shadow lantern
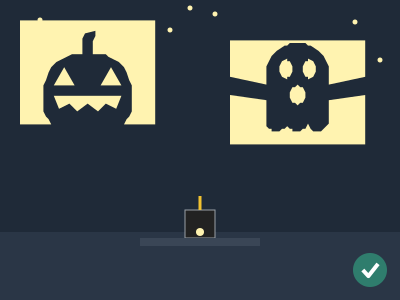
A 10 cm black card sleeve with four windows (pumpkin, ghost, moon with a bat and haunted house) hangs from the tip of a pencil around a white LED. When you spin it with your fingers, shadows more than a metre tall go round the walls of the darkened room, with a starry sky above them.
What they will learn
- That light travels in a straight line and that a shadow is the area it can't reach because something is in the way.
- That the shadow grows in proportion to the distance as you move the wall away (similar triangles): with the wall 1.5 m away, a 3 cm silhouette casts a shadow of about 90 cm.
- What the umbra and penumbra are, and why a small light gives sharper shadows than a large one.
- How to build a circuit with an LED, a resistor and a switch, getting the polarity right.
- Why an object hanging from a point above its centre of gravity is stable and spins with very little friction.
Prepare beforehand
- Print the templates at 100 % (without «fit to page») and check with a ruler that the red line in the header measures 50 mm.
- Test the LED with the resistor and batteries before the session (step 1): that way you know the component works.
- Wash the bottle, remove the label and dry the inside well.
- If the children are young, cut the bottle and the windows of the sleeve yourself before the session (they are the tricky cuts).
- Choose the room for testing: it should be possible to make it completely dark and it should have a pale, smooth wall 1–2 m from a table.
Materials and tools
- Black card — 2 A4 sheets
200–250 gsm, opaque (hold a sheet in front of a torch: no light should come through) - Clear plastic water bottle — 1
0.5 L, PET, smooth (no rings or patterns on the body), Ø 60–70 mm, with its cap - Short pencil — 1
HB graphite, hexagonal Ø 7 mm, 8–9 cm long (the ones from furniture shops or a worn-down one), well sharpened - Corrugated cardboard — 1 piece 25 × 35 cm
single-wall, 3 mm, smooth and flat (for the 160 × 230 mm base and the Ø 100 mm lid) - 5 mm wide-angle white LED — 1 (+1 spare) buy
«straw hat» or flat-top, 120° angle, 3.0–3.3 V / 20 mA, long legs not cut (the long one is +) - 100 Ω resistor — 1 buy
1/4 W (colours brown-black-brown) - 3 × AA battery holder with switch — 1 buy
with lid, switch and red (+) and black (−) wires about 15 cm long - AA batteries — 3
1.5 V alkaline (4.5 V in total) - Modelling clay — ≈ 30 g
a Ø 15 mm ball for the LED and 3 Ø 10 mm balls for the bottle - PVA glue — a little squeeze
wood glue or school glue - Sticky tape — ≈ 40 cm
19 mm clear tape or masking tape (to fix the template and insulate the joins) - A4 sheets — 4
to print templates A, B, C and D at 100 % - Coloured cellophane (optional) — 1 piece 10 × 10 cm
orange or purple, to tint the light from one of the windows
Tools
- Craft knife and cutting mat — cut the bottle and the windows of the sleeve adult
- Fine-pointed scissors — cut round the outline of the panels and the curves of the figures
- Awl — make the dimple in the cap, the hole in the lid and the stars adult
- Hot glue gun — fix the pencil in the lid adult
- Ruler, pencil and set square — measure the bottle and check that the pencil is vertical
- Permanent marker and a few books — mark the cutting line on the bottle at 145 mm
- Clothes pegs (4) — hold the seam and the hem while the glue dries
Pieces and templates
- A · Sleeve: half with pumpkin and ghost ×1 — black card 200–250 gsm
- B · Sleeve: half with moon and haunted house ×1 — black card 200–250 gsm
- C · Lid ×1 — corrugated cardboard 3 mm
- D · Base ×1 — corrugated cardboard 3 mm
Step by step
Test the circuit
Twist one leg of the 100 Ω resistor together with the long leg (+) of the LED. Join the red wire from the battery holder to the other leg of the resistor and the black wire to the short leg (−) of the LED. Put in the 3 AA batteries and switch on: the LED should give a strong white light.
1 Join the resistor, LED and battery holder as in the drawing 2 Switch on: the LED should give a strong white light Check: If it doesn't light up, turn the LED round (swap its legs): it only lets current through in one direction.Tip: Don't touch the two legs of the LED directly with the wires without the resistor: at 4.5 V it is ruined in a few seconds.Cut the bottle adult
Stand the bottle upside down (with the cap on) on the table. Rest a marker on a stack of books 145 mm high and turn the bottle against the tip to mark a line all the way round. Cut along the line: a nick with the craft knife and then scissors. Keep the part with the cap.
1 Turn the bottle against the marker to mark it at 145 mm 2 Cut along the line: a nick with the craft knife and then scissors 3 The cap part measures 145 mm and sits flat Check: The cap part measures 145 mm (± 5) tall and its cut edge sits flat on the table without wobbling.Tip: If the edge is jagged, even it up with the scissors or cover it with a strip of tape: it's sharp.Make the dimple in the cap adult
Screw the cap on tightly. Mark its centre with the marker and press the tip of the awl in there while twisting, until the plastic sinks 1 mm, without going through. That dimple is the bearing: the tip of the pencil will spin inside it.
1 Press the awl into the centre of the cap, twisting 2 A 1 mm dimple, not all the way through: the tip stays inside Check: The tip of a pencil resting in the dimple stays in place even if you tilt the bottle a little.Tip: If you go through it by mistake, don't worry: stick a 1 cent coin on top with modelling clay and have the pencil rest in its centre.Fix the templates and cut the outline
Stick each sheet with templates A and B onto a piece of black card with 4 pieces of tape at the corners. Cut through both layers at once with scissors along the outer solid line: the 8 tabs at the top, the side tab and the hem at the bottom.
1 Fix the paper onto the black card with 4 pieces of tape 2 Cut through both layers at once round the outline Check: Each panel measures 157 mm wide not counting the 12 mm side tab.Tip: Don't remove the paper yet: it is your guide for the windows and the stars.Cut out the windows of panel A adult
On the cutting mat, cut out the grey areas of panel A with the craft knife: the background of the pumpkin window (52 × 40 mm), its eyes and mouth, and the two areas of the ghost window with its eyes and mouth. Cut the small inner holes first and then the outline of each window.
1 Cut the eyes and mouth first, then the window 2 The pumpkin and the ghost are still joined to the frame Check: The pumpkin is still joined to the frame at the bottom and the ghost by both hands.Tip: Children aged 9 or over can cut the large curves with fine-pointed scissors if the adult first makes a nick to put the point in.Cut out the windows of panel B adult
Cut out of panel B the two grey areas of the moon (above and below the bat) and those of the haunted house with its windows, the door and the round window in the roof. The bat is held by the tips of its wings and the tower by the peak at the top.
1 Cut out the moon above and below the bat 2 The bat and the house don't hang loose Check: When you lift the panel by one corner, the bat and the house don't bend or hang loose.Tip: If you cut a bridge by accident, mend it on the inside with a small piece of tape: the shadow of the tape hardly shows.Punch the stars adult
Place each panel on a big lump of modelling clay or a piece of thick cardboard and push the awl through each circle in the top area: 13 stars per panel, the small ones 3 mm and the big ones 4.5 mm. Then remove the paper and the tape.
1 Push the awl through each circle 2 Against the light you can see 13 dots and 2 windows per panel Check: When you look at a lamp through the panel you can see 13 little dots of light and the 2 windows.Tip: For Halloween you can add a few more stars, but don't make holes in the 12 mm strip along the left edge: that's where the other panel's tab is glued.Fold the tabs and glue the hem
Fold the 8 tabs at the top of each panel inwards (towards the side where the paper was), to 90°. Also fold the 10 mm hem at the bottom, put PVA glue on it and stick it on the inside of the panel. Hold it with pegs for 5 minutes.
1 Fold the 8 tabs and the hem inwards 2 Glue the hem and hold it with pegs Check: The hem lies flat and doesn't cover the bottom of the windows.Tip: Score the folds first by running an empty ballpoint pen along the ruler: that way they fold straight.Close the sleeve
Put glue on the side tab of panel A and stick it on the inside under the left edge of panel B, with the top edges level. Curve the panels and stick the tab of B under the left edge of A in the same way. Hold both seams with pegs for 10 minutes.
1 Stick each tab on the inside, under the edge of the other panel 2 A Ø 100 × 150 mm cylinder: leave it to dry standing up Check: The sleeve is a cylinder 100 mm in diameter (measure it across at the top and bottom) and 150 mm tall.Tip: Stand the sleeve upright on the table while it dries: that way it stays round and not oval.Cut the lid and the base adult
Stick templates C and D onto the corrugated cardboard and cut them out: the lid is a Ø 100 mm circle and the base a 160 × 230 mm rectangle. Make the hole in the centre of the lid with the awl and widen it by twisting the pencil itself until it fits tightly.
1 Cut out the Ø 100 lid C and the 160 × 230 base D 2 Widen the hole by twisting the pencil until it fits tightly Check: The pencil is a push fit in the lid and doesn't fall out by itself when you turn it upside down.Tip: Leave the paper of template D stuck on the base: its marks will show you where everything goes.Glue on the lid
Stand the sleeve up with the tabs folded inwards. Put a drop of glue on each of the 16 tabs and rest lid C on top, with its edge exactly over the edge of the sleeve. Put a book on top and leave it to dry for 15 minutes.
1 Put a drop of glue on each folded tab 2 Rest lid C on top and put a book on it for 15 minutes Check: Seen from above, the lid doesn't stick out anywhere: that way the hole is in the centre of the sleeve.Tip: If the lid sticks out on one side, the sleeve has gone oval: squeeze it gently until it lines up before it dries.Fit the pencil adult
Measure the height of your bottle from the cut edge to the top of the cap (about 145 mm). Work out how far the pencil must stick out below the lid: 160 − bottle height. With 145 mm, that's 15 mm. Push the pencil through the hole, point down, to that measurement, and fix it with hot glue on top.
1 Work it out: 160 minus the height of your bottle 2 Glue the pencil with the tip 15 mm below the lid 3 Check with the set square that it is vertical Check: With the set square resting on the lid, the pencil is vertical, and its tip sticks out by the calculated amount.Tip: Before gluing it, tap the pencil tip on a piece of paper a couple of times: a very sharp tip breaks; a slightly blunt one spins just as well.Mount the LED on the base
Stick a Ø 15 mm ball of modelling clay onto the cross in the centre of base D. Bend the LED's legs out to the sides, 3 mm below the head, and push it into the clay facing upwards. Join the resistor and the wires as in step 1, cover each join with tape and run the wires to the battery holder, in the FRONT area.
1 Push the LED into the ball of modelling clay, facing up 2 Join the resistor, insulate with tape and run the wires to the battery holder Check: The LED sits right above the cross, straight, and the legs don't touch each other.Tip: Tape the wires to the base: that way the LED doesn't move if you accidentally pull the battery holder.Place the bottle
Stick 3 Ø 10 mm balls of modelling clay on the cut edge of the bottle, spaced out. Place the bottle over the LED, centred between the two grey circles on the base, and press down a little. The wires come out under the edge, between two balls.
1 Stick 3 balls of modelling clay on the cut edge 2 Place it over the LED, centred, with the wires underneath Check: Looking down through the cap, the LED is in the centre of the bottle.Tip: If the bottle isn't vertical, squash the ball on the high side a little more.Hang the sleeve and spin it
Lower the sleeve over the bottle until the tip of the pencil goes into the dimple in the cap: you'll feel it hang straight. Switch off the room light, switch on the LED and spin the pencil between two fingers, slowly, like a spinning top.
1 Lower the sleeve until the pencil goes into the dimple 2 Spin the pencil between two fingers, slowly, like a spinning top 3 Switch off the light: the shadows go round the walls Check: The bottom edge of the sleeve is 8–12 mm above the base and the same distance from the bottle all the way round.Tip: Atmosphere: put the lantern in the middle of the table at a Halloween tea, with cotton-wool cobwebs round the base (not on top of the sleeve) and tell a story while the ghosts go past on the wall.
Does it work? The test
In a completely dark room, put the lantern on a table 1.5 m from a pale wall. Switch on the LED, spin the pencil with your fingers and measure the size of the pumpkin's shadow on the wall with a tape measure. Time how long the sleeve keeps spinning after one spin.
What should happen: On each wall patches of light appear about 1.2 m tall and 1.5 m wide with the pumpkin, the ghost, the bat over the moon and the house in black (the pumpkin is almost 1 m tall) and, higher up, little star dots reaching the ceiling. With a gentle spin the sleeve keeps turning for about 20–40 s (estimate: it depends on the pencil tip and the dimple).
If something goes wrong
- The LED doesn't light up — LED the wrong way round, a loose join or batteries put in wrongly. Solution: Check that the long leg goes to the resistor and the resistor to the red wire; twist each join again; look at the + and − drawing inside the battery holder.
- The sleeve rubs against the bottle or hangs crooked — The pencil isn't in the centre of the lid or isn't vertical, or the sleeve has gone oval. Solution: Check with the set square that the pencil is straight and correct it by reheating the hot glue; if the sleeve is oval, squeeze it gently until it is round again.
- It only spins once or twice — The pencil tip is rubbing outside the dimple, the tip is broken or the edge of the sleeve is touching the base. Solution: Redo the dimple in the exact centre of the cap, sharpen the pencil again and raise the sleeve (let the pencil stick out 2–3 mm more) so it sits 10 mm above the base.
- The shadows come out blurred — The wall is too far away, the LED gives diffused light or there is another light on in the room. Solution: Move the lantern to 1–1.5 m from the wall, use a clear LED (not milky) and switch off all lights and screens.
- The shadows grow and shrink as it spins — The LED isn't in the centre of the sleeve. Solution: Lift the bottle and move the LED onto the cross on the base; check by looking through the cap that it is in the centre.
- The shadows fall on the ceiling or the table instead of the wall — The LED is too low or too high in relation to the windows, or it is pointing crooked. Solution: The LED should sit about 10 mm above the base, pointing straight up, and the sleeve 10 mm above the base. If you want the shadows lower, raise the LED with more modelling clay.
- A stripe of light can be seen spinning with the sleeve — One of the seams is open. Solution: Glue the tab on the inside again and hold it with pegs while it dries.
Safety
- An adult cuts the bottle and the windows with the craft knife, on a cutting mat and always with the holding hand behind the blade. The cut edge of the bottle is sharp: even it up or cover it with tape.
- Only an adult uses the hot glue and the awl; the child shows where.
- Never put a candle, an incandescent bulb or anything that gets hot inside the lantern: it is made of card and cardboard. The LED barely warms up (it uses about 0.05 W).
- Don't join the two wires of the battery holder without the LED and resistor (short circuit: the batteries get hot). Switch off when you have finished.
- In the dark room, clear toys and cables off the floor before switching off the light, and don't run.
- Don't look at the LED close up for a long time: it is very bright and dazzling.
The science behind it
For children
Light comes out of the LED and always travels in a straight line, like very fast arrows. Where the black card has been cut out, the arrows go through and reach the wall; where there is card, they get trapped and a dark patch is left on the wall: the shadow. Because the arrows spread apart as they travel, the further away the wall is, the bigger the shadow gets, just like when you move your hand close to a torch and a giant monster appears. The LED is very small, almost a dot, and that's why the edges of the shadow come out clean; with a big light, the edges look blurred. And because the sleeve spins, all the shadows go round the room.
For the adult
Rectilinear propagation and similar triangles: a point on the sleeve at a horizontal distance d = 50 mm from the LED is projected onto a wall at distance D with a magnification of D/d. With the wall at 1.5 m the magnification is 30: the 35 mm pumpkin casts a shadow of about 1.05 m and each 40 × 52 mm window a patch 1.2 m tall and about 1.7 m wide (the window spans 60° of the sleeve). Illuminance falls off as 1/D²: at 3 m the shadow is twice as big but the wall receives 4 times less light. Umbra and penumbra: if the source measures s, the edge of the shadow has a penumbra zone of width ≈ s·(D − d)/d. With an LED whose apparent size is about 2 mm (estimate), at 1.5 m the penumbra is about 6 cm on a 1 m shadow: sharp. With an LED candle (plastic flame ≈ 10 mm) it would be about 30 cm, and with a 60 mm bulb, 1.8 m: there would be no recognisable shadow, just a grey patch. That's why the figures are designed without details smaller than 4–5 mm (they would give 12–15 cm on the wall, of the order of the penumbra). Ideal LED position: on the axis of the sleeve, because then all the silhouettes are at the same d and the shadow doesn't change size as it spins (with the LED offset by 10 mm, d varies between 40 and 60 mm and the magnification between 37 and 25: the shadows «breathe» by 50 % on each turn); and in height, about 10 mm below the lower edge of the windows (which run from 20 to 60 mm above the base), so that the rays leave between 11° and 45° upwards and fall on the walls and not on the table. A wide-angle LED (120°) facing upwards is used: an ordinary 20–30° one would concentrate the light on the lid. The stars, at 50–70° elevation, fall high on the wall and on the ceiling. Circuit: 3 AA batteries give 4.5 V; the white LED needs ≈ 3.1 V, so the 100 Ω resistor limits the current to I = (4.5 − 3.1)/100 ≈ 14 mA (≈ 17 mA with fresh 4.8 V batteries), below the nominal 20 mA; consumption ≈ 0.05 W, about 130 h with 2000 mAh alkaline batteries (estimate). Pivot: the sleeve (≈ 20 g with lid and pencil) hangs from the pencil tip and its centre of gravity sits about 3 cm below the point of support, like a pendulum: if it tilts, the weight rights it by itself. The friction torque of a point is ≈ μ·m·g·a, with a contact radius a of tenths of a millimetre: about 4·10⁻⁶ N·m. A wooden skewer inside a straw rubs along the whole straw with a radius of 1.5 mm (about 20 times more torque) and would also take up the axis, exactly where the LED has to go. Graphite is also a solid lubricant. Why it doesn't spin by itself like candle lanterns: a candle gives off about 80 W of heat, which creates a rising air current; the LED only 0.05 W, not enough (and much safer). The speed of the shadow on the wall is v = ω·D: at one turn every 3 s and 1.5 m, about 3 m/s, which is why it is best to spin it slowly.
- shadow: an area that light can't reach because an opaque object is in its way.
- umbra: the central part of the shadow, completely dark: no light reaches it from any point of the source.
- penumbra: the grey edge of the shadow, where light arrives from only part of the source; the bigger the light, the wider it is.
- opaque: a material that doesn't let light through, like black card.
- pivot: the point something turns on; here, the pencil tip in the dimple in the cap.
- centre of gravity: the point where all of an object's weight can be thought of as concentrated.
By age
- 5–7 years: The adult cuts the bottle, the windows and the stars and glues the pencil. The child fixes the templates, cuts the outer outline with scissors, folds the tabs, glues the hem and the lid, puts on the modelling clay and the LED and discovers in the dark room that the shadow grows as the wall gets further away. Circuit-free alternative: a battery LED candle in the centre (slightly blurrier shadows).
- 8–10 years: They follow all the steps with help only for the craft knife, the awl and the hot glue. Have them build the circuit themselves, find the LED's polarity and measure the shadow at 1 and 2 m to check that it doubles in size.
- 11–12 years: Have them make the table from experiment 1 and calculate the magnification (D/d), design a window of their own leaving bridges of at least 4 mm and calculate the LED current with Ohm's law. Challenge: predict the size of the shadow on a wall 2.5 m away before measuring it.
In a group or in class
Teams of 2–3 children, one lantern per team (≈ €1.50–2.50 in components per lantern). Before the session: print the templates, cut the bottles and make the dimples, cut out the windows for the youngest and test each LED with its resistor. 90-minute session: 10 min of demonstration with a finished lantern, 60 min of assembly (while the sleeve glue dries, the base and the LED are put together) and 20 min of «shadow cinema» with the class in the dark, switching on the lanterns one at a time. Have spare LEDs, resistors and pencils.
Challenges
- Design your own sleeve half: copy the outline of template A without the windows and draw a new scene (a black cat on a fence, a witch on her broomstick), leaving each figure joined to the frame by bridges of 4 mm or more.
- Stick orange cellophane on the inside of the moon window and purple cellophane on the house one: the moon will come out orange on the wall and the house in a purple night.
- Make stars in the lid too with the awl (away from the pencil) to fill the ceiling with spinning dots.
- Make it spin by itself: glue 8 folded card fins of 20 × 30 mm round the edge of the lid and blow on it with a small fan from one side. How many fins and at what angle make it spin fastest?
- Build a second Ø 140 mm sleeve (with 3 panels) and compare: do the shadows come out smaller or bigger with the wall at the same distance? Why?