Squishy balloon ball
A soft ball about 7 cm across made with two latex balloons and 250 ml of flour: it squashes, stretches and goes back to its round shape on its own because the rubber pushes the grains back into place.
What they will learn
- What an elastic material (latex) is: it stretches when you apply a force and gets its shape back when you let go.
- That a powder (a granular material) sometimes behaves like a solid and sometimes like a liquid: it flows when you squeeze it and stays put when you let go.
- That air takes up space: if you do not get it out before tying the knot, the ball stays hard and cannot be moulded.
- To measure volumes (250 ml) and compare fillings fairly by changing only one thing at a time.
Prepare beforehand
- The day before: wash the bottle and the funnel and leave them to dry upside down for 24 h. Check inside that there are no drops left.
- Ask whether anyone is allergic to latex. If so, use latex-free balloons (nitrile/TPE) or do not do the project.
- Cover the table with newspaper or work inside a baking tray.
- If you do not have a funnel, print template A at 100 % and assemble it beforehand.
- Have 3 balloons ready per child (one spare): it is normal for some to burst when stretched.
Materials and tools
- Latex balloons — 2 per ball (+ 1 optional for a third layer) and 2 spares buy
round, 30 cm (12") in diameter when inflated, ordinary latex (not foil or modelling balloons) - Wheat flour — 250 ml (≈ 135 g) per ball
plain flour, dry and free of lumps - Plastic bottle — 1
500 ml water bottle, standard 28 mm neck, CLEAN AND DRY (24 h) - Funnel — 1
kitchen funnel that fits into the neck of the bottle - Permanent marker — 1–2
fine or medium tip, black (Edding or Sharpie type) - Measuring jug — 1
to measure 250 ml of flour - Paper tissues — 2
to cover the mouth of the balloon when letting the air out
Tools
- Scissors — cut the neck off the second balloon
- Tray or newspaper — work on top of it to catch any flour that falls
- Spoon — help the flour through the funnel
Pieces and templates
- A · Paper funnel (if you do not have one) ×1 — card 160–200 gsm or double 80 gsm paper
- B · Face ideas (model to copy) ×1 — paper
Step by step
Measure the flour
Put the funnel in the dry 500 ml bottle and pour in 250 ml of flour (one cup), using the spoon if it gets stuck. The flour should reach halfway up the bottle.
1 Put the funnel in the bottle and fill the measuring jug to 250 ml 2 Pour the flour through the funnel; use the spoon if it gets stuck 3 The flour reaches halfway and the neck stays clean Check: The neck of the bottle must be clean and free of lumps.Tip: Tap the bottle gently on the table so the flour goes down and does not stay in the neck.Loosen up the first balloon
Blow up balloon 1 to about 20 cm and let it down. Do this 2 times: the rubber becomes softer and then stretches more easily over the bottle and as it fills with flour.
1 Blow up balloon 1 to about 20 cm in diameter 2 Let it down and repeat 2 times: the rubber goes soft Half-inflate the balloon
Blow up balloon 1 to about 15 cm in diameter (like a grapefruit) and pinch the neck with your fingers so the air does not escape. Do not tie it.
1 Blow up balloon 1 to about 15 cm, like a grapefruit 2 Pinch the neck so the air does not get out; do not tie it Tip: If the child finds it hard to blow up, use a balloon pump.Fit the balloon onto the bottle
Keeping the neck pinched, stretch the mouth of the balloon over the thread of the bottle until it goes down 1 cm. Now let go of the pinch: the balloon will stay slightly inflated on top of the bottle.
1 Keeping it pinched, bring the mouth of the balloon to the thread 2 Stretch the mouth of the balloon and pull it 1 cm down the thread 3 Let go of the pinch: the balloon stays slightly inflated and does not come off Check: The balloon must stay inflated (at least Ø 10 cm) and be held firmly: pull it gently and it should not come off.Get the flour into the balloon
Turn the bottle upside down with the balloon at the bottom. Squeeze the bottle and release it, 10–15 times in a row, as if pumping: the flour falls into the balloon and the air goes up into the bottle.
1 Turn the bottle over: the balloon is at the bottom 2 Squeeze and release the bottle 10–15 times, as if pumping 3 Keep going until the bottle is almost empty and the balloon is heavy Check: At the end the bottle should be almost empty and the balloon heavy and full of flour.Take the balloon off the bottle
With the bottle still upside down, tap it with your hand so any flour left in the neck goes down, and pinch the neck of the balloon just above the flour. Keeping it pinched, slide the mouth of the balloon off the thread.
1 With the bottle still upside down, tap it to bring the flour down 2 Pinch the neck above the flour and slide the balloon off the thread 3 Now you have the flour ball; do not let go of the pinch Let the air out adult
Cover the mouth of the balloon with a folded paper tissue and hold it with the same fingers that are pinching the neck. Slowly loosen the pinch while you squeeze the ball with your other hand: the air comes out through the tissue and the flour stays inside. Stop when the ball is soft and has no air pocket.
1 Cover the mouth of the balloon with a folded paper tissue 2 Slowly loosen the pinch and squeeze the ball: the air comes out 3 Stop when the ball is soft and has no air pocket Tip: Do it inside a large plastic bag: if a little flour escapes, it stays inside.Tie the balloon adult
Tie the neck of the balloon as close to the flour as possible, with a tight single knot. Cut off the rest of the neck, leaving 1 cm above the knot.
1 Tie the neck as close to the flour as possible 2 Cut off the rest, leaving 1 cm above the knot 3 Squeeze hard: not even a wisp of flour should come out Check: Squeeze the ball hard: not even a wisp of flour should come out of the knot.Cut the second balloon
Cut the neck off balloon 2 just where it starts to widen (about 3 cm from the mouth). You are left with a latex «bag» with an opening of about 15 mm.
1 Mark the cut on balloon 2 where the neck starts to widen 2 Cut off the neck with the scissors 3 You are left with a latex bag with an opening of about 15 mm Tip: The colour of the second balloon is the one that will show: choose the one you like best.Cover the ball
Stretch the opening of balloon 2 with the fingers of both hands (ask for help) and push the ball in, knot end first. Adjust it until the opening is exactly on the opposite side to the knot of balloon 1.
1 Stretch the opening of balloon 2 with the fingers of both hands 2 Push the ball in, knot end first 3 Adjust it: the opening ends up right opposite the knot Check: When you turn the ball, the inner balloon can only be seen through the small opening of the outer one, never the knot.Third layer (optional)
For a school ball that lasts for months, cut the neck off a third balloon and cover the ball again, with the opening of this layer over the knot of balloon 1 (the opposite side to the opening of balloon 2).
1 Cut the neck off a third balloon and cover the ball again 2 Put the opening of balloon 3 over the knot, away from that of balloon 2 3 Now you have a three-layer school ball Draw the face
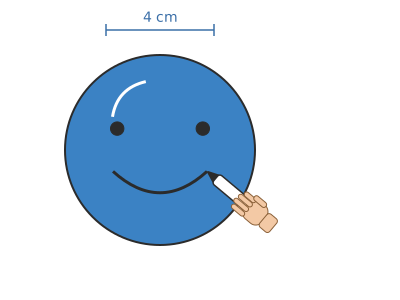
With the permanent marker, draw the face on the area without openings, about 4 cm wide (copy the ideas from template B). Leave it to dry for 2 minutes without touching it so the ink does not smudge.
1 Draw a face about 4 cm wide on the area without openings 2 Leave it to dry for 2 minutes without touching it
Does it work? The test
Squeeze the ball with your whole hand for 3 seconds, let go and look at it. Then stretch it between both hands and press it with one finger.
What should happen: It should squash without any hard resistance, keep your finger marks for a moment and, when you roll it between your hands for 2–3 seconds, become round again (≈ 7 cm). No powder should come out anywhere.
If something goes wrong
- The flour does not go down from the bottle into the balloon — Damp bottle (caked flour) or the balloon went down and leaves no space. Solution: Tap the bottle and pump by squeezing and releasing. If it is damp, start again with a dry bottle and another balloon.
- The ball is as hard as a stone — Air under pressure was left inside or there is too much flour for the balloon. Solution: Let more air out before tying. If it is already tied, make another one with 200 ml of flour.
- The balloon bursts when fitting it onto the bottle — Small or cheap balloon, or it was not loosened up beforehand. Solution: Blow up and let down the balloon 2–3 times beforehand and use good-quality 30 cm balloons.
- Fine powder comes out of the ball — Tiny hole in the inner balloon or a loosely tied knot. Solution: Add the third layer with the opening over the knot. If a lot comes out, throw it away inside a bag.
- A cloud of flour comes out when letting the air out — The pinch was released all at once. Solution: Paper tissue over the mouth and release very slowly, inside a large bag.
- The face rubs off or smudges — Water-based marker or it was touched before it dried. Solution: Use a permanent marker and leave it for 2 minutes without touching it.
Safety
- Balloons: choking hazard for children under 8 if they put them in their mouths or swallow pieces. An adult blows them up, supervises and picks up pieces of burst balloons straight away.
- Latex allergy: ask first. If there is an allergy, do not make it with latex balloons.
- Don't squeeze it with your teeth or poke the ball with pencils: if it bursts, the flour gets everywhere and can irritate the eyes.
- Raw flour: do not eat it. Wash your hands afterwards.
- If the ball bursts, clean it up with a damp cloth; do not blow the powder.
The science behind it
For children
The ball has two secrets. The first is the balloon: it is made of stretchy rubber, and rubber is like a very soft spring that wants to go back to its place when you stretch it. The second is the flour: it is thousands of tiny grains. When you squeeze, the grains slide over each other like sand on the beach and let your fingers sink in. When you let go, the rubber hugs the flour and makes it round again.
For the adult
Latex is an elastomer: its long, coiled and cross-linked polyisoprene chains stretch when a force is applied and recover their shape through an entropic effect when released; it can withstand strains of 500–700 % before breaking. Flour is a granular material (particles of 10–100 µm): with no air under pressure, the grains can slide over one another and the mass deforms plastically (it keeps the imprint), like a fluid with a yield stress. The taut membrane of the balloon applies a small, uniform pressure which, when you knead the ball, brings it back to a sphere (the shape with the smallest surface for a given volume). If it is tied with air inside, the gas is compressed and the ball behaves like an inflated ball (rigid and springy, not mouldable). Cornflour has finer, more angular grains and gives a firmer, «crunchier» feel. The double layer reduces the likelihood of bursting (two independent failures) and covers the weak point at the knot.
- elasticity: the ability of a material to change shape and go back to its shape when you stop pushing it.
- latex: natural rubber that balloons are made of.
- granular material: a material made up of a huge number of loose grains, like sand or flour.
- deformation: a change in the shape of an object when you push or stretch it.
- volume: the amount of space something takes up; it is measured in millilitres (ml).
By age
- 5–7 years: The adult blows up the balloon, fits it on, ties the knot and lets the air out. The child measures the flour with the cup, pumps the bottle, helps put on the second layer and draws the face.
- 8–10 years: They do all the steps in pairs (one holds the bottle, the other the balloon). The adult only supervises letting the air out and tying the knot.
- 11–12 years: They design the four-fillings experiment with a table and a hardness scale, and work out the bulk density of each filling by weighing 100 ml.
In a group or in class
Pairs, one dry 500 ml bottle and one funnel per pair, 3 balloons per child. Beforehand: dry the bottles (ask for them the day before and leave them open upside down), put the flour containers on 3–4 tables with a measuring cup and trays. 30 min: 5 min demonstration, 15 assembling, 10 for faces and comparison. Keep a vacuum cleaner or broom to hand and a bag for burst balloons.
Challenges
- Make a ball that weighs exactly 100 g: how much flour do you need?
- Make a juggling ball that bounces little and does not roll (hint: rice and 3 layers).
- Invent an egg-shaped or pear-shaped ball using a long balloon.
- Make a family of 3 balls measuring 5, 7 and 9 cm, working out the volume of filling for each one (V = 4/3·π·r³).