Snow globe in a jar
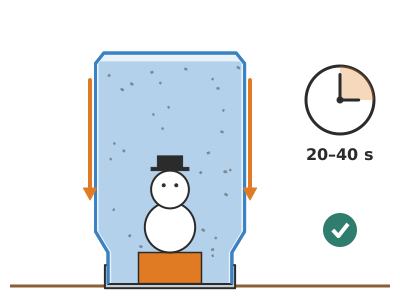
A glass jar with a small figure glued to the lid, filled with water thickened with glycerine and glitter: turn it over and shake it, and it «snows» slowly around the figure for 20–40 seconds.
What they will learn
- That the viscosity of a liquid (how thick it is) slows down objects falling through it: with glycerine the glitter takes 3–5 times longer to reach the bottom.
- That some things sink and some float, depending on their density compared with the liquid's (glitter sinks; polystyrene floats).
- That flat particles fall more slowly, «gliding», than round ones of the same material.
- How to run a fair test: change just one thing (the amount of glycerine) and time the snowfall.
Prepare beforehand
- The day before: wash the jar and lid in hot soapy water, remove the label and dry them.
- Boil 300 ml of water for 2 minutes and leave it to cool, covered.
- Check that the figure and the cap pedestal fit through the mouth of the jar and that the lid closes with them in place.
- Glue the figure (steps 1–3) in good time: epoxy at least 1 h before, silicone 24 h before.
- If the jar is glass and the children are young, have the plastic jar version ready.
Materials and tools
- Glass jar with screw lid — 1
≈ 370 ml (jam or preserves jar), Ø ≈ 70 mm, mouth ≈ 55–60 mm, metal lid that closes and doesn't rust - Small plastic figure — 1
hard plastic, max. 45 mm high and able to fit through the mouth of the jar (Kinder toys, Playmobil, cake toppers) - Plastic bottle cap — 1
Ø 30 mm, from a bottle, as a pedestal (≈ 15 mm high) - Liquid glycerine — 110 ml buy
vegetable or pharmacy glycerine (glycerol), clear - Water — 230 ml
boiled for 2 minutes and cooled, or distilled water (unscented iron water) - Glitter — 1 level teaspoon (≈ 3–5 g)
plastic (not paper), a mix of fine and chunky, silver, white or iridescent - Washing-up liquid — 1 drop
clear - 5-minute epoxy glue — 1 dose
clear two-part, waterproof - Sandpaper — 1 piece, 5 × 5 cm
120 grit, to scuff the inside of the lid - Electrical tape or PTFE tape — 30 cm
to seal the thread
Tools
- Measuring cup or measuring jug — measuring the water and glycerine
- Teaspoon and wooden stick — adding the glitter and stirring
- Saucepan — boiling the water (or making the syrup) adult
- Tray and cloth — working on top of: something always spills
- Stopwatch (phone) — timing how long the snowfall lasts
Pieces and templates
- A · Decorative lid band ×1 — card or wrapping paper
- B · Background scenery ×1 — card (200 gsm)
Step by step
Sand the lid and the cap adult
Scuff the centre of the inside of the lid with the sandpaper (a 3 cm circle) and both faces of the cap pedestal: the rim of its opening (the ring that will be glued to the lid) and the flat top face (where the figure will go), until they are matt. Glue grips much better on a rough surface.
1 Find the 3 cm circle in the centre of the lid 2 Scuff the centre with sandpaper until it's matt 3 Sand the cap too: the rim and the flat face Glue the pedestal adult
Put epoxy on the sanded rim of the 30 mm cap (mix the two parts in equal amounts) and glue it upside down in the centre of the inside of the lid, with the ring resting on the sanded area. This raises the figure 15 mm so it won't be hidden behind the rim of the lid.
1 Mix the two parts of the epoxy in equal amounts 2 Glue the cap upside down in the centre of the lid 3 Rest it on the jar: the pedestal should be centred Check: Rest the lid on the jar upside down (without screwing it on): the pedestal should be centred.Glue the figure adult
Glue the figure on top of the cap with another drop of epoxy, facing forwards. Leave it to cure for 1 hour (5-minute epoxy) or 24 hours if you use silicone.
1 Put a drop of epoxy on the cap and set the figure facing forwards 2 Leave it to cure for 1 hour untouched (24 h with silicone) 3 Push the figure with a finger: it shouldn't move Check: Once it has cured, push the figure gently with a finger: it shouldn't move at all.Tip: If the figure is very light and hollow, fill it with a little silicone first: with air inside it tends to float and come unstuck.Check the size
Put the figure on its lid inside the empty jar and screw it on. Check that the figure doesn't touch the glass and that the lid closes fully.
1 Put the figure on its lid into the empty jar 2 Screw it on: the figure mustn't touch the glass Mix the liquid
In the jug, mix 230 ml of boiled, cooled water with 110 ml of glycerine (2:1 ratio). Stir for 30 seconds until you can't see any clear «threads» swirling about.
1 Pour 230 ml of boiled, cooled water into the jug 2 Add 110 ml of glycerine up to the 340 mark 3 Stir for 30 seconds until no threads are visible Tip: No glycerine: dissolve 120 g of sugar in 120 ml of hot water, leave it to cool and mix it with 200 ml of water.Fill the jar
Pour the liquid into the jar up to 2 cm below the brim. The figure will take up space when it goes in: this way it won't overflow.
1 Pour the liquid from the jug into the jar 2 Stop 2 cm from the brim: the figure will take up room Add the snow
Add 1 level teaspoon of glitter (or half glitter and half crushed eggshell) and 1 drop of washing-up liquid. Stir with the stick until all the glitter sinks.
1 Add 1 level teaspoon of glitter 2 Add 1 drop of washing-up liquid 3 Stir until all the glitter sinks Check: No glitter should be left floating on the surface: if there is, stir more or add another drop of washing-up liquid.Test the speed
Stir hard and time how long it takes for almost all the glitter to reach the bottom. Ideally 20–40 seconds. If it falls in under 15 s, add 30 ml more glycerine; between 15 and 20 s, add 15 ml. If it takes more than 40 s, add 30 ml of boiled, cooled water (with that much glycerine the snow stays floating halfway up). Before adding, spoon out the same amount of mixture so the level stays 2 cm below the brim, and repeat the test.
1 Stir hard to lift all the glitter 2 Time it: ideally it takes 20–40 seconds 3 If it takes under 15 s, add 30 ml of glycerine and repeat Check: After adjusting, the glitter takes between 20 and 40 seconds to fall.Put the figure in and close
Lower the figure upside down into the liquid slowly so it doesn't splash, and screw on the lid. If it overflows, wipe it dry; if there's a lot of air left, open it and add liquid until it's almost full to the brim.
1 Lower the figure upside down into the liquid, slowly 2 Screw on the lid and wipe up any overflow 3 Turn it over: the bubble should be lentil-sized Check: When you turn it over, the air bubble should be about the size of a lentil or a chickpea, no bigger.Seal the thread adult
Dry the thread, unscrew the lid a little, run a thin bead of silicone (or 2 turns of PTFE tape) around the jar's thread and screw it on tightly. On the outside, wrap one turn of electrical tape around the lid–glass join.
1 Run a thin bead of silicone around the jar's thread 2 Screw the lid on tightly 3 Wrap one turn of electrical tape around the lid–glass join Decorate
Stick decorative band A around the rim of the lid and scenery B on the outside at the back of the jar, with clear tape along the edges.
1 Stick band A around the rim of the lid 2 Stick scenery B on the outside, at the back 3 The result: band on the lid and scenery behind Make it snow
Turn the jar upside down (lid on the table, figure upright) and shake it for 3 seconds. Leave it still on the table and watch it snow around the figure.
1 Shake the jar upside down for 3 seconds 2 Leave it still on the table and watch it snow
Does it work? The test
Shake the jar for 3 seconds, put it down on the table and time it until almost all the glitter is on the floor of the scene (on the lid). Repeat 3 times and work out the average.
What should happen: With plain water the snowfall lasts ≈ 8–12 s. With 1 part glycerine to 2 parts water, ≈ 25–40 s; the flat particles glide down, sparkling. After 24 h upside down there shouldn't be a single drop on the table.
If something goes wrong
- The glitter falls too fast — Too little glycerine or very chunky glitter. Solution: Add glycerine 30 ml at a time (up to half and half) or use finer glitter.
- The glitter stays floating at the top — Surface tension: dry glitter doesn't get wet. Solution: Add 1 drop of washing-up liquid and stir; never more than 2 drops (it foams).
- The figure comes unstuck — Smooth, unsanded surfaces, uncured glue or glue that isn't waterproof. Solution: Empty it, dry it for 1 day, sand and glue again with epoxy, waiting the full curing time.
- The water turns cloudy or yellow within a few weeks — Tap water with microbes, syrup fermenting, a painted figure whose colour runs or a lid that rusts. Solution: Use boiled or distilled water, glycerine instead of sugar, and unpainted plastic figures; varnish the inside of the lid or use a jar with a plastic lid.
- It drips from the lid — Unsealed thread or a lid with a damaged seal. Solution: Seal with silicone on the thread and electrical tape on the outside; replace the lid if the seal is broken.
- There's a big air bubble — It wasn't filled enough or the figure is small. Solution: Open it and top up with more mixture almost to the brim before closing.
Safety
- Glass: if the jar is dropped it can break; with children aged 5–7 use a plastic jar or work over a tray and a towel.
- Epoxy and silicone are applied by an adult in a ventilated area; don't touch uncured glue and wash your hands.
- Glitter must not be eaten and sticks in the eyes: don't rub your eyes with glittery hands; wash your hands when you finish.
- If you use boiled water or hot syrup, wait until it's cold before the children touch it.
- Disposal: don't pour large amounts of glittery liquid down the sink (it's microplastic): strain it through a coffee filter and put the glitter in the bin.
The science behind it
For children
When you shake the jar, the glitter goes up and then wants to fall, because it's heavier than water. But to fall it has to push the water out of its way. If the water is thick, like honey, it's much harder to push aside, so the glitter falls really slowly, as if it had a parachute. That's why the snow lasts much longer with glycerine. And because glitter is flat, it rocks from side to side on the way down, like leaves from a tree.
For the adult
A particle falling through a liquid quickly reaches a terminal velocity at which its apparent weight (weight minus Archimedes' buoyancy) equals the drag force. For small, slow particles (low Reynolds number) Stokes' law applies: v = 2·(ρp − ρf)·g·r² / (9·μ). The velocity is inversely proportional to the viscosity μ and proportional to the density difference. PET glitter has ρ ≈ 1.38 g/cm³; water, 1.00 g/cm³ and μ ≈ 1 mPa·s. A 1/3 glycerine mixture has ρ ≈ 1.08 g/cm³ and μ ≈ 2.5–3 mPa·s: the viscosity triples and the density difference drops from 0.38 to 0.30, so the fall is ≈ 3–4 times slower. At 50 % (μ ≈ 6 mPa·s) it is ≈ 8 times slower. Flat particles also oscillate and glide («falling-leaf» motion), which lengthens their path and gives the snow effect. Expanded polystyrene (ρ ≈ 0.02–0.05 g/cm³) has ρp < ρf and floats: it's no good. The drop of surfactant (washing-up liquid) lowers the surface tension so the dry particles get wet and aren't held up at the surface. Syrup works for the same reason (a 50 % sugar solution has μ ≈ 15 mPa·s), but it can ferment.
- viscosity: how thick a liquid is: honey is very viscous and water hardly at all.
- density: how heavy a piece of material is compared with its size; anything denser than water sinks.
- float: to stay at the top of a liquid because you are less dense than it.
- settle: when particles that were loose in a liquid gradually collect at the bottom.
- glycerine: a clear, thick, sweetish liquid that mixes with water and thickens it.
By age
- 5–7 years: The adult glues the figure and seals the jar. The child measures the water and glycerine with the jug, adds the glitter, stirs, times with help and decorates the lid. Best in a plastic jar.
- 8–10 years: They do everything except the epoxy and the sealing; they make two versions (with and without glycerine) and compare times.
- 11–12 years: They do the 4-concentration experiment with a time–% glycerine graph and explain Stokes' law in their own words.
In a group or in class
Individually or in pairs. The adult glues the figures to the lids the day before (epoxy). Per table of 4: a jug of 2:1 mixture ready made, a pot of glitter with a teaspoon, and washing-up liquid. 30 min: 5 min demonstration (glass of plain water versus glass with glycerine), 15 filling and closing, 10 decorating and timing. The adult seals the threads at the end. Have trays and cloths ready, and plastic jars for the youngest.
Challenges
- Make a snowfall that lasts exactly 1 minute by adjusting the glycerine.
- Make a snow globe with two kinds of “snow” that fall at different speeds.
- Design a snow globe in which something rises instead of falling (hint: something less dense than the mixture, held down by a thread).
- Add an LED with a coin cell under the lid (on the outside, in a cardboard stand) to light up the snowfall at night.