Solar car with belt drive
A 16 cm cardboard car with bottle-cap wheels that moves on its own when the sun shines on it: a mini solar panel powers a motor that turns the rear axle through a rubber-band belt.
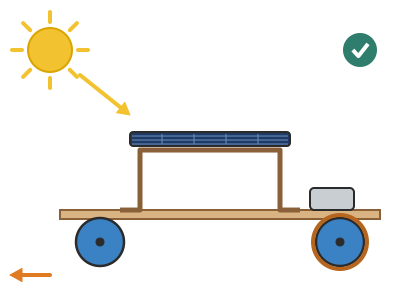
What they will learn
- That a solar panel turns light into electricity and that the amount of light changes the speed.
- What a closed circuit is and what happens when you reverse a motor's polarity (it spins the other way).
- How a belt drive with a large pulley reduces speed and increases force (1:7 ratio).
- Why axles should turn inside a bearing (the straw) to reduce friction.
Prepare beforehand
- Print the template at 100 % (without «fit to page») and check with a ruler that the red line in the header measures 50 mm.
- Test the panel with the motor before you start: connect the wires and put it in the sun. If the shaft does not turn, the problem is the components, not the car.
- Pierce the 4 bottle caps and cut the pulley discs before the session if the children are young.
- Check that the skewer turns freely inside the straw (if it rubs, look for wider straws).
- Choose a sunny day for the test or have a 40–60 W halogen or incandescent lamp ready.
Materials and tools
- Corrugated cardboard — 1 sheet, 20 × 25 cm
single-wall, 3–4 mm thick (shipping box); flat and uncreased - Plastic bottle caps — 4 (wheels)
all the same, Ø 30 mm (water or fizzy drink bottles) - Wooden skewers — 2
Ø 3 mm, straight (roll the skewer on the table: if it «wobbles», discard it) - Straws — 1–2
straight, inner Ø 5–6 mm (wider than the skewer) - Mini solar panel — 1 buy
5–6 V, 100–200 mA, about 110 × 60 mm, with soldered wires (red +, black −) - Low-start solar motor — 1 buy
RF-300 or «solar motor» (starts at 0.4 V and ~25 mA), body Ø 24 mm, 2 mm shaft - Small thin rubber band — 1 (belt) + 4 (tyres)
belt: orthodontic or hair elastic, Ø 20–25 mm unstretched; tyres: thin office rubber bands - Cable sleeve — 1 piece, 8 mm
the plastic from a stripped wire that fits snugly on the motor shaft (improves the belt's grip) - Double-sided tape — 2 pieces, 3 cm
to fix the panel (lets you remove it and reuse it) - Glue sticks for hot glue — 2
for a hot glue gun - Poster paints or felt-tip pens — as you like
to decorate at the end (do not paint the panel)
Tools
- Metal ruler and pencil — mark lines and check measurements
- Scissors — cut out the template and the straws
- Craft knife and cutting mat — cut the chassis and the pulley slot adult
- 3 mm nail and hammer (or drill with a 2.5 mm bit) — pierce the centre of the bottle caps adult
- Hot glue gun — glue the wheels, pulley and motor adult
- Glue stick — stick the paper template onto the cardboard
Pieces and templates
- A · Chassis ×1 — corrugated cardboard 3–4 mm
- B · Panel stand (bridge) ×1 — corrugated cardboard 3 mm
- C · Pulley: side discs ×2 — corrugated cardboard 3 mm
- D · Pulley: centre disc ×1 — corrugated cardboard 3 mm
- E · Bottle cap centring guide ×4 — paper (no cardboard needed)
- F · Front straw (bearing) ×1 — straw Ø 6 mm
- G · Rear straws (bearings) ×2 — straw Ø 6 mm
- H · Axles ×2 — wooden skewer Ø 3 mm
Step by step
Test the components
Before cutting anything, connect the panel's red wire to one motor terminal and the black wire to the other (twist the copper round the terminal). Put the panel in the sun: the motor shaft should spin fast.
1 Connect the red wire to one motor terminal and the black wire to the other 2 In direct sun, the motor shaft should spin fast Check: If it does not turn in direct sun, try another motor or panel: do not carry on until it works.Tip: Stick a small piece of tape on the motor shaft as a «flag» so you can clearly see which way it turns.Stick on the template and cut the chassis
Stick template A onto the cardboard with a glue stick, with the cardboard flutes running across the width. Cut out the 70 × 160 mm rectangle with scissors or a craft knife and ruler.
1 Stick template A on with the cardboard flutes running across 2 Cut along the line with a ruler and craft knife (or scissors) 3 A 70 × 160 mm chassis that does not bend when you hold it Check: The chassis should not bend when you hold it by one end.Cut the pulley slot adult
With a craft knife, cut the 14 × 30 mm slot marked next to the motor area. Cut the two long sides first and then the short ones, without going past the corners.
1 Find the 14 × 30 mm slot next to the motor area 2 First the two long sides, then the short ones 3 Without going past the corners: the opening comes out clean Mark the axles underneath
Turn the chassis over. With the ruler, draw a line 30 mm from the front edge and another at 130 mm (the same position as the lines on the template). The bearings will go there.
1 Turn the chassis over: you work on the underside 2 With the ruler, draw lines 30 mm and 130 mm from the front edge Glue on the bearings adult
Cut a 70 mm straw (F) and glue it along the front line. Cut two lengths of 37 mm and 17 mm (G) and glue them along the rear line, leaving the gap under the slot clear. Use a thin line of hot glue or sticky tape over the top.
1 Glue straw F (70 mm) along the front line 2 Glue the two G lengths (37 and 17 mm) and leave the gap under the slot 3 A skewer should pass through straight and turn effortlessly Check: Push a skewer through the straws: it should go through straight and turn effortlessly. If it goes in crooked, unstick it and realign with the ruler.Make the pulley
Cut out the two C discs (Ø 28 mm) and the D disc (Ø 20 mm). Pierce all three in the centre with the tip of the skewer. Glue D between the two Cs, well centred, with PVA or a thin bead of hot glue.
1 Cut two C discs of Ø 28 mm and one D disc of Ø 20 mm 2 Pierce the centre of each disc with the tip of the skewer 3 Glue D between the two Cs, well centred Check: Look at the pulley edge-on: the discs should be parallel and concentric.Pierce the bottle caps adult
Put the paper centring guide (E) in each cap and mark the centre. Rest the cap on a piece of wood and pierce it with a 3 mm nail (or a 2.5 mm drill bit). The hole should be tight: the skewer has to go in snugly.
1 Put centring guide E in the cap and mark the centre 2 Rest it on a piece of wood and pierce with a 3 mm nail 3 The skewer has to go in snugly Tip: If the hole ends up too big, the drop of hot glue in the next step will sort it out.Fit the front axle adult
Cut a 100 mm skewer (H). Push it through the front straw. Push a cap onto each end with the open side facing inwards, leaving a 2 mm gap from the chassis. Fix each cap with a drop of hot glue on the inside.
1 Push a 100 mm skewer through the front straw 2 A cap on each end, 2 mm from the chassis, with a drop of hot glue 3 Spin it with your finger: it should turn several times on its own Check: Spin the wheels with your finger: they should turn several times on their own. If they slow down quickly, the cap is rubbing on the chassis.Fit the rear axle with the pulley adult
Push the second skewer through the first length of straw, thread the pulley on in the gap under the slot and carry on through the second length. Glue the pulley to the axle with hot glue just under the slot. Fit and glue the two rear wheels as in the previous step.
1 Push the skewer through one straw, the pulley and the other straw 2 Glue the pulley to the axle just under the slot 3 Fit the wheels: the pulley turns without rubbing the slot Check: The pulley should turn inside the slot without touching the edges.Fit the tyres
Put a thin rubber band round each rear wheel, wrapping it twice if it is loose. That way the drive wheels do not slip on smooth floors.
1 Put a rubber band round each rear wheel 2 If it is loose, wrap it twice: that way it does not slip Prepare the motor and the belt
Slide the piece of cable sleeve (8 mm) onto the motor shaft so the belt grips better. Pass the small rubber band through the slot, round the pulley, and then over the motor shaft.
1 Slide the piece of cable sleeve onto the motor shaft 2 Pass the band through the slot, round the pulley and over the shaft Tip: The band should be taut but not strangle the motor: when you turn the wheel by hand, the motor shaft should turn too.Fix the motor adult
Lay the motor on its side on the marked area, with its shaft just above the pulley. Slide the motor towards the opposite side until the band is taut and glue it with two large dabs of hot glue, one on each side of the body.
1 Motor shaft over the pulley; slide the motor until the band is taut 2 Glue it with two large dabs of hot glue, one on each side 3 Turn a rear wheel: the motor should turn with it Check: Turn a rear wheel by hand: the band should drive the motor shaft without slipping. If it slips, raise the motor with a small piece of cardboard underneath (this tightens the belt).Assemble the panel stand
Score the folds on piece B with a dry ballpoint pen and the ruler. Fold it into a bridge shape (foot – leg – roof – leg – foot). Glue the feet onto the lines 35 and 95 mm from the front.
1 Score the four folds on B with a dry ballpoint pen 2 Fold it into a bridge: foot, leg, roof, leg and foot 3 Glue the feet to the chassis: the roof sits flat at 35 mm Check: The roof should be flat and 35 mm above the chassis.Fit the panel and connect it
Stick the panel on the roof with two pieces of double-sided tape. Run the wires to the motor and connect them by twisting the copper round each terminal. Cover each joint with electrical tape.
1 Stick the panel on the roof with two pieces of double-sided tape 2 Twist each wire round a terminal and cover it with electrical tape 3 Secure the wires so they do not touch the wheels or the belt Check: The wires must not touch the wheels or the belt: fix them to the stand with a piece of tape.First test in the sun
Go out into direct sun and put the car on a smooth floor. It should start on its own within 1–2 seconds. If it goes backwards, swap the two motor wires.
1 In direct sun on a smooth floor, it starts on its own in 1 or 2 seconds 2 If it goes backwards, swap the two motor wires Decorate
Paint the chassis and the stand with poster paints or felt-tip pens, without touching the panel or the belt. Leave to dry for 15 minutes before testing it again.
1 Paint the chassis and the stand, without touching the panel or the belt 2 Leave to dry for 15 minutes before testing it again
Does it work? The test
In direct sun, on a smooth floor (terrace, hallway, playground), mark a start and a finish 2 m apart. Time the run.
What should happen: With a 5 V / 150 mA panel in full sun, the car covers 2 m in about 5–10 s (0.2–0.4 m/s). With clouds it slows down a lot or stops; in the shade, it stops.
If something goes wrong
- The motor spins freely but the car does not move — The belt is slipping on the motor shaft or on the pulley. Solution: Fit the cable sleeve on the motor shaft, use a smaller rubber band or raise the motor with a piece of cardboard to tighten it.
- The motor does not turn even in the sun — Loose wire, a motor that needs too much current or a panel that is too small. Solution: Check the joints; test the panel and motor on their own. Use a low-start motor (RF-300). An ordinary toy motor will not start with a mini panel.
- The motor tries to turn but gets stuck — Belt too tight or axles rubbing. Solution: Loosen the belt (lower the motor) and check that each wheel turns freely with your finger.
- The car goes backwards — The motor's polarity is reversed. Solution: Swap the two motor wires.
- It veers to one side — Axles not parallel or bottle caps off-centre. Solution: Check with the ruler that the straws are at 30 and 130 mm on both sides. Replace any cap that «wobbles».
- It does not work indoors — LED light or light through a window does not have enough energy. Solution: Try it in direct sun or with a 40–60 W halogen/incandescent bulb at 15 cm (do not touch it: it burns).
Safety
- Piercing bottle caps with a nail and hammer or a drill: always an adult, with the cap resting on a piece of wood.
- Hot glue burns: the adult applies it, the child points to where.
- The craft knife is used by an adult with a metal ruler and cutting mat.
- Do not look at the sun or let the panel reflect light into anyone's eyes.
- Halogen lamps burn: do not bring them closer than 10 cm to the cardboard.
The science behind it
For children
The solar panel is like a plant leaf that eats light: when the sun shines on it, it pushes electricity through the wires. That electricity makes the motor spin very, very fast, but with little force, like a little mouse running. The rubber band and the big cardboard wheel turn that fast spin into a slower but stronger one, like when you ride your bike up a hill in the easiest gear. That is why the more sun there is, the faster the car goes.
For the adult
The panel's silicon cells generate a current proportional to the irradiance (≈ 1000 W/m² in full sun; ten times less with clouds). A 110 × 60 mm mini panel delivers at most ≈ 0.5–1 W. A DC motor spins faster the higher the voltage, and its torque is proportional to the current; with so little power we need a low-start motor (high-resistance winding and low friction) and a mechanical reduction. The belt between the Ø 3 mm shaft and the Ø 20 mm pulley gives a ratio of ≈ 1:7: the rear axle turns 7 times more slowly than the motor but with ≈ 7 times more torque (minus losses), enough to overcome the rolling resistance of a ≈ 60 g car. The straws act as bearings: the skewer only touches the straw along a line, reducing friction compared with a hole in the cardboard. Reversing the polarity reverses the direction of the current and, with it, the motor's direction of rotation.
- solar panel: a panel that turns light into electricity.
- circuit: a closed path that electricity flows round, from one terminal to the other.
- pulley: a wheel with a groove that a belt or rope runs in.
- reduction: a drive that makes something turn more slowly but with more force.
- bearing: a part that an axle turns in with little friction (here, the straw).
By age
- 5–7 years: The adult prepares the chassis, pulley, pierced bottle caps and glued-on motor. The child sticks on the straws with tape, threads on the axles and wheels, connects the wires (by twisting) and decorates. Focus on «more sun = faster».
- 8–10 years: They follow all the steps, with help only for the craft knife, piercing and hot glue. Let them discover why the belt slips and how to fix it.
- 11–12 years: Let them design their own bodywork and measure the speed (m/s) in different conditions, making a graph. Challenge: work out the gear ratio and try three different pulleys.
In a group or in class
Teams of 2–3 children, one car per team (≈ €6–10 in components per car). Before the session: pierce all the bottle caps, pre-cut the chassis and test each panel-motor pair. 90 min session: 10 min demonstration, 60 min building, 20 min race in the playground on a 2 m track marked with chalk. Have 2–3 spare motors and rubber bands.
Challenges
- Make the car climb a 10° ramp (a tilted folder).
- Add a second panel in parallel (red to red, black to black) and compare the force on the ramp.
- Design bodywork that weighs less than 15 g and does not shade the panel.
- Build a car that drives in a circle: what do you need to change on the front axle?