Rubber band car
A 14 cm cardboard car with bottle-cap wheels and a rubber band motor: as you roll it backwards, the band winds round the rear axle; when you let go, it unwinds and the car shoots off, covering 2–4 metres.
What they will learn
- That a stretched rubber band stores energy (elastic potential energy) and gives it back as movement (kinetic energy).
- That more turns of the band store more energy, but only until the band is fully stretched.
- That the wheels push the car thanks to friction with the floor: without grip, they spin.
- That friction in the axles and the air slow the car down until it stops.
- How to measure distances and compare results by changing just one thing (floor, band, weight).
Prepare beforehand
- Print the template at 100 % and check the red 50 mm line in the header.
- Pierce the 4 caps in the centre (3 mm, so the skewer fits tightly).
- Cut 2 axles of 90 mm and 1 pin of 30 mm from the skewer, without the points.
- Cut a 15 mm piece of the paperclip and bend it into an L (8 mm + 7 mm) with the pliers.
- Find a smooth corridor at least 4 m long for testing, and a tape measure.
Materials and tools
- Corrugated cardboard — 1 piece, 15 × 12 cm
single-wall, 3 mm (shipping box) - Plastic bottle caps — 4
matching, Ø 30 mm (water or fizzy drink) - Wooden skewers — 1 (for 2 axles of 90 mm and 1 pin of 30 mm)
Ø 3 mm, straight - Medium rubber bands — 2 (motor) + 2 thin ones (tyres)
motor: Ø 40–50 mm, 1.5–2 mm thick; tyres: thin office rubber bands - Metal paperclip — 1
32 mm, for the axle hook - Straw — 1
Ø 6 mm, for 4 spacers of 3 mm - €1 coins — 2
15 g of ballast over the rear axle - Glue sticks — 1–2
for a hot glue gun - Sticky tape — 1 roll
clear or masking tape - Felt-tip pens or poster paints — as you like
for decorating
Tools
- Craft knife, ruler and cutting mat — cutting the chassis and the anchor slot adult
- Empty ballpoint pen — scoring the chassis folds
- Awl or 3 mm nail — piercing the caps (3 mm) and the axle holes in the chassis (twisting it to widen them to 4 mm) adult
- Hot glue gun — fixing the caps to the axle and the hook adult
- Small pliers — cutting and bending the paperclip, cutting skewers
- Tape measure — measuring the distance travelled
Pieces and templates
- A · Upside-down U chassis ×1 — corrugated cardboard 3 mm
- B · Cap centring guide ×4 — paper
- C · Axles ×2 — wooden skewer Ø 3 mm
- D · Anchor pin ×1 — wooden skewer Ø 3 mm
- E · Spacers ×4 — straw Ø 6 mm
- F · Axle hook ×1 — metal paperclip
Step by step
Cut the chassis adult
Stick template A onto the cardboard with the corrugations in the direction shown and cut out the 140 × 110 mm rectangle with a craft knife and ruler. Also cut the 10 × 3 mm slot in the centre of the front edge (nose).
1 Stick template A on with the corrugations running across 2 Cut each side with ruler and craft knife, without going past the corners 3 Cut the 10 × 3 mm slot in the centre of the nose Pierce the axle holes adult
With the cardboard still flat, pierce the 4 holes of 4 mm marked on the sides, 24 mm (front) and 116 mm (back) from the nose and 7 mm from the edge. Twist the awl until a skewer passes through and turns freely.
1 Mark the 4 holes: 24 and 116 mm from the nose, 7 mm from the edge 2 Pierce each hole with the awl, twisting it, on a mat 3 A skewer must pass through and turn freely Check: A skewer turns inside the hole without effort.Fold the U
Score the two folds 25 mm from each long edge with an empty ballpoint pen and ruler, and fold the sides 90° downwards. You'll have a tunnel with a 60 mm roof and 25 mm walls.
1 Score the two folds 25 mm from each long edge 2 Fold both sides 90° downwards 3 Push a skewer through the holes: it must go in straight Check: Push a skewer through the two front holes: it goes in straight, perpendicular to the sides. Repeat at the back.Prepare the wheels adult
If they aren't pierced, put centring guide B in each cap, mark the centre and pierce it with the 3 mm awl over a piece of wood. The hole should be just big enough for the skewer to fit tightly.
1 Put centring guide B in the cap and mark the centre 2 Pierce the centre with the 3 mm awl over a piece of wood 3 The skewer must fit tightly Fit the front axle adult
Push a 90 mm axle through the front holes, put a 3 mm straw spacer on each side and press a cap onto each end with the open side facing in, flush with the end of the axle. Fix them with a dab of hot glue on the inside.
1 Push a 90 mm axle through the two front holes 2 Spacer E and cap on each end, open side in; dab of hot glue 3 Spin a wheel: it turns several times on its own Check: Spin a wheel: it turns several times on its own and both turn together.Put the hook on the rear axle adult
Place hook F in the centre of the second axle, with the 8 mm part stuck along the skewer and the 7 mm part standing up. Hold it with 3 tight turns of tape and a dab of hot glue. Wind 3 more turns of tape next to the hook so the band grips.
1 Cut 15 mm of paperclip and bend it into an L: 8 mm and 7 mm 2 Stick it in the centre with 3 turns of tape and a dab of hot glue 3 Add 3 more turns of tape: the hook must not turn Check: The hook doesn't turn round the skewer when you push it with your finger.Fit the rear axle adult
Pass the axle with the hook through the rear holes, leaving the hook in the centre of the tunnel. Fit the spacers and glue on the two rear caps like the front ones.
1 Pass the axle with the hook through the rear holes 2 Fit the spacers and glue on the caps as on the front axle 3 The hook sits in the centre of the tunnel and the wheel turns freely Check: The hook is centred between the sides and the wheel turns freely.Fit the tyres
Stretch a thin rubber band round each rear wheel, with 2 turns if it's loose. That way the drive wheels don't spin when you let the car go.
1 Put a thin rubber band round each rear wheel 2 If it's loose, wrap it twice: that way it doesn't spin Make the rubber band chain
Join the 2 medium bands with a lark's head knot: pass one through the other and pull its end through itself. You'll get a chain about 90–100 mm long unstretched.
1 Pass the end of one band through the other 2 Push the other end of band 2 through its own loop and pull 3 You get a 90–100 mm chain unstretched Tip: If you only have one large band (Ø 70 mm or more), use it on its own.Anchor the band at the nose
Push one end of the chain up through the slot in the nose from below, pass the 30 mm pin D through the loop above the roof and pull from below so the pin rests in place. Stick the pin to the roof with a piece of tape.
1 Push one end of the chain through the slot, from below 2 Pass the 30 mm pin D through the loop, above the roof 3 Pull from below and tape the pin to the roof Hook the band onto the axle
Take the other end of the chain through the tunnel to the rear axle and hook it onto the hook. The band should be slightly taut, without touching the front axle.
1 Take the other end through the tunnel to the rear hook 2 Hook it on: it must pass over the front axle Check: Look at the tunnel from the side: the band passes over the front axle without rubbing it.Add the ballast
Tape 2 €1 coins onto the roof, above the rear axle ("ballast" line). Their weight presses the rear wheels against the floor and improves grip.
1 Tape 2 €1 coins onto the roof, above the rear axle 2 The weight presses the rear wheels against the floor Wind up the motor
Put the car on the floor and push it backwards with your hand about 55–60 cm: that's about 6 turns of the wheel, because each turn of a Ø 30 mm cap moves ≈ 9.4 cm (π × 30 mm). The band winds onto the axle. Don't go beyond 8 turns (about 75 cm): the band could snap.
1 Put the car down and push it backwards about 55–60 cm (6 turns) 2 Look underneath: the band winds in a spiral round the axle 3 Don't go beyond 8 wheel turns: the band could snap Check: Looking underneath, you can see the band wound in a spiral round the axle and nice and taut.Let go
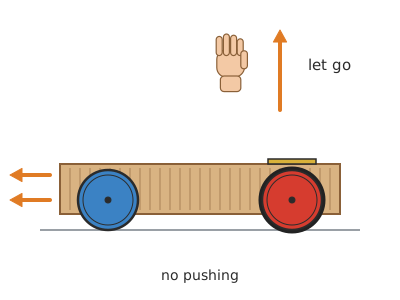
Hold the car still for a second with the nose pointing down the corridor and let go without pushing. Measure where it stops with the tape measure and write it down.
1 Hold it still for a second with the nose towards the corridor 2 Let go without pushing: it sets off forwards by itself 3 Measure where it stops with the tape measure and write it down Decorate
Paint or draw windows, numbers and stripes on the roof and sides. Don't paint the tyres or the axle holes. Let it dry before racing.
1 Draw windows, numbers and stripes on the roof and sides 2 Don't paint the tyres or the axle holes 3 Let it dry before racing
Does it work? The test
In a smooth corridor (tiles or wooden floor), wind the car up with 6 wheel turns (≈ 57 cm backwards), let it go and measure the distance from the starting point to where it stops. Repeat 3 times and work out the average.
What should happen: It shoots off in the first second, the band comes off the hook after ≈ 0.6 m and the car keeps rolling under its own momentum: 2–4 m in total on a smooth floor. On carpet it only manages 0.5–1 m.
If something goes wrong
- The wheels turn but the car doesn't move forward — The rear wheels are spinning. Solution: Fit the rubber band tyres and the coin ballast over the rear axle; wind fewer turns so it starts more gently.
- It moves a little and stops dead — The band doesn't come off the hook and winds up the other way. Solution: Shorten the hook's leg to 4–5 mm or tilt it slightly towards the side the band pulls from.
- It veers to one side — Misaligned axle holes or off-centre caps. Solution: Check the holes are at 24 and 116 mm on both sides; replace the wobbly cap.
- It stops quickly even though the band is taut — Friction: a cap touching the chassis or an axle rubbing on the cardboard. Solution: Fit the straw spacers and check that the holes in the chassis are 4 mm (twist the awl to widen them).
- The band slips off the hook while winding — Band not taut when you start winding. Solution: Use a shorter chain (2 smaller bands) so it's taut from the start.
- The band rubs on the front axle — Chain too slack or anchor too low. Solution: Make sure the band comes out of the slot in the roof and not from the bottom edge; tighten it with shorter bands.
Safety
- Rubber bands can snap and hit you: don't wind more than 8 turns and keep your face away while winding.
- Piercing caps and using the hot glue gun: always an adult.
- Cut the points off the skewers before fitting them.
- Cut paperclips are sharp: cover the hook with tape except for the tip that catches the band.
- Coins, rubber bands and paperclips are small parts: keep them out of reach of children under 3.
The science behind it
For children
When you push the car backwards, the band winds up and stretches, like when you pull back a catapult: you're storing your strength inside the band. When you let go, the band wants to go back to its size and turns the axle and the wheels. The wheels push the floor backwards and the floor pushes the car forwards, but only if the wheels grip! That's why we give them rubber bands as tyres.
For the adult
Winding the band does work that is stored as elastic potential energy (≈ ½·k·x² for moderate stretches). On release, the band's tension T applies a torque T·r to the axle (r ≈ 3 mm, the radius of the tape drum), which at the wheel of radius R = 15 mm becomes a tractive force T·r/R ≈ T/5. That traction is only transmitted if it doesn't exceed the maximum static friction μ·N between tyre and floor: hence the rubber tyres (higher μ) and the ballast over the drive axle (higher N). With a band of ≈ 4 N, the traction is ≈ 0.8 N and a car of ≈ 60 g accelerates sharply. The useful number of turns is limited by the band's maximum elongation: with 116 mm of travel and a drum of ≈ 6 mm diameter, about 7 turns fit (≈ 0.65 m with Ø 30 mm wheels, which advance ≈ 94 mm per turn). When the band comes off the hook, the car carries on under inertia with the kinetic energy it has gained until rolling resistance, axle friction and air resistance dissipate it. Larger drive wheels go further per turn but give less traction: it's a trade-off, like the gears on a bicycle.
- elastic potential energy: energy stored in something stretched or twisted, like the rubber band.
- kinetic energy: energy an object has because it is moving.
- friction: force between two surfaces that touch; it slows things down, but it also lets the wheels push.
- inertia: tendency of an object to keep moving (or stay still) if nothing changes it.
- traction: force with which the wheels push the car forwards.
By age
- 5–7 years: The adult cuts, pierces and glues the axles and hook. The child folds the U, fits the spacers, tyres and band, winds up the car and measures in footsteps. Focus on "stretching = storing strength".
- 8–10 years: They follow all the steps with help for the awl and the hot glue. Have them measure in metres and average 3 attempts.
- 11–12 years: Have them graph turns–distance, try Ø 40 mm rear wheels and calculate the distance per turn (π·D). Challenge: optimise the car for maximum distance.
In a group or in class
Pairs, one car per pair. Before the session: pierce caps, cut axles and bend hooks. 60-minute session: 40 min of building and 20 min of racing in a corridor with a starting line and marks every 50 cm in masking tape. Each pair records its 3 attempts in a shared table on the board. Have spare bands and caps ready.
Challenges
- Make your car travel more than 4 m on a smooth floor.
- Build a car that climbs a 5 cm ramp.
- Swap the rear wheels for Ø 40–60 mm lids and compare.
- Design an aerodynamic card body that weighs less than 10 g.
- Make a car that goes in a straight line for 3 m without veering more than 20 cm.