Gliding paper aeroplane
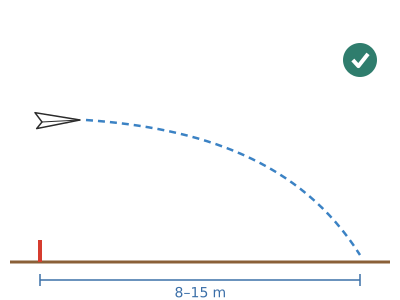
A dart-style paper aeroplane folded from an A4 sheet, plus two variations on the same fold: a wide-winged glider and a stunt plane that loops the loop. With well-creased folds and trimmed elevators, the dart flies 8–15 m in a straight line.
What they will learn
- That an aeroplane flies thanks to the balance of four forces: weight, lift, drag and thrust.
- That the position of the centre of gravity relative to the wings decides whether the plane pitches, crashes or flies steadily.
- That bending the trailing edge of the wings up by 1 cm (ailerons/elevator) lifts the nose.
- How to measure distances, repeat tests and work out the average to compare designs fairly.
Prepare beforehand
- Find a corridor, sports hall or playground with no wind, at least 12 m long; mark a launch line and markers every metre with tape.
- Print gauge B and cut it out of card.
- Fold a test dart yourself first: that way you will be able to spot which step the children get wrong.
- Have plenty of spare sheets: a bad fold can't be fixed, you start a new sheet.
Materials and tools
- A4 sheets — 4–6
80 gsm printer paper (≈ 5 g per sheet), free of creases - Metal paperclips — 2
standard 28–32 mm (≈ 0.5 g each) - Card — 1 piece of 3 × 10 cm
for the 1 and 2 cm gauge (piece B) - Sticky tape — 2 pieces of 2 cm
to close the body under the wings - Tape measure or sewing tape — 1
5–10 m long, or marks every metre on the floor
Tools
- Ruler — running its edge firmly along each fold
- Scissors — cutting out gauge B
- Pencil — marking the 253 mm points and the body line
Pieces and templates
- A · Dart fold guide (whole A4 sheet) ×1 — 80 gsm A4 paper
- B · 1 and 2 cm gauge ×1 — card (200 gsm)
Step by step
Mark the centre
Lay the A4 sheet portrait on the table. Fold it in half lengthways (297 mm side onto 297 mm side), lining up the corners carefully, and run the edge of the ruler along the fold. Open it out again.
1 Fold the A4 sheet in half lengthways, corner to corner 2 Press the fold firmly with the edge of the ruler 3 Open it out: the fold runs exactly down the middle Check: The fold runs exactly from the middle of the top edge (105 mm) to the middle of the bottom edge.Corners to the centre
Bring the top left corner over to the centre fold, so that the top edge lies right along the centre line. Crease with the ruler. Repeat with the right corner. A 90° point forms.
1 Bring the top left corner over to the centre fold 2 Crease with the ruler and do the same with the right corner 3 The edges meet in the centre and form a 90° point Check: The two edges meet in the centre without overlapping or leaving a gap, and the folds reach the side edge 105 mm below the tip (measured vertically, along the edge).Edges to the centre again
Bring the new slanted edge on the left over to the centre fold, starting from the tip. The fold reaches the side edge about 253 mm below the tip, measured vertically (44 mm from the bottom edge). Crease and repeat on the right side.
1 Mark a point on each edge 253 mm below the tip 2 Fold from the point to the tip: the slanted edge goes to the centre 3 Repeat on the right: narrow tip and two equal halves Check: The tip is narrow (45°) and the two halves are the same: if one covers more than the other, fold it again.Tip: For the glider model, skip this step.Close the body
Fold the plane along the centre fold towards you, closing it like a book, so that the flaps end up inside and the smooth side outside. Run the ruler along the bottom edge (the keel) from tip to tail.
1 Fold along the centre towards you, with the flaps inside 2 Run the ruler along the keel from tip to tail Mark the wing line
With the plane closed and the keel towards you, rest gauge B on the keel and draw a pencil line 20 mm from it, from the tail to where the thick part of the tip begins. Do the same on the other side.
1 Rest gauge B on the keel and mark a line at 20 mm 2 Mark the same line on the other side Fold the wings down
Fold the first wing down along the 20 mm line, so that its edge is parallel to the keel. Crease with the ruler. Turn it over and fold the other wing the same way, making it line up with the first.
1 Fold the wing down along the 20 mm line 2 Its edge is parallel to the keel; fold the other wing the same way 3 From behind: a 2 cm body and both wings the same width Check: Look at the plane from behind: the body is 2 cm deep and both wings are exactly the same width (≈ 85 mm).Make a gentle «Y»
Open the wings until they are almost horizontal, tilted slightly upwards (a very open «Y» shape, about 5–10° per wing). Join the two sides of the body under the wings with 2 cm of tape, 4 cm from the tip.
1 Open the wings almost flat, slightly up, in a «Y» 2 Join the body with 2 cm of tape, 4 cm from the tip Tip: That small upward angle (dihedral) makes the plane right itself if it tips over.Trim the ailerons
At the back of each wing, on the outer 4 cm, curve 10 mm of the edge upwards (use the 1 cm gauge). Both sides the same: about 2–3 mm high seen from behind.
1 Mark 10 mm of the trailing edge on the outer 4 cm of each wing 2 Curve both ailerons upwards, the same on each wing Fit the paperclip
Slide a paperclip onto the keel, underneath, 25 mm from the tip. Check the balance: hold the plane with two fingers under the wings; it should balance at 1/3 of its length from the tip (≈ 10 cm).
1 Slide the clip onto the keel, 25 mm from the tip 2 Hold it with two fingers at 10 cm: it should balance Check: If it drops towards the tail, move the clip 5 mm towards the tip.Launch the dart
Hold the body between your thumb and index finger at 1/3 from the tip. Throw it straight ahead and slightly upwards (5–10°), with a gentle push, as if throwing a dart. Don't throw it as hard as you can.
1 Hold it at 1/3 from the tip and throw it straight and gently 2 It flies straight and comes down gradually Check: It flies straight and comes down gradually: 8–15 m in a long corridor.Model 2: glider
Take another sheet and repeat only steps 1, 2, 4, 5, 6, 7 and 8 (without step 3): the nose is blunter and the wings wider. Fit the paperclip 30 mm from the nose and throw it gently, almost horizontally.
1 Fold another sheet with steps 1, 2, 4, 5, 6, 7 and 8: without step 3 2 Wider wings; fit the clip 30 mm from the tip 3 Throw it gently and almost horizontally: it glides slowly Check: It moves forward slowly and glides in a long arc; with a gentle throw it should stay in the air for 2–3 s.Model 3: stunt plane
Take a finished dart and remove the clip. Raise the ailerons much more: fold up 15–20 mm of the trailing edge of each wing, at almost 45°. Throw it hard and upwards (30–45°).
1 Remove the clip from a finished dart 2 Fold up 15–20 mm of the trailing edge of each wing 3 Throw it hard upwards: it loops and comes back Check: It climbs, does a full loop and comes back towards you. If it just «stalls» in the air, throw it harder or raise the ailerons more.Correct the flight
If it nosedives, raise the ailerons 1–2 mm more. If it climbs, stalls and drops tail first, lower them or move the clip forward. If it turns right, raise the left aileron a little and lower the right one (and vice versa): the wing with the raised aileron drops and the plane turns towards that side.
1 If it nosedives, raise both ailerons 1–2 mm more 2 If it climbs and drops tail first, lower the ailerons or move the clip forward 3 If it turns right, raise the left aileron and lower the right one Hold the competition
Launch each model 5 times from the same line and measure with the tape measure where it first touches the ground. Write down the 5 distances, cross out the worst and work out the average of the other 4.
1 Launch from the line and measure where it first touches the ground 2 Cross out the worst of 5 throws and average the other 4
Does it work? The test
In a 12 m corridor or a sports hall with no draughts, launch the dart with its clip 5 times from the start line, always with the same force and from the same height (shoulder).
What should happen: A well-folded dart flies straight for 8–15 m. The glider covers less distance (4–8 m) but takes longer to come down. The stunt plane does a loop and lands 2–5 m away.
If something goes wrong
- It nosedives and crashes after 1–2 m — Nose too heavy or ailerons flat. Solution: Raise the ailerons 1–2 mm more or move the clip 5 mm back.
- It climbs, stalls and drops tail first — Ailerons raised too much or thrown too steeply upwards. Solution: Lower the ailerons, move the clip forward and throw it more horizontally.
- It always turns to one side — Wings of different widths or uneven ailerons. Solution: Compare the wings with the gauge; if one aileron is raised more, make them the same. To correct a turn to the right, raise the left aileron a little and lower the right one.
- The wings open into a very narrow V or droop — Body not closed: the wings spread apart in flight. Solution: Put the piece of tape under the wings, 4 cm from the tip.
- It spirals down to the ground — Reversed dihedral (wings tilted downwards) or soft folds. Solution: Leave the wings tilted slightly upwards (open Y) and run the ruler along the keel.
- It flies well once and then worse — The tip gets squashed on impact and the paper goes soft. Solution: Straighten the tip and crease the folds again; after about 20 crashes, fold a new one.
Safety
- Never throw towards anyone's face: the tip of the dart can damage an eye. If there are several of you, throw in the same direction as everyone else and collect your plane once everyone has thrown.
- The paperclip is a small part: keep it out of reach of children under 3.
- If you throw in the playground, keep away from stairs and open windows.
- Paper cuts hurt: crease the folds with the ruler, not by sliding your finger along the edge.
The science behind it
For children
A paper aeroplane is like a slide made of air. When you throw it, the wings push the air down a tiny bit and the air, annoyed, pushes the wings up: that holds it up. Its weight pulls it towards the ground and the air slows its nose down. The paperclip is like a rucksack on its nose: it makes it go straight as an arrow. And the raised ailerons at the back are like a rudder telling it «nose up!».
For the adult
Four forces act on the plane: weight (≈ 0.05 N for 5 g), lift, aerodynamic drag and, only during the launch, thrust. In gliding flight the plane is a glider: it descends by converting potential energy into work against drag, and its range depends on its L/D efficiency (≈ 4–6 for a dart, somewhat more for the glider) and on the initial energy. Lift arises because the wing, at a small angle of attack, deflects air downwards (Newton's third law). Longitudinal stability requires the centre of gravity to be ahead of the centre of pressure: the clip moves the CG forward; the raised aileron (elevator or «reflex») produces a small downward force at the tail that balances the pitching moment and keeps a positive angle of attack. With too much deflection the plane goes into cycles of climbing and stalling (phugoid) or, with more speed, completes a loop: that is the stunt model. Dihedral (wings in a Y) gives lateral stability: when the plane banks, the lower wing presents more effective area and rights the plane. The dart has little surface area and a high wing loading: it needs speed and flies far and fast; the glider, with more area and less loading, flies slowly and comes down gently.
- lift: the upward force the air exerts on the wings.
- drag: the force of the air that slows the plane down.
- centre of gravity: the point where the plane balances on a finger.
- aileron (elevator): the trailing edge of the wing which, when raised, lifts the nose.
- dihedral: the open V-shaped angle formed by the two wings.
- average: the result of adding up several measurements and dividing by how many there are.
By age
- 5–7 years: The adult marks folds 2 and 3 in pencil and the child folds along the line. Focus on the dart and on «harder doesn't mean further». The adult trims the ailerons.
- 8–10 years: They fold the three models on their own and hold the competition with averages. Let them discover how to correct a turn by adjusting the ailerons.
- 11–12 years: Have them measure the angles of the folds (45° and 22.5°), work out where the edge is cut (253 mm) and design a fourth model of their own, comparing it with data and a distance–aileron graph.
In a group or in class
Pairs, 6 A4 sheets and 2 paperclips per pair. Beforehand: mark a start line and cones every metre in the sports hall or playground. 50-minute session: 15 min guided folding of the dart (the teacher folds an A3 sheet where everyone can see), 10 min variations, 20 min competition in turns with a child as «judge» doing the measuring, 5 min sharing averages on the board. Everyone throws in the same direction and collects on the signal.
Challenges
- Design a plane that stays in the air for more than 4 s when released from 2 m.
- Make the plane land inside a hoop 5 m away.
- Build a plane that comes back to you (boomerang) by setting one aileron higher than the other.
- Fold the dart from an A5 sheet and from an A3 sheet: which flies further? Why?