House with LED lights in each room
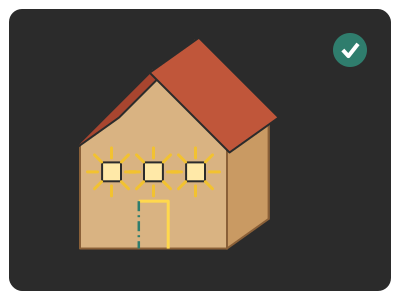
A 14 × 9 × 17 cm cardboard house with three tracing-paper windows that light up: behind each one is an LED wired in parallel with copper tape to a CR2032 coin cell with a switch.
What they will learn
- What a parallel circuit is: each LED has its own path between the two tracks, so if one fails the others stay lit.
- That an LED has polarity: the long leg (+) goes to the positive track, and only then does it light up.
- How a diffuser (tracing paper) spreads the light from a single point across the whole window.
- How to use copper tape as a flat wire and how to turn corners without breaking the track.
Prepare beforehand
- Print the templates at 100 % and check the red 50 mm line in the header.
- Test each LED with the battery: long leg on the + side (the flat side with lettering), short leg on the − side. Set aside any that don't work.
- Check that the 3 LEDs are the same colour and light up with similar brightness.
- Cut out the windows and door with a craft knife before the session if the children are young.
- Have a room ready that can be darkened for the final test.
Materials and tools
- Corrugated cardboard — 1 sheet, 40 × 35 cm
single-wall, 3–4 mm (shipping box), flat - 5 mm LEDs — 3 (+1 spare) buy
warm white or yellow, all the SAME colour; legs untrimmed (about 25–28 mm) - CR2032 coin cell — 1 buy
3 V lithium, 220 mAh - CR2032 battery holder with switch and wires — 1 buy
with ON/OFF switch and red (+) and black (−) wires 10–15 cm long - Self-adhesive copper tape — ≈ 80 cm buy
5–6 mm wide, conductive adhesive if possible - Tracing paper (greaseproof / baking paper) — 3 squares, 26 × 26 mm
translucent: it diffuses the light - White A4 sheet — 1
to line the inside of back wall B: it reflects the LEDs' light towards the windows - Sticky tape — 1 roll
clear or masking tape - Glue sticks — 2
for a hot glue gun - Poster paints or felt-tip pens — as you like
decorate BEFORE building the circuit
Tools
- Craft knife, metal ruler and cutting mat — cutting the walls, windows and door adult
- Scissors — cutting out templates, tracing paper and copper tape
- Hot glue gun — joining the walls and roof adult
- Awl or wooden skewer — 3 mm hole for the wires adult
- Needle-nose pliers or tweezers — bending the LED legs
- Glue stick — sticking the paper templates onto the cardboard
Pieces and templates
- A · Front wall (outer face) ×1 — corrugated cardboard 3–4 mm
- B · Back wall ×1 — corrugated cardboard 3–4 mm
- C · Side wall with the battery holder ×1 — corrugated cardboard 3–4 mm
- D · Plain side wall ×1 — corrugated cardboard 3–4 mm
- E · Roof ×1 — corrugated cardboard 3–4 mm
- F · Window diffuser ×3 — tracing paper
- G · Circuit template (inner face of the front) ×1 — paper
Step by step
Test the LEDs
Take the CR2032 battery and put the long leg of each LED on the + side (the flat side with lettering) and the short leg on the − side. If it lights up, the LED is fine. Pick out 3 with the same brightness.
1 The LED's long leg is +; on the battery, + is the side with lettering 2 Pinch the battery between the legs: long leg on the + side 3 Pick out 3 LEDs with the same brightness Check: If an LED doesn't light, turn it round: the legs may have been the wrong way. If it still doesn't light, it's broken.Cut out the five pieces adult
Stick templates A, B, C, D and E onto the cardboard with a glue stick and cut along the solid line with a craft knife and ruler. Roof E measures 104 × 216 mm: draw it directly with a ruler if it doesn't fit on the sheet. Then the adult makes the 3 mm hole in C with the awl, 20 mm from the front edge and 28 mm from the top edge.
1 Stick templates A, B, C, D and E onto the cardboard with a glue stick 2 Cut along the solid line with a ruler and craft knife 3 Make the 3 mm wire hole in C with the awl Open the windows and door adult
Cut out the 3 windows, 18 × 18 mm, in wall A. For the door, cut only the top and right-hand sides (28 and 45 mm) and fold the left side so it opens like a hinge.
1 Mark 3 windows of 18 × 18 mm and the 28 × 45 mm door 2 Cut the 4 sides of each window without going past the corners 3 Cut the top and right; fold the left: the door opens Check: The windows have clean corners and the door opens and closes without tearing.Decorate the walls
Paint the outer faces of A, B, C, D and E with poster paints or felt-tip pens (roof tiles, bricks, window frames). Leave to dry for 10 minutes before carrying on: copper tape won't stick to wet paint.
1 Paint the outer faces of A, B, C, D and E: roof tiles, bricks... 2 Leave to dry for 10 minutes before carrying on Stick on the diffusers
On the inner face of A, stick a 26 × 26 mm square of tracing paper F over each window with 4 thin strips of tape along the edges. Then stick template G on top, with its openings matching the windows.
1 Stick a square F over each window with tape along the edges 2 Stick template G on top with its openings over the windows 3 Against the light, the three windows look milky white Check: Hold the wall up to the light: the three windows look milky white and template G is lined up.Stick down the two copper tracks
Stick a 122 mm strip of copper tape along the TRACK + line (top) and another the same along TRACK − (bottom). Press down hard with your fingernail. Looking at the wall from inside, the tracks start 8 mm from the left edge and end 10 mm from the right, which is the side where wall C will go: that's where you'll connect the wires.
1 Stick a 122 mm copper strip along the + track (top) 2 Stick another the same along the − track and press hard with your nail 3 The tracks are 36 mm apart and don't touch anywhere Check: The two tracks are 36 mm apart and don't touch anywhere.Bend the LED legs
With pliers, bend both legs of each LED at 90°, 8 mm from the base (where the plastic ends). Then open the long leg upwards and the short leg downwards, in line, making a T with the LED standing in the middle. Trim off the excess so each leg is 18 mm long from the bend (the short one can be 16 mm: it just needs to rest on the track's tape).
1 Mark the long leg with a dot of red felt-tip pen 2 With pliers, bend at 8 mm: long leg up, short leg down 3 Trim the excess: each leg 18 mm from the bend Tip: Before bending, mark the long leg with a dot of red felt-tip pen: once bent, you can no longer tell which was the long one.Position the LEDs
Lay each LED's T flat on template G, with the bend in the centre of its window: the LED stands upright, 8 mm from the wall, facing into the house. The + leg (marked red) rests on the top track and the − leg on the bottom one. Hold each leg down with a 15 mm piece of copper tape stuck over it.
1 Each LED in front of its window: red leg on the top track 2 Hold each leg with a 15 mm piece of copper on top 3 Test: holder's red on the + track, black on the −, at ON Check: Put the battery in the holder and set the switch to ON. Touch the bare tip of the red wire to the end of the + track and the black one to the − track (if the wires aren't already stripped, strip 10 mm of each now): all three LEDs should light up at once. Then switch off.Tip: The LEDs don't point at the windows: the light goes inwards, bounces off the white-lined back wall and comes back out through the three windows. That way each window lights up fully and evenly, with no bright spot in the middle.Assemble the walls adult
Glue a white A4 sheet to the inner face of back wall B (trim it to shape). Then, with hot glue, fix side walls C and D inside A, flush with its edges, and finally back wall B, with the paper facing inwards. Wall C goes on the side where the tracks end, with the 3 mm hole next to the front wall.
1 Glue C and D inside A; C goes on the side where the tracks end 2 Glue the paper inside B and close the box with it 3 The box is square and the LEDs haven't moved Check: The box is square and the LEDs haven't moved.Connect the battery holder adult
The adult glues the battery holder to the outside of wall C with hot glue. Feed its wires through the 3 mm hole. If you didn't do it in step 8, strip 10 mm of each; lay the copper of the red wire on the end of the + track and the black on the − track, and cover them with 20 mm of copper tape, pressing hard.
1 Glue the holder outside C and feed the wires through the hole 2 Strip 10 mm: red on the + track and black on the − 3 Cover them with 20 mm of copper; at ON the 3 LEDs light up Check: Set the switch to ON: all 3 LEDs light up.Tip: No battery holder: let the tracks come out through a slot, rest the battery with its − side on the − track and make a copper-lined card flap joined to the + track that closes over the battery with a clothes peg. The peg is the switch.Put on the roof adult
Fold roof E along the ridge and rest it on the two triangular gables of A and B, with an 8 mm overhang at the front and back. Glue it with a bead of hot glue along the four sloping edges.
1 Score the ridge with an empty pen and fold E in half 2 Hot glue on the sloping edges of A and B; rest the roof on top 3 Leave an 8 mm overhang at the front and back Switch on in the dark
Turn off the room light, put the house on the table and set the switch to ON. The three windows should light up evenly and light will also escape through the gap around the door.
1 Turn off the room light and set the switch to ON 2 The three windows glow evenly and light comes out round the door
Does it work? The test
With the room dark, switch on and look from 1 m away. Then cover a window with your finger and open the door.
What should happen: All 3 windows glow with a soft, similar brightness. If you remove an LED, the other two stay lit (parallel). With a new CR2032, the house stays lit continuously for about 8–15 hours.
If something goes wrong
- No LED lights up — + and − tracks swapped, switch at OFF or wire poorly joined to the tape. Solution: Check that the red wire goes to the top track. Press the joins down with your nail or add another piece of copper tape on top.
- One LED lights but another doesn't — That LED is the wrong way round or its leg isn't touching the track properly. Solution: Turn the LED round (long leg up) and press down its piece of copper tape. Test it directly on the battery.
- The LEDs give very little light — Flat battery or white LEDs with a high forward voltage. Solution: Change the battery. If it persists, use yellow or warm white 2.8–3 V LEDs. Look at the house in the dark.
- One shines brightly and the others hardly at all — LEDs of different colours or types. Solution: Use three identical LEDs from the same pack.
- It only works if I press on one spot — The copper tape has broken at a corner or the adhesive doesn't conduct. Solution: At the joins, put copper on copper by folding over the end of the tape (metal side against metal side) or reinforce with another piece.
- The battery gets hot — Short circuit: the + and − tracks are touching. Solution: Switch off, find the point of contact (often a crooked piece of tape) and separate it with ordinary sticky tape.
Safety
- Coin cells are very dangerous if swallowed (they can burn the oesophagus in 2 hours): keep them out of reach of children under 6 and, if one is swallowed, go to A&E immediately.
- Never connect the LEDs to a 9 V battery without a resistor: they burn out and can get hot.
- The craft knife and hot glue are used by an adult.
- LED legs are sharp: bend them inwards and don't leave loose ends sticking out.
- Switch the house off when you're not looking at it; a short circuit heats up the lithium battery.
The science behind it
For children
Electricity leaves the battery from the + side like water through a pipe, runs along the top copper track, goes down through each LED and comes back along the bottom track to the − side. Each LED has its own path, like three slides side by side: if one breaks, the others keep working. An LED only lets electricity through in one direction, which is why it has to go with the long leg towards the +. Tracing paper is like a cloud: it spreads the light so the whole window glows.
For the adult
The three LEDs are in parallel between the two tracks, so each one receives the same voltage (the battery's, minus the drop along the tracks, which is negligible). An LED is a diode: it only conducts when forward-biased, above its threshold voltage (≈ 2 V yellow/red, ≈ 2.8–3.1 V white). Above that threshold the current rises almost exponentially, which is why a current-limiting resistor is normally needed. With a CR2032 it isn't: its internal resistance (≈ 10–30 Ω, higher the more depleted it is) limits the total current to about 10–25 mA. With 220 mAh of capacity and ≈ 15 mA of draw, it lasts in the order of 10 h. Mixing colours fails because the LED with the lowest threshold voltage pins the parallel voltage below the threshold of the others. Tracing paper is a diffuser: it scatters light in many directions (scattering in the cellulose fibres) and turns an almost point-like source into a more evenly lit surface; placing the LED 8 mm away increases the lit area. Copper tape acts as a flat conductor; its adhesive may not be conductive, which is why at the joins copper should touch copper.
- parallel circuit: a connection in which each device has its own path between the two terminals of the battery.
- polarity: the + side and the − side of a battery or an LED.
- LED: light-emitting diode: a tiny light that only works one way round.
- diffuser: a material that spreads and softens light.
- short circuit: when + and − touch directly without going through anything: the battery drains and heats up.
By age
- 5–7 years: The adult cuts out and assembles the house and bends the LED legs. The child decorates, sticks on the diffusers and the copper tracks (marked lines) and positions the LEDs with the red leg at the top. Focus on «light has a way there and a way back».
- 8–10 years: They do everything except the craft knife and hot glue. Have them test each LED with the battery before positioning it and find the fault on their own if one doesn't light.
- 11–12 years: Have them add a switch for each room (a copper flap on each LED's + track) and draw the circuit diagram with symbols. Challenge: measure the voltage and current with 1, 2 and 3 LEDs using a multimeter.
In a group or in class
Pairs, one house per pair (≈ €2 per house for LEDs, battery and holder). Before the session: cut the cardboard pieces (or use 1 L milk cartons as the body), print the G templates and cut the copper tape into 122 mm strips. 90 min session: 10 min demonstrating the LED and battery, 60 min building, 20 min to turn off the classroom lights and gather the houses into a «neighbourhood» on a table. Keep spare LEDs and batteries.
Challenges
- Add a fourth LED in the attic (a window in the gable) without running a new track from the battery.
- Fit a separate switch for each window.
- Build a street lamp with an LED, a straw and two copper strips connected to the same battery.
- Make the house light up when you open the door (the door closes the circuit as it moves).