Santa's magnet-guided sleigh
A 40 × 30 cm snowy village on cardboard legs, with 4 little houses, standing trees and a road. Santa's card sleigh has a hidden magnet and moves all by itself on top: it is pulled along by another magnet stuck to the tip of a wand that you move underneath the board. With it you play at delivering presents house by house against the clock.
What they will learn
- That a magnet's force passes through cardboard, paper, wood or plastic without touching them: the magnetic field doesn't need a path of material.
- That only some metals stick to a magnet (iron, steel, nickel): they are called ferromagnetic. Aluminium, copper and cardboard don't.
- That two magnets attract through opposite faces and repel through like faces, and how to tell which face goes which way without knowing north and south.
- That a magnet's force drops very quickly with distance: at twice the gap, much less than half the force. They check it by counting layers of cardboard.
- Why an object pulled from the front straightens itself out, like a trailer, and that is why the sleigh's magnet goes at the front.
Prepare beforehand
- Print the templates at 100 % (“actual size”) and check with the ruler that the 50 mm square measures 50 mm. Board A doesn't fit on A4: draw it straight onto the cardboard with a ruler (400 × 300 mm).
- Find flat cardboard: board A must have the flutes running along the 400 mm (so it doesn't sag between the legs) and legs B, along the 300 mm.
- Take only 2 magnets out of the packet and keep the rest in their little bag, closed and out of reach of small children. Count the magnets at the start and end of the session.
- Move mobile phones, bank cards and watches more than 10 cm away from the work table.
- If you use a box lid as the board, first cut a 100 × 40 mm arch in the front edge and another in the back edge, so the wand can go in underneath.
- For groups: cut the boards, legs, wands with their hole and the houses beforehand yourself, and glue the magnets into each wand yourself.
Materials and tools
- Corrugated cardboard — 1 sheet of 40 × 30 cm + 2 pieces of 30 × 20 cm + 1 strip of 35 × 4 cm + offcuts for 4 houses (≈ 25 × 20 cm)
single-wall, 3–4 mm, from a shipping box, flat and not crushed - Neodymium disc magnets — 2 (+2 spare) buy
Ø 10 × 3 mm, grade N35 or higher (each holds ≈ 1.5 kg stuck to a steel plate, according to the seller) - White paper — 1 A3 sheet (or 2 A4)
ordinary 80 gsm paper: it is the snow and makes the smooth surface the sleigh slides on - Red card — 1 piece of 20 × 15 cm
160–200 gsm, for the sleigh and the 2 runners - Green card — 1 A4
160–200 gsm, for 4 trees (8 halves of 60 × 80 mm) - White or coloured card — 1 piece of 15 × 10 cm
160–200 gsm, for Santa and the 8 presents of 15 × 15 mm - Clear packing tape — ≈ 30 cm
48 mm, smooth: it goes under the sleigh so it slides and over the magnets to hold them - PVA glue — ≈ 20 ml
school or wood glue, for the legs, houses and trees - Glue stick — 1
for gluing the snow paper and the templates - Sticky tape — ≈ 1 m
masking tape or 19 mm clear tape, for the sleigh's corners and holding things while they dry - Felt-tip pens — 1 grey or light blue + 1 black + colours
for the road, the doors and windows, Santa and marking the magnets' faces - For the experiments — 2 metal paperclips, 1 glass jar lid (steel), 1 piece of aluminium foil, 1 ruler
the paperclips must be steel (a magnet attracts them); plastic-coated or coloured ones also work if they have steel inside - Cotton wool or white poster paint (optional) — a little
to put snow on the roofs
Tools
- Craft knife with metal ruler and cutting mat — cutting the board, legs, wand and houses from corrugated cardboard adult
- Scissors — cutting out the card pieces: sleigh, runners, trees, Santa and presents
- Awl or sharp pencil — starting the 10 mm hole in the wand adult
- Empty ballpoint pen and ruler — scoring the folds of the legs, wand and sleigh
- Hot glue gun (optional) — fixing the magnets (one dot) and the houses more quickly adult
- Stopwatch (the one on your phone) — timing the present-delivery game; keep the phone more than 10 cm from the magnets
Pieces and templates
- A · Board (snowy village) ×1 — corrugated cardboard 3 mm
- B · Leg (40 × 50 mm tube) ×2 — corrugated cardboard 3 mm
- C · House front (with chimney) ×4 — corrugated cardboard 3 mm
- D · House support ×4 — corrugated cardboard 3 mm
- E · Tree: half with a cut from the tip ×4 — green card 160–200 gsm
- F · Tree: half with a cut from the trunk ×4 — green card 160–200 gsm
- V · Wand (with the magnet at the tip) ×1 — corrugated cardboard 3 mm
- T · Sleigh (net) ×1 — red card 160–200 gsm
- P · Runner ×2 — red card 160–200 gsm
- N · Santa ×1 — white card 160–200 gsm
- G · Present ×8 — coloured card 160–200 gsm
- K · Test square (experiments) ×4 — corrugated cardboard 3 mm
Step by step
Cut the board and the legs adult
With a ruler, draw board A of 400 × 300 mm, with the cardboard flutes running along the 400 mm, and the 2 legs B of 300 × 195 mm, with the flutes along the 300 mm. Cut them out with a craft knife and metal ruler on the cutting mat.
1 Cut board A of 400 × 300 mm with the flutes lengthwise 2 Cut the 2 legs B of 300 × 195 mm Check: The board doesn't bend if you hold it by the two short sides: the flutes run from one short side to the other.Tip: If you have the lid of a large box of about 40 × 30 cm, use it as the board and skip to step 4: its edges already act as legs (cut out the arches for the wand).Fold the legs into tubes
Score the 4 folds of each leg B with the empty ballpoint pen and the ruler (at 50, 90, 140 and 180 mm from the edge) and fold them to 90°. Put glue on the 15 mm tab, close the tube with the tab inside the first wall and hold it with 3 strips of tape while it dries.
1 Score the 4 green folds with the empty ballpoint pen 2 Glue the tab on the inside and hold with tape while it dries 3 Squeeze the tube: it doesn't squash Check: Each leg is a rectangular tube 300 mm long, 40 mm wide and 50 mm tall that doesn't squash when you squeeze it with your hand.Glue the legs under the board
Turn board A over. Put glue on one 40 mm face of each leg and glue them along the short sides (300 mm), with the edge of the leg flush with the edge of the board. Put 2 books on top and leave to dry for 15 minutes.
1 Glue a leg along each short side, flush with the edge 2 Put weight on top and leave to dry for 15 minutes 3 There is a 50 mm gap, open at the front and back Check: With the board standing on its legs, there is a clear gap 320 mm wide and 50 mm tall between them, open at the front and back.Tip: The lines marked 40 mm from each short side of the template tell you where each leg ends.Cover the board with snow
Run the glue stick over the whole top face of the board and stick the white A3 sheet on top (or 2 A4 sheets side by side), smoothing it with your hand from the centre outwards so there are no bubbles or wrinkles.
1 Run the glue stick over the whole top face 2 Stick on the A3, smoothing from the centre outwards Check: Run your hand over it: the paper is smooth and well stuck, with no lumps in the area between the legs.Tip: Don't paint the snow with poster paint: it leaves the cardboard rough and the sleigh gets stuck. Smooth paper is what slides best.Draw the road and the delivery spots
In pencil, draw a closed road 60 mm wide (as on the board plan) between the two legs: don't bring it closer than 50 mm to the short sides, because the leg is underneath there and the wand can't reach. Mark the “North Pole” start at the front, in the centre, and 4 doormats of 40 × 40 mm at the edge of the road. Go over it with a grey or light blue felt-tip pen.
1 Draw a 60 mm road between the legs in pencil 2 Go over the road, the start and 4 doormats of 40 × 40 mm Check: The sleigh (≈ 41 mm wide) fits on the road with 1 cm to spare on each side.Tip: To keep the width even, first draw the centre line and make marks 30 mm on each side every 3–4 cm; then join them by hand.Make the 4 houses adult
Stick templates C and D onto cardboard and cut out with a craft knife 4 fronts C (60 mm wide and 75 mm tall, with a chimney) and 4 support triangles D (35 × 45 mm). Draw the door and windows, number the houses 1 to 4 and glue each triangle upright behind its front, in the centre, with glue and a strip of tape.
1 Cut 4 fronts C and 4 triangles D with a craft knife 2 Draw the door and windows and number the houses 1 to 4 3 Glue triangle D upright behind the front Check: Each house stands up on its own and doesn't fall over if you blow hard.Tip: Put a little cotton wool or white poster paint on the roof: it looks like real snow.Make the trees
Cut out 4 halves E and 4 halves F from green card. Cut the 40 mm line in each one (in E from the tip, in F from the trunk). Fit each F onto an E by sliding one slot into the other until both bases are level.
1 Cut the 40 mm line: in E from the tip, in F from the trunk 2 Slide F down, slot into slot 3 The tree forms a cross and stands up by itself Check: Each tree is a cross that stands up by itself, with 4 equal branches seen from above.Set up the village
Glue each house with PVA glue on the outer edge of the road, with the door facing its doormat. Glue 2 trees in the centre, inside the closed road. The other 2 are loose obstacles: put them outside the road, on the bends, touching its edge, so the sleigh hits them if it goes off the road.
1 Glue each house with the door facing its doormat 2 2 trees in the centre and 2 loose ones as obstacles Check: Each doormat is inside the road and less than 50 mm from its house's door, and the sleigh goes all the way round the road without touching any tree.Tip: The houses can go on top of the legs (near the short sides): the sleigh doesn't have to get there, only as far as their doormat.Cut the wand and make the hole adult
Cut wand V of 350 × 40 mm with the flutes lengthwise. In the marked half, 15 mm from the tip, make the 10 mm hole: pierce the centre with the awl and widen it by twisting the tip of the scissors until the magnet just fits. Score the lengthwise centre fold with the empty ballpoint pen.
1 Make the 10 mm hole with the awl, 15 mm from the tip 2 Widen it by twisting the tip of the scissors 3 The magnet fits tightly and sits flush Check: The magnet goes into the hole tightly, with no play, and sits flush with the surface of the cardboard.Mark the magnets' faces adult
Bring the 2 neodymium magnets together and let them snap together on their own, face to face. Without separating them, draw a black X with the felt-tip pen on each of the 2 outer faces. Separate them by sliding them sideways, never by pulling: the faces without an X are the ones that attract.
1 Let the 2 magnets come together slowly, face to face 2 Draw an X on the 2 outer faces without separating them 3 Slide them apart sideways: the faces without an X attract Check: If you bring the two faces without an X together, the magnets attract; if you bring the two with an X together, they attract too. A face with an X and a face without one push apart.Tip: Bring the magnets together slowly and sideways, holding one in each hand: if they snap together suddenly they can pinch you or chip.Put the magnet in the wand adult
Push one magnet into the hole in the wand with the X facing down (the face without an X stays on top, flush). Put glue on the inner face of the other half, fold the wand along the fold so it covers the magnet from underneath, and wrap the tip with 2 turns of packing tape.
1 Put the magnet in with the X facing down 2 Apply glue and fold the other half underneath 3 Wrap the tip with tape: a paperclip sticks on TOP Check: The wand measures 350 × 20 mm, with the magnet covered by the tape, and a paperclip sticks to the tip on the TOP side.Tip: Write “TOP” on the side with the hole: it is the one that must always face the board.Assemble the sleigh
Cut out net T from red card, with the drawing facing you. Score the 4 green folds with the empty ballpoint pen and raise the flaps to 90°: the 2 sides of 18 mm, the 25 mm backrest at the back and the 12 mm front at the front. Join each corner on the outside with a 3 cm strip of tape.
1 Cut out T and score the 4 green folds 2 Raise the sides, the backrest and the front 3 Join each corner on the outside with tape Check: You have an open box with a 70 × 40 mm floor, with the backrest taller than the sides, and the magnet drawing is inside, on the floor.Glue on the runners and the sliding tape
Cut out the 2 runners P and glue one to each side on the outside, with the glue stick or PVA glue: the bottom edge flush with the floor of the sleigh and the curved tip sticking out in front. Then cover the whole underside of the floor with an 80 × 45 mm piece of packing tape, nice and smooth.
1 Glue a runner P to each side, flush with the floor 2 Cover the underside of the floor with smooth packing tape 3 Push it with a finger: it slides without catching Check: Resting on the table, the sleigh touches it with its floor and runners at the same time and doesn't wobble; pushed with a finger, it slides without catching.Tip: The packing tape is what makes the sleigh slide: without it, the paper and card rub twice as much.Glue in the sleigh's magnet and Santa adult
Put the other magnet inside the sleigh, on the circle drawn 12 mm from the front, with the X facing up. Fix it with a dot of hot glue (adult) or PVA glue and cover it with a 25 × 25 mm square of packing tape. Colour in Santa N, fold his tab and glue it to the floor, next to the backrest.
1 Glue the magnet on the circle, with the X facing up 2 Cover it with tape and colour in Santa 3 Glue Santa next to the backrest: the sleigh is ready Check: Shake the sleigh upside down: the magnet doesn't move. The face without an X faces down, towards the board.Tip: If you don't have a second magnet, glue an M8 steel washer or a large paperclip bent into a zigzag in the same place: the sleigh will still follow you, though with less force.Test the guidance
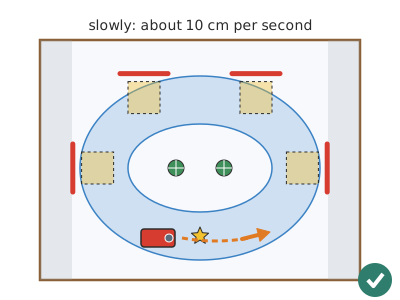
Put the sleigh on the start. Slide the wand in from the front under the board with the TOP side facing the cardboard and bring it under the sleigh: you'll feel a “click” when the magnets find each other. Move it slowly, at about 10 cm per second, and go all the way round the road.
1 Slide the wand underneath until it finds the magnet 2 Move it slowly: the sleigh follows you tip first Check: The sleigh follows the wand all the way round the road, tip first, and stays still when you stop.Tip: You don't need to push the wand upwards: the magnet itself keeps it pressed against the board. Just slide it.Play at delivering the presents
Cut out and colour the 8 presents G of 15 × 15 mm and put them on the start. Load 1 present onto the sleigh, take it to the doormat of house 1, tilt the board slightly or push it with your finger to drop it off, and go back for another. Whoever delivers 2 presents to each house in the shortest time wins.
1 Cut out and colour 8 presents, 2 per house 2 Take each present to its house's doormat 3 Deliver the 8 presents against the clock and write down your time Check: The 8 presents are on their doormats (2 per house) and you have written down your time.Tip: Rules for playing as a family: +5 seconds if the sleigh touches a tree or goes off the road; if the sleigh comes away from the magnet, you get it back without moving the sleigh by hand.
Does it work? The test
With the sleigh on the start and the wand underneath, go round the whole road 3 times: once slowly (about 10 cm/s), once fast and once carrying 2 presents. Then pull the wand out from underneath in one go.
What should happen: The sleigh follows the wand all along the road, slightly behind it (≈ 1 cm on bends), with its tip pointing where it is going. If you go too fast (estimate: more than 30–40 cm per second) it comes away and stays still: get back underneath it and you recover it. With 2 presents inside it works the same. When you pull the wand out, the sleigh doesn't move: nothing pushes it, there was only the force of the magnet below.
If something goes wrong
- The magnets push each other away instead of attracting — One of the two is upside down: two like faces are facing each other. Solution: Check the Xs: on the wand the X faces down and on the sleigh it faces up (the two faces without an X face each other through the cardboard). If not, unstick the sleigh's magnet and turn it over.
- The sleigh lags behind or moves in jerks — Too much friction: the sleigh's floor or the paper is rough, or the board has paint on it. Solution: Cover the sleigh's floor with smooth packing tape, smooth out the snow paper and don't paint the road with poster paint. Move the wand more slowly.
- The sleigh spins round or goes sideways — The magnet is in the centre or at the back: the sleigh is pulled from the middle and doesn't straighten. Solution: Put the magnet at the front, 12 mm from the front panel. When pulled from the tip, the sleigh lines up behind, like a trailer.
- The wand can't reach some parts of the road — The road goes over the legs or the wand is too short. Solution: Keep the road more than 50 mm from the short sides. If the board is bigger than 40 × 30 cm, make the wand longer (45 cm).
- The sleigh doesn't move even though the wand is underneath (with a paperclip or washer) — The paperclip is small or the board is thick: the force isn't enough to drag it. Solution: Use an M8 steel washer or two paperclips, or switch to the second magnet. Check that the board is a single layer of 3–4 mm.
- The board sags in the middle and the wand rubs on the table — The cardboard flutes run the wrong way or the cardboard is soft. Solution: Glue a 300 × 40 mm strip of cardboard underneath, between the legs and in the middle, with the flutes in the other direction, without blocking the wand's path (glue it at the front or back), or use stiffer cardboard.
- The sleigh's magnet comes unstuck and stays stuck underneath, to the wand — The tape doesn't hold it firmly enough and the force of the other magnet pulls it down when they snap together. Solution: Glue the magnet with a dot of hot glue (an adult does this) and cover it with packing tape. Bring the wand up to the sleigh slowly, without knocks.
Safety
- Neodymium magnets: if a child swallows 2 magnets, or 1 magnet and a piece of steel, they attract each other through the walls of the intestine and can perforate it. It is an emergency even if there are no symptoms: go to hospital straight away. Keep them out of reach of children under 3 and of any child who puts things in their mouth.
- The magnets must always be covered with tape and stuck in the wand and in the sleigh. Count the magnets at the start and end and keep the spares in their closed bag.
- Two neodymium magnets that snap together suddenly pinch the skin hard and can break and throw off chips: bring them together sideways and slowly, without putting your fingers between them. No putting several together to play.
- Keep the magnets more than 10 cm away from mobile phones, bank cards, watches, computers and people with pacemakers or other implanted medical devices.
- The craft knife and the awl are used by an adult, with a metal ruler and cutting mat, always cutting away from the hand that is holding.
- Hot glue burns: an adult applies it and the child points to where. With children under 3 nearby, put away the presents and small offcuts.
The science behind it
For children
A magnet is surrounded by an invisible force that we call a magnetic field. That force passes through cardboard, paper and wood as if they weren't there: that is why the wand's magnet, under the board, finds the sleigh's magnet, which is on top, and pulls it along. Only some metals feel that force, like the iron and steel in paperclips; cardboard, plastic and aluminium don't. Each magnet has two different faces: if different faces look at each other they hug, and if the same faces look at each other they push apart. And the further apart the magnets are, the weaker the force gets, by a lot: with just a few extra layers of cardboard, the sleigh no longer follows you.
For the adult
A permanent NdFeB magnet (neodymium, grade N35, remanence Br ≈ 1.2 T) creates a magnetic field around it. On the axis of a disc of radius R = 5 mm and thickness L = 3 mm, magnetised along the axis, the field is B(z) = (Br/2)·[(L + z)/√(R² + (L + z)²) − z/√(R² + z²)]: ≈ 0.31 T at the centre of the face, ≈ 0.11 T at 4 mm, ≈ 0.023 T at 10 mm and ≈ 0.009 T at 15 mm (calculation for an ideal disc; the Earth's field is ≈ 0.00005 T). Cardboard, paper, wood, plastic, water and aluminium have a relative permeability μr ≈ 1: the field passes through them just as through air, without weakening, which is why the magnets don't need to touch. Only ferromagnetic materials (iron, steel, nickel, cobalt) have μr in the hundreds or thousands: their magnetic domains align with the field, the material becomes temporarily magnetised and is attracted; in addition, a steel sheet “diverts” the field lines through itself and acts as a shield (the jar-lid experiment shows this). Two magnets attract through opposite poles: when you put them together and mark the outer faces, the unmarked faces are always opposite, so all they need is to face each other through the board. Distance: far from the magnet, the force between two coaxial dipoles falls as 1/d⁴ (d = distance between centres): doubling the distance divides the force by ≈ 16; close up the drop is gentler. Estimate for two 10 × 3 mm discs (surface-charge model, no losses): ≈ 4 N with 3.5 mm of cardboard and paper between them, ≈ 1.5 N at 6.5 mm, ≈ 0.7 N at 9.5 mm, ≈ 0.35 N at 12.5 mm and ≈ 0.2 N at 15.5 mm: each 3 mm layer divides the force by 2–2.5. Why it drags the sleigh: the magnet below pulls the one above downwards (force F) and, if they are misaligned, sideways as well; the maximum sideways force is a fraction of F (estimate: 0.3–0.5·F). Friction is μ·(weight + F), with μ ≈ 0.2 for packing tape on paper and ≈ 0.4 for card on paper: since F is about 50 times the sleigh's weight (≈ 7 g, 0.07 N), what decides it is whether the sideways fraction exceeds μ; that is why the smooth tape under the sleigh makes the difference, and when F drops to only a few times the weight (towards 0.2 N, with 3–4 extra layers of cardboard: estimate), the sleigh stops following. A steel paperclip of ≈ 1 g is only partly magnetised and receives a much smaller force (estimate: 0.1–0.4 N at 4 mm), enough for the board but not for extra layers. Orientation: if you pull from a point in front of the centre of friction, any turn creates a torque that brings the sleigh back to the line of pull (like a trailer or a box dragged on a string); if you pull from the centre, there is no torque to straighten it and it turns at random. That is why the magnet goes 12 mm from the front. Speed: with the sleigh offset, the sideways force grows to its maximum at a few millimetres of misalignment; if the wand moves away faster than the sleigh can accelerate against friction, the offset goes past that point, the force drops and the sleigh comes away. Design safety: the magnets are set in and covered because two swallowed magnets attract through the intestinal walls; and a field of several tenths of a tesla a few millimetres away can wipe magnetic stripes and upset a phone's compass, although at 10 cm it is already below 0.0001 T.
- magnetic field: the invisible area around a magnet where its force can be felt.
- pole: each of the two faces of a magnet; different poles attract and like poles repel.
- ferromagnetic: a material that a magnet attracts, such as iron, steel or nickel.
- neodymium: a metal used to make the strongest small magnets there are.
- friction: a force that slows an object down when it is dragged over another; with smooth surfaces it is smaller.
- magnetic shield: a sheet of iron or steel that diverts a magnet's field and doesn't let it through to the other side.
By age
- 5–7 years: The adult cuts the board, legs, wand and houses, and fits and glues the two magnets before handing it to the child. The child sticks on the snow paper, colours the road, Santa and the presents, cuts out and slots together the trees, and plays. Focus on “the force passes through cardboard” and “different faces hug”. Never leave a loose magnet on the table.
- 8–10 years: They do everything except the craft knife and the hole in the wand; they mark the magnets' faces with the adult watching. Have them do the layers and materials experiments, write the results in a table and play the timed delivery game.
- 11–12 years: Have them design their own village (road, obstacles, houses) on squared paper at 1:2 scale before drawing it, make a graph of “layers of cardboard — does it follow?” for magnet and for paperclip, and explain with the trailer idea why the magnet goes at the front. Challenge: a second sleigh that moves away from the first using like faces.
In a group or in class
One village per team of 3–4 children (≈ €1 of magnets per team, the rest recycled). Before the session: cut the boards, legs, wands with their hole and the houses, and glue and cover the magnets of each wand and each sleigh yourself (that way no magnet is left loose on the tables). 2-hour session: 10 min demonstration (does the force pass through cardboard? my hand?), 30 min legs and snow, 30 min houses, trees and road, 20 min sleigh, 10 min testing and 20 min of a timed present-delivery tournament and the layers experiment. Count the magnets at the start and when tidying up, and have 2 spare sleighs ready assembled.
Challenges
- Add a reindeer in front of the sleigh with a third magnet and a wand for each: two players have to guide them together without them getting more than 5 cm apart.
- Make an obstacle course with “ice” (smooth aluminium foil, more slippery) and “deep snow” (kitchen paper, more friction) and compare the times.
- Build a two-storey village: a second board 5 cm higher, with a cardboard ramp between the two. Does the wand reach? What would you have to change?
- Put a paperclip in a house and another in a loose snowman: the sleigh with the magnet “drags” them along when it passes close by. Design a game of collecting the snowmen.
- Turn over the magnet of a second sleigh (X facing down): with the same wand, one follows you and the other moves away. Use the one that moves away to push presents without touching them.