Floating needle compass
A sewing needle magnetised with a magnet rests on a cork disc floating in a bowl of water: it turns freely and within a few seconds settles pointing north. With the printed compass rose underneath, it becomes a compass you can read.
What they will learn
- That a piece of steel can be turned into a magnet by stroking it always in the same direction, and that it loses its magnetism if stroked back and forth or heated.
- That the Earth behaves like a giant magnet and that a magnetised needle free to turn lines up with its field, pointing north.
- Why water works as an almost friction-free bearing and what happens to the compass if it rubs against the side of the bowl.
- How to find their bearings: locate north, south, east and west at home or in the playground and read bearings in degrees.
Prepare beforehand
- Print the rose at 100 % and check that it measures 124 mm in diameter.
- Cut the 5–8 mm cork slices before the session (an adult, with a serrated knife on a board).
- Check that the needle is steel: bring the magnet near it; if it isn't attracted, it won't work.
- Choose the testing spot: a wooden or plastic table, away from radiators, speakers, fridges and mobile phones.
- Find out where north is in that room with the phone's compass and mark an arrow on the table with masking tape (to check at the end).
Materials and tools
- Neodymium magnet — 1 buy
Ø 10–20 mm disc (N35 or higher); a strong fridge magnet or a speaker magnet also works - Sewing needle — 1–2
steel, 40–50 mm long (darning needle or thick sewing needle); not austenitic stainless steel or brass - Cork — 1
wine cork, Ø 22–25 mm, to cut a 5–8 mm slice - Clear bowl — 1
glass or plastic, Ø 15–20 cm, with no metal parts - Water — ≈ 0.5–1 l
tap water, up to 1 cm below the rim of the bowl - Paper and cardboard — 1 A4 sheet + 1 square of cardboard, 15 × 15 cm
to print the compass rose and stick it onto cardboard - Sticky tape and red felt-tip pen — 2 strips of 1 cm + 1 permanent marker
to fix the needle to the cork and mark the north tip - Clear plastic sleeve — 1
to protect the rose from water (or laminate it)
Tools
- Serrated knife or craft knife — cutting the cork slice adult
- Scissors — cutting out the rose and the polystyrene float
- Glue stick — sticking the rose onto the cardboard
- Pliers (only if you push through the cork) — pushing the needle without pricking yourself adult
- Mobile phone with a compass — checking north
Pieces and templates
- A · Compass rose ×1 — paper stuck onto cardboard
- B · Float (if you use polystyrene) ×1 — polystyrene tray (3–5 mm)
- C · Needle ×1 — steel sewing needle 40–50 mm
Step by step
Prepare the rose
Cut out the Ø 124 mm compass rose, stick it with a glue stick onto a 15 × 15 cm square of cardboard and put it in a clear plastic sleeve.
1 Cut out rose A along the line, 124 mm in diameter 2 Spread glue on the 15 × 15 cm cardboard and stick the rose on top 3 Put the cardboard in the sleeve: the red N is easy to read Check: The rose lies flat and the red N is easy to read.Check the needle
Bring the needle near a paperclip: it shouldn't attract it (it isn't a magnet yet). Then bring the magnet near the needle: it must attract it. That way you know it's steel.
1 Bring the needle near a paperclip: it shouldn't attract it yet 2 Bring the magnet near: if it attracts the needle, it's steel 3 If the magnet doesn't attract it, change the needle: it won't work Check: If the magnet doesn't attract the needle, change it: it's made of an unsuitable metal.Magnetise the needle
Hold the needle by the eye on the table. Rest one face of the magnet next to the eye and slide it to the tip, without pressing. Lift the magnet in an arc, go back to the eye through the air and repeat 40 times, always in the same direction and with the same face.
1 Hold the eye and slide the magnet to the tip 2 Go back to the eye through the air and repeat 40 times the same way 3 Check that the tip lifts a paperclip Check: Bring the tip near a paperclip: it should lift it or at least move it.Tip: Count out loud in tens. Never stroke back and forth: the second stroke undoes the first.Cut the float adult
An adult cuts a 5–8 mm slice from a cork with a serrated knife, on a board. If there's no cork, cut out disc B, Ø 30 mm, from a polystyrene tray.
1 The adult cuts a 5–8 mm slice on a board 2 With no cork, cut out disc B from a polystyrene tray 3 Now you have the float: cork slice or disc B Fix the needle to the float
Rest the needle on top of the disc, passing through the centre and sticking out the same amount on both sides. Hold it with two 1 cm strips of sticky tape, one on each side of the centre.
1 Place needle C over the centre of the cork 2 Hold it with two strips of tape, one on each side 3 Put it on your fingertip: it should stay level Check: Balance the disc with the needle on your fingertip: it balances without tilting to one side.Tip: If you'd rather push through the cork, the slice must be 8 mm thick and the adult pushes the needle through the middle of the edge with pliers.Fill the bowl
Place the clear bowl on the rose, centred, and fill it with water up to 1 cm below the rim. Do it on a wooden table, away from mobile phones, speakers and radiators.
1 Place the clear bowl on top of the rose, centred 2 Fill it with tap water 3 Stop 1 cm below the rim: the water comes almost to the top Check: Look from the side: the water comes almost up to the rim.Float the compass
Gently place the float with the needle on the water, in the centre of the bowl. Take your hands away and wait 10–20 seconds without touching the table.
1 Gently place the float in the centre of the water 2 Take your hands away and wait 10–20 s without touching the table 3 It settles, always in the same direction Check: The needle turns a little, swings and settles, always in the same direction.Tip: If it drifts to the side and sticks, push it back to the centre with a cocktail stick and let go gently: in a wide bowl (Ø 15–20 cm) it takes a while to get back to the side and has time to line up.Find the north tip
Compare with the phone's compass (or with the tape arrow from the preparation). Mark the tip of the needle that points north with the red felt-tip pen.
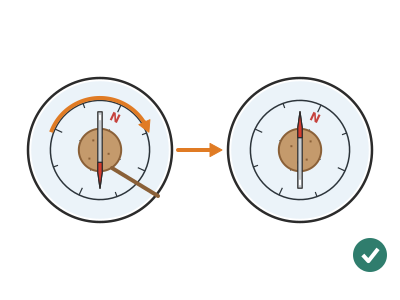
1 Compare with the phone's compass, 30 cm away 2 Colour the tip that points north red 3 Turn it half a turn: the red tip goes back to north Check: Turn the float half a turn with the cocktail stick and let go: it should settle again with the red tip pointing north.Line up the rose
Without moving the bowl, turn the rose's cardboard underneath until the red N is exactly under the red tip of the needle. Now you can read east, south, west and all the directions in between.
1 Turn the cardboard underneath, not the bowl 2 Stop when the red N is under the red tip Read bearings
Look towards the door, the window and other points in the room and write down which direction they are in (for example, ‘the window is SE, at 135°’) by reading the 5° marks on the rose.
1 Look towards the window and read its direction on the rose 2 Write down each place with its direction and degrees Check: The door and the window always give the same bearing even if you move the bowl to another spot on the table (away from metal). If the rose turns when you move the bowl, put it back with the N under the red tip before reading.
Does it work? The test
Float the compass 3 times in a row, turning it to a different position each time, and compare the final direction with the phone's compass.
What should happen: Within 10–20 s the needle settles and always points to the same place, with an error of 5–10° compared with the phone. In Spain magnetic north and true north are almost aligned (0–2° difference).
If something goes wrong
- The needle doesn't line up: it stays where you put it — Needle weakly magnetised or rubbing against the side of the bowl. Solution: Magnetise it with 40 more strokes (always in the same direction) and keep the float away from the side.
- The float always drifts to the side — The meniscus: next to the side the water climbs a little up the glass and the float ‘falls’ uphill towards it (Cheerios effect). Filling the bowl more doesn't prevent it as long as the water stays below the rim. Solution: Use a wide bowl (Ø 20 cm) and place the float right in the centre; if it gets close to the side, push it back to the centre with a cocktail stick. Tip: if you fill the bowl until the water bulges above the rim (with the bowl on a tray), the meniscus reverses and the float stays in the centre.
- It points somewhere different from the phone — There is iron nearby (table legs, radiator, speaker) or the phone itself is deflecting the needle. Solution: Test on a wooden table or on the floor and keep the phone at least 30 cm away when comparing.
- The float tips over and the needle sinks — Disc too small or needle off-centre. Solution: Use a Ø 25–30 mm disc and centre the needle; polystyrene is more stable than a thin cork slice.
- The next day it doesn't work as well — The needle loses magnetism with knocks, heat or if it was next to another magnet. Solution: Magnetise it again with 40 strokes; store it away from magnets.
- The north tip has switched ends — You magnetised it again with the other face of the magnet or in the opposite direction. Solution: Check again with the phone and correct the red mark.
Safety
- The needle is sharp: the adult hands it out and collects it; it never goes in the mouth or in a pocket.
- The cork slice is cut by an adult with a serrated knife on a board, cutting away from the body.
- Neodymium magnets pinch if two snap together and are very dangerous if swallowed: keep out of reach of children under 3.
- Keep the magnet away from mobile phones, bank cards and pacemakers.
- Wipe up spilt water to avoid slipping, and if the bowl is glass, keep it on a stable surface.
The science behind it
For children
Inside the needle there are loads of tiny magnets, each facing a different way, like children at playtime. When you stroke it with the magnet always the same way, they all line up facing the same way, like soldiers on parade: the needle has turned into a magnet. The whole Earth is a giant magnet, and the needle wants to line up with it. The water lets it turn with hardly any braking, which is why it always ends up pointing north.
For the adult
The steel of the needle is ferromagnetic: it is made up of randomly oriented magnetic domains, so its net magnetisation is almost zero. When a magnet is passed repeatedly in the same direction, the domains aligned with the magnet's field grow at the expense of the others and, because of the hysteresis of carbon steel, part of that orientation remains: the needle stays magnetised (remanence). Stroking back and forth, knocking it or heating it scrambles the domains again. The Earth's magnetic field (≈ 45 µT in Spain, with a downward inclination of about 55°) exerts a torque on the needle's magnetic moment, τ = m·B·sin θ, which tends to align it with the horizontal component of the field. The float cancels out the vertical component (the needle cannot tilt) and the water acts as an almost friction-free bearing: the torque, though very small, is enough to turn it. Near the side, the meniscus creates a slope in the surface that pulls the float towards the edge (the ‘Cheerios’ effect). The north pole of the needle points towards the geographic North Pole, where there is in fact a magnetic south pole. Magnetic declination in the Iberian Peninsula is currently 0–2°, so magnetic and true north almost coincide. The Chinese water compass (11th–12th centuries) used exactly this principle.
- magnetise: to turn a piece of iron or steel into a magnet.
- pole: each of the two ends of a magnet, north and south, where its force is strongest.
- Earth's magnetic field: the magnetic force that surrounds the whole Earth.
- compass rose: a drawing with the cardinal points used to read directions.
- bearing: the direction you are heading in, measured in degrees from north.
By age
- 5–7 years: The adult magnetises the needle and sticks it to the float; the child counts the strokes out loud, puts the compass in the water and works out with the adult what is to the north of the room. Focus on ‘it always goes back to the same place’.
- 8–10 years: They do everything except cutting the cork. Have them check the magnetisation with a paperclip, find the north tip with the phone and line up the rose.
- 11–12 years: Have them read bearings in degrees, compare with the phone in several places and do the number-of-strokes experiment with a table and a graph.
In a group or in class
Pairs, one compass per pair (1 magnet for every two pairs is enough). Beforehand: print roses, cut cork slices or polystyrene discs, set out bowls of water on the tables away from radiators and mark true north on the board. 40-minute session: 10 min magnetising, 10 min building, 20 min checking (all the needles in the classroom should point the same way: photo time!). Collect and count the needles at the end.
Challenges
- Make a compass that works without water: hang the magnetised needle from a thread tied around its middle.
- Build a cardboard compass box with a clear lid to take it into the playground without spilling.
- Organise a treasure hunt with clues given as bearings (‘20 steps to the NE’).
- Magnetise two needles and put them on two floats in the same bowl: watch what they do and explain it.