Two-bottle water clock
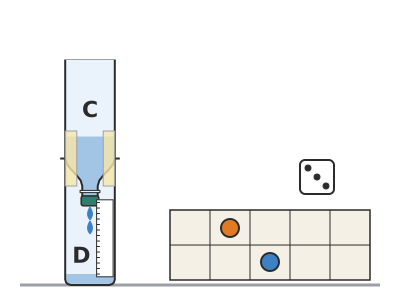
Two 1.5 l bottles, one on top of the other: water from the upper reservoir drips through a tiny 1 mm hole in the cap and gradually fills the lower one, where a scale calibrated with your phone shows the minutes that have passed over 15–30 minutes.
What they will learn
- That time can be measured with any process that repeats in the same way: here, falling water.
- What calibrating means: comparing a home-made instrument with a reliable one (the stopwatch) to give it a scale.
- That water flows out faster when there is a lot of it above (more pressure), which is why the minute marks are not evenly spaced.
- What flow rate is and how it depends on the size of the hole.
- To take readings every minute and draw a level–time graph.
Prepare beforehand
- Print guide strip A (2 pieces joined with tape) and scale B at 100 %.
- Remove the labels from the bottles and dry the outsides well so that the tape sticks.
- If the children are young, cut the bottles and pierce the cap yourself before the session.
- Have a jug of water ready (with 2 drops of colouring if you like) and the phone with the stopwatch open.
Materials and tools
- Identical plastic bottles — 2
1.5 l water bottles, with a straight middle section (cylindrical, Ø ≈ 9 cm), label removed; one with its cap - Drawing pin — 1
with a fine point, ≈ 1 mm in diameter - Sticky tape — ≈ 50 cm
masking tape (it peels off and sticks back on without tearing), to join the two bottles; and clear tape to protect the scale - Paper and permanent marker — 1 strip + 1 marker
scale B printed out; fine-tip permanent marker - Phone or stopwatch — 1
with a stopwatch that shows seconds - Tap water — 600 ml per fill
clean (no grit, which blocks the hole); a few drops of food colouring help you see the level - Measuring jug — 1
1 l, so you always load 600 ml
Tools
- Craft knife and scissors — starting the cut in the bottles with the craft knife and finishing it with scissors adult
- Wooden board and pliers — resting the cap on and pushing the drawing pin in while holding it with pliers adult
- Permanent marker — marking the cutting lines with guide strip A
- Ruler — measuring the cutting heights from the table
- Tray — standing the water clock on during calibration (it may drip)
Pieces and templates
- A · Cutting guide strip (2 halves) ×2 — paper
- B · Minute scale ×1 — paper (protected with clear tape)
- C · Upper reservoir (bottle C) ×1 — PET bottle 1.5 l
- D · Lower reservoir (bottle D) ×1 — PET bottle 1.5 l
Step by step
Mark the cut on the lower bottle
Stand bottle D upright (the lower one, without a cap) and find where the straight part ends and it starts to narrow (≈ 23 cm from the table). Wrap guide strip A round it there and go over the top edge with permanent marker.
1 Find where it starts to narrow: about 23 cm from the table 2 Wrap strip A round the bottle and go over its top edge 3 Measure at 3 points: the line must be the same height Check: The line must be at the same height when measured with the ruler at 3 different points round the bottle.Mark the cut on the upper bottle
On bottle C (the upper one, which keeps its cap), place guide strip A 5 cm from the table and mark the line. That bottom piece is the only part you remove.
1 On the bottle with the cap, put strip A 5 cm from the table and mark 2 Only the bottom comes off: the rest is reservoir C Cut the bottles adult
The adult starts a 2 cm cut with the craft knife on each line and finishes with scissors along the line. Trim the edges with the scissors so there are no jagged bits.
1 The adult starts a 2 cm cut on the line with the craft knife 2 Finish the cut with scissors along the line 3 Put C upside down on D: it must sit straight without wobbling Check: Stand bottle C upside down on D: C's shoulder must sit on D's rim, straight and without wobbling.Pierce the cap adult
Rest the cap, open side down, on a wooden board. The adult holds the drawing pin with pliers and pushes it into the centre until it goes through; then twist it and pull it out. This leaves a hole of ≈ 1 mm.
1 Rest the cap on the wood and push the pin in with pliers 2 Twist the pin and pull it out: this leaves a 1 mm hole 3 Test with a glass of water: a fine trickle should come out Check: Screw the cap on, hold C upside down (cap downwards) over the sink and pour a glass of water into the opening at the top: a very fine trickle or a fast drip should come out.Make the air vent adult
With the same drawing pin, and then widening it with the tip of a pencil, make a 3 mm hole in bottle D, 4 cm below the cut edge (any higher and C's shoulder would cover it). Air escapes through it while the water comes in.
1 Mark the air vent 4 cm below the rim of D 2 Prick with the pin and enlarge with a pencil tip 3 Air escapes through the vent while the water comes in Mark the fill line
Measure 600 ml of water in the jug. Hold C upside down (cap downwards) over a glass, covering the hole in the cap with a finger, and pour the 600 ml into the opening at the top (it is easier with two people: one holds and the other pours). Mark the water level on the outside with the marker: that is the fill line.
1 Measure 600 ml of water in the jug 2 Cover the hole with your finger and pour the 600 ml into C 3 Mark the water level on the outside: that is the fill line Tip: Always filling to the same line is what makes the clock repeat the same time.Assemble the water clock
Empty C. Fit it upside down on top of D, with the cap inside D. Join the two bottles with 3 strips of masking tape, 10 cm long, spaced round the joint, with 1 cm at each end folded over as a tab so you can peel them off. Stand it on a tray, next to a wall.
1 Fit C upside down on D, with the cap inside 2 Join the bottles with 3 strips of tape, 10 cm long 3 The cap sits about 8 cm inside D, centred Check: The cap sits about 8 cm inside D, centred and not touching the side of the bottle. No strip covers the air vent (it is 4 cm below the rim, just where the tape reaches): if one does, move the strip to one side.Stick on the scale
Stick scale B vertically on the lower bottle, with the 0 level with the flat inside bottom (about 2 cm above the table). Cover it completely with clear tape so it does not get wet.
1 Cut out scale B: 30 × 140 mm 2 Stick it vertically on D, with the 0 at 2 cm from the table 3 Cover it completely with clear tape Fill it and start the stopwatch
Peel the 3 strips off by their tabs and lift out C. Cover the hole in its cap with a finger, hold it upside down over a glass and fill it from the top up to the fill line, as in step 6. Take your finger away, fit C into D straight away and start the stopwatch at that very moment. Stick the strips back on.
1 With a finger on the hole, fill C up to the fill line 2 Put it on D and start the stopwatch at the same moment 3 Water is already dripping into D: the clock is measuring Tip: It is easier with two people: one fills and places C, and the other starts the stopwatch on hearing «go!» when the finger is removed. The 2–3 s it takes to put it in place are the same every time you fill it and do not spoil the calibration.Calibrate minute by minute
Each time the stopwatch shows a whole minute, draw a line on the scale at the water level and write the number. Do this every minute up to 10 and then every 2 minutes until it stops dripping.
1 Every minute, draw a line at the water level and its number 2 The lines get closer and closer together: that is correct Check: The lines for the first minutes are further apart (4–8 mm) than those at the end (1–3 mm): that is correct, because there is less and less water pushing.Check your clock
Peel off the strips, remove C and empty D completely. Fill C up to the line again as in step 9, put it in place and start the stopwatch without looking at it (or ask someone to cover it). Say «now!» when you think the water reaches the 5-minute mark and look at the stopwatch.
1 Remove C and empty bottle D completely 2 Refill to the line and start the stopwatch without looking 3 Say «now!» at mark 5: it should read 5 min ± 15 s Check: If the water clock is reliable, the stopwatch will show 5 min ± 15 s.Use it
Use your water clock to time a board game, a reading turn or brushing your teeth. Remember always to fill it up to the line and to empty the lower bottle (D) before you start.
1 Use it to time turns in a game or while brushing your teeth 2 Before starting: D empty and C filled up to the line
Does it work? The test
Load 600 ml up to the line, start the stopwatch and every minute write down the water height on scale B (in mm). Repeat the whole test again and compare the two records.
What should happen: With a ≈ 1 mm hole, the water in D rises about 4–8 mm in the first minute and only 1–3 mm per minute at the end; the whole fill takes 15–30 min depending on the hole. Between two tests, the same mark should match to within 15–20 s over the first 10 minutes.
If something goes wrong
- No water comes out or it drips very slowly — Hole too small or blocked by a particle, or the air vent is missing and D cannot let the air out. Solution: Go over the hole again with the drawing pin, use clean water and check that the 3 mm air vent exists and is not covered by any strip of tape.
- It empties in 3–4 minutes — Hole too big (≥ 2 mm). Solution: Use a new cap with a drawing-pin or needle hole (0.8–1 mm).
- The water below reaches the cap and stops — You loaded more than 600 ml or cut the lower bottle shorter. Solution: Only fill up to the line. With other bottles, check that the water in D stays at least 2 cm below the cap.
- The two tests do not match — Different starting load, D not completely emptied, or a hole that has gradually become blocked. Solution: Always fill up to the line, empty D completely and use clean water. Start the stopwatch exactly as you remove your finger.
- It drips at the joint between the two bottles — The cap is loose or the water is running down the outside of the neck. Solution: Tighten the cap firmly before assembling and dry the outside of the neck.
- The water clock falls over easily — The centre of gravity is high when the upper bottle is full. Solution: Join the bottles firmly with tape, stand it next to a wall or inside an upright shoebox, and do not touch it while measuring.
Safety
- Only an adult uses the craft knife: the bottle plastic is slippery, so lay the bottle on its side on a cloth and cut away from your hand.
- The cut plastic edges can be sharp: trim them with the scissors or cover them with sticky tape.
- The drawing pin is pushed in with pliers and with the cap resting on wood, never holding it in your hand.
- Work on a tray and wipe up any water on the floor: it is slippery.
- Put the drawing pin away: it is small and sharp, keep it out of reach of little ones.
The science behind it
For children
The water in the top bottle wants to go down, but it can only get out through a very small hole, so it comes out little by little, always at the same pace each time you repeat it. That is why it can be used to measure time, just as the Egyptians did. At the start, when there is a lot of water at the top, the water above pushes hard on the water below and it comes out faster. At the end there is not much water left pushing and it comes out more slowly. That is why the minute lines are closer together at the end.
For the adult
The speed at which water leaves a small hole is given approximately by Torricelli's law, v = √(2gh), where h is the height of water above the hole; the flow rate is Q = Cd·a·√(2gh), with a the area of the hole and Cd ≈ 0.6 the discharge coefficient. With a 1 mm hole (a ≈ 0.8 mm²) and h ≈ 16 cm, Q ≈ 0.8 ml/s at the start, but in practice, with such small holes, viscosity and surface tension reduce the flow and the real value is around 0.5–0.8 ml/s (about 30–50 ml in the first minute). Since Q depends on √h, the flow decreases as the level drops: the level does not fall linearly (in a cylindrical reservoir h(t) follows a parabola; √h decreases linearly with t), which is why the minute marks are not evenly spaced and you have to calibrate rather than divide the scale into equal parts. That is the great flaw of the simple water clock; the Greeks corrected it with a constant-level reservoir (with an overflow), in which h does not change and the flow is fixed, or by giving the vessel a shape that compensates for the variation (Egyptian water clocks were shaped like a truncated cone). Accuracy depends on always loading the same volume, on temperature (warm water is less viscous and flows a little faster) and on the hole not getting blocked. A larger hole gives a greater flow (Q ∝ d²): it measures less time and each error in reading the level counts for more.
- clepsydra (water clock): an ancient clock that measures time with falling water.
- flow rate: the amount of water that passes a point every second.
- calibrate: to compare an instrument with a reliable one so you can give it the correct marks.
- pressure: the push of the water; the more water there is above, the harder it pushes.
- scale: the numbered marks that let you read a measurement.
By age
- 5–7 years: The adult cuts, pierces and assembles. The child fills the water up to the line and says «now!» when the water reaches a mark. Use it with a single big mark (for example, minute 3) for a game.
- 8–10 years: They mark the lines with the guide strip, assemble it, calibrate minute by minute and write the scale. They check the clock against the stopwatch.
- 11–12 years: They draw the graph, discuss why the marks are not evenly spaced and relate it to pressure. Challenge: design a constant-level reservoir with an overflow, or work out the hole size for a 10-minute water clock.
In a group or in class
Teams of 3 (one times, one marks, one records) with 2 bottles per team. The adult cuts all the bottles and pierces the caps before the session, checking that they all drip. 60-minute session: 15 for assembly and scale, 30 for calibration (all the water clocks at once, with a shared stopwatch projected on the board), 15 for comparing scales between teams and testing the clock. Have spare caps already pierced and a tray for each team.
Challenges
- Build a water clock that measures exactly 10 minutes from start to finish.
- Make a constant-level water clock: a reservoir with an overflow that always keeps the same height of water above the hole, and check that the marks come out evenly spaced.
- Add a float (a bottle cap with a wooden skewer stuck to it) in the lower bottle that rises and points to the minutes on an outside scale, like the water clocks of Ctesibius.
- Compare your water clock with a home-made sand timer made from two small bottles.
- Find out what the water clocks of Egypt and Greece were like and draw one.