Cup wind meter
A 25 cm cardboard cross with four little cups that spins on a pin stuck into the rubber of a pencil. Count the turns of the red cup in 30 seconds and divide by 5 to get the wind speed in km/h.
What they will learn
- That the wind pushes the hollow side of a cup harder than the rounded side (drag coefficient ≈ 1.4 versus ≈ 0.4) and that difference makes it spin.
- How to turn turns into speed: turns → turns per second → distance travelled by the cup → wind speed.
- What the Beaufort scale is and how wind is described with numbers instead of words.
- That every home-made instrument has to be calibrated by comparing it with a trusted one (an official weather station).
Prepare beforehand
- Print the templates at 100 % and check the 50 mm scale.
- Cut the cardboard strips with a craft knife and ruler (scissors crush the flutes).
- Check that the bead slides onto the pin and that the 4 cups weigh the same (same model).
- Find where to put it outdoors: an open spot, at least 1 m above nearby walls or railings, away from corners that create eddies.
- If you want to test it indoors, have a hairdryer on COLD or a fan ready.
Materials and tools
- Small cups — 4 identical
paper or thin plastic, 150–200 ml (mouth Ø 65–75 mm, 75–85 mm tall), as light as possible (≈ 3–4 g) - Corrugated cardboard — 2 strips of 25 × 250 mm
single-wall, 3 mm, with the flutes running along the strip - Card or thin card — 1 piece of 60 × 60 mm
cereal-box card, for the guide disc - Pencil with a rubber — 1
new or long (≥ 15 cm), with the rubber on the end still whole - Sewing pin — 1 (+1 spare)
straight, with a head, ≈ 25 mm long (short sewing pin): head + 2 mm clearance + 7 mm of cross + 4 mm bead + 10 mm in the rubber. If you only have 30–38 mm pins, thread 1–3 more beads under the first so that the point goes in only 10 mm - Necklace bead — 1
plastic or glass, 3–5 mm, with a hole the pin can pass through - Sticky tape — 1 m
clear or parcel tape - Stapler — 8 staples
2 per cup - Red permanent marker — 1
to colour one cup completely - PVA glue or hot glue gun — a little
to glue where the arms cross - 1.5 l bottle with sand or water — 1 (optional)
base for testing on a table; cap with a 7 mm hole
Tools
- Scissors and ruler — cut and mark the strips
- Craft knife and cutting mat — cut the straight strips of corrugated cardboard adult
- Stopwatch (mobile phone) — time 30 s
- Awl or 3 mm nail — make a hole in the cap of the base bottle (optional) adult
Pieces and templates
- A · Arm ×2 — 3 mm corrugated cardboard
- B · Crossing guide disc ×1 — card or thin card
- C · Turn record sheet (counter) ×1 — paper
- D · Pencil (mast) ×1 — pencil with a rubber
Step by step
Cut and mark the arms adult
Cut two strips of cardboard 25 × 250 mm with the flutes running lengthways. On each one, mark the centre (at 125 mm), the 25 mm crossing area and a line 60 mm from each end (cup edge), as on template A.
1 The adult cuts two 25 × 250 mm strips with a ruler and craft knife 2 Mark the centre, the 25 mm crossing and a line 60 mm from each end 3 Hold it by one end: the strip should stay straight, not bend Check: Hold the strip by one end: it must not bend under its own weight.Glue the cross
Lay one arm across the other to make a cross, with the centres on top of each other. Glue them with PVA or hot glue on the 25 × 25 mm crossing square and, on top, glue guide disc B with its lines lined up with the edges of the arms.
1 Put glue on the centre square and lay the other arm across 2 Glue disc B on top with its lines on the edges of the arms 3 Check: 125 mm from the centre to each end and right angles Check: Measure with the ruler: the 4 ends must be 125 mm from the centre and form right angles.Make the axle hole adult
Push the pin through the cross at the hole in the guide disc, keeping it upright. Pull it out and push it back in, making small circles, until the hole is ≈ 1.2 mm across and the pin turns freely inside.
1 The adult pierces the centre of the disc with the pin, upright 2 Move the pin in little circles until the hole is 1.2 mm 3 The pin has to turn freely inside the hole Tip: If the hole ends up too big and the cross wobbles a lot, glue a small square of card on top and pierce it again.Colour the red cup
Colour the whole outside of one of the cups with the red marker, or wrap it in red tape. That will be your reference cup for counting turns.
1 Colour the whole outside of one cup with a red marker 2 You will use that red cup to count the turns Fit the first cup
Lay a cup on its side on the table. Rest the end of one arm on it, at right angles to the cup's axis, so that the arm covers the cup from the 60 mm line to the end and sits halfway up its height. Staple it with 2 staples and wrap one turn of tape round cup and arm.
1 Lay a cup on its side and bring the end of an arm across it 2 Staple it twice and wrap one turn of tape round cup and arm 3 The mouth must face one side of the arm, not the centre or outwards Check: The mouth of the cup must face to one side of the arm, not towards the centre or outwards.Fit the other three cups the same way round
Fix the other three cups in the same way. Looking at the cross from above, all the mouths must face the same direction of rotation (for example, each one «chasing» the next one clockwise).
1 Fix the other three cups with their mouths the same way round 2 Not like this: one cup the wrong way round slows the others 3 Turn it by hand: the cups follow each other, bottom first Check: Turn the cross by hand: all the cups must move bottom first; never two mouths facing each other.Prepare the pivot
Push the ≈ 25 mm pin through the hole in the cross from above, then thread the bead onto it under the cross. There should be 2 mm of clearance between the head of the pin and the cross, and about 10 mm of point sticking out below the bead.
1 Push the pin in from above and thread the bead on underneath 2 Leave 2 mm of clearance between the head and the cross Push the pin into the rubber adult
Push the point of the pin about 10 mm into the centre of the pencil's rubber, keeping it upright, until the bead touches the rubber (with a longer pin, add beads: never push it in more than 12 mm, because it would hit the metal ferrule). The bead rests on the rubber and the cross rests on the bead.
1 The adult pushes the head: the point goes 10 mm into the rubber 2 Look from the front: the cross must be level Check: Look from the front: the cross must be level. If it tilts, straighten the pin.Blow test
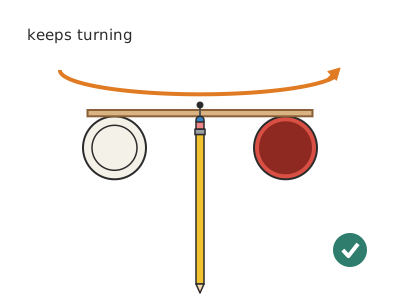
Hold the pencil upright and blow hard at a cup from 20 cm away, or use a hairdryer on cold at 50 cm. The cross should start on its own and keep turning a few times after you stop blowing.
1 Hold the pencil and blow hard at a cup from 20 cm 2 Or use a hairdryer on cold at 50 cm 3 When you stop blowing it should keep turning for a while Check: If it stops dead, the pin is rubbing: widen the hole or change the bead.Set it up outdoors adult
Tie the pencil upright to a broom handle or a railing with 3 turns of tape at the top and 3 at the bottom, leaving the cross at least 20 cm above the edge. Find an open spot, away from walls that block the wind.
1 The adult ties the pencil to a pole with 3 turns of tape at top and bottom 2 Leave the cross at least 20 cm above the railing 3 For the table, push it into the cap of a bottle of sand Tip: For tests on the table, push the pencil through a 7 mm hole in the cap of a 1.5 l bottle filled with sand or water.Count the turns
Set the stopwatch to 30 s and count out loud every time the red cup passes in front of you. If it spins too fast to count, count for 10 s and multiply by 3.
1 Set the stopwatch to 30 s and keep your eyes on the red cup 2 Count out loud each time the red cup passes in front Tip: One person counts and another calls «go!» and «stop!».Convert to km/h
Divide the turns in 30 s by 5 to get the approximate wind speed in km/h (example: 45 turns → 9 km/h, Beaufort 2, «light breeze»). Look up the result in table C and write it down with the date and time.
1 Divide the turns in 30 s by 5: that gives you km/h 2 Look up the result in table C and note it with date and time Calibrate against an official station
Take 5 measurements on different days and compare each one with the wind given by the nearest weather station on the official weather service website or app at that time. Divide the official speed by your turns in 30 s and take the average: that is YOUR conversion number.
1 Measure at the same time as the official station's reading 2 Divide the official km/h by your turns and average over 5 days Tip: Weather stations measure at a height of 10 m: at ground level the wind is usually 20–40 % lighter.
Does it work? The test
With a hairdryer on cold and low speed 1 m away, count the turns in 30 s. Then, outdoors, count 3 times in a row and take the average.
What should happen: It starts on its own with a wind of 4–6 km/h (tree leaves move). In a light wind of 10 km/h it makes about 50 turns in 30 s (almost 2 per second); at 20 km/h, about 100. When the wind stops it keeps turning for 2–4 s by inertia.
If something goes wrong
- It doesn't turn or stops straight away — The pin rubs in the hole in the cross or the cross touches the rubber. Solution: Widen the hole by making circles with the pin and put the bead between the cross and the rubber.
- The cross tilts and a cup rubs against the pencil — Bent pin or cups of different weights. Solution: Straighten the pin; use 4 cups of the same model and the same amount of tape on each.
- It turns a little one way and comes back — One of the cups faces the wrong way. Solution: Check from above that all the mouths follow the same direction of rotation.
- In strong wind the cups come off — Tape only, or tape that has got damp. Solution: Add 2 staples per cup and bring the anemometer in when winds are over 30 km/h.
- The arms bend downwards — Cardboard flutes running the wrong way or damp cardboard. Solution: Cut the strips with the flutes running lengthways or use doubled lolly sticks.
- My measurements don't match the weather app — The app gives the wind at a height of 10 m in an open spot; your anemometer measures close to the ground. Solution: That's normal: calibrate your own factor (step 13) and always measure in the same place.
Safety
- The pin is sharp: the adult pushes it in and, when it is not in use, covers the point with a small piece of rubber or cork. Not suitable for children under 3 (small parts and bead).
- Fixing it to a railing or window is a job for an adult: the child must not lean out or climb on chairs next to railings.
- With the hairdryer, always use cold air and keep the appliance away from water.
- Don't put it out during a thunderstorm or in strong wind: the cups can fly off.
The science behind it
For children
A cup lying on its side is like a parachute on one side and like a ball on the other. When the wind blows into the mouth, the cup fills with air and gets a strong push. When the wind hits the round bottom, the air slips round the sides and pushes very little. As the cross always has one cup with its mouth to the wind and another with its back to it, the «parachute» side wins and the cross spins. The harder the wind blows, the faster it turns.
For the adult
The drag force on each cup is F = ½·ρ·v²·A·Cd. The drag coefficient of a hemisphere or cup is ≈ 1.4 on the concave side and ≈ 0.4 on the convex side: the difference creates a net torque and the rotor speeds up until, at steady state, the cup moves at a fixed fraction of the wind speed (≈ 1/3 in Robinson's anemometer, 1846). So the angular speed is proportional to the wind speed: v_wind ≈ K·2π·R·n, where R is the radius to the centre of the cup and K the «anemometer factor» (≈ 2.5–3.5 in home-made models; it includes friction). Here R = 95 mm → each turn covers 0.60 m; with K ≈ 3, v (km/h) ≈ 0.22 × turns in 30 s ≈ turns/5. Friction at the pivot introduces a starting threshold (≈ 4–6 km/h) and makes the instrument read low at low wind speeds; that is why it is calibrated against a reference. Wind measured near the ground is lower than at weather stations (at 10 m) because of the boundary layer. The Beaufort scale (1805) classifies wind from 0 (calm, < 1 km/h) to 12 (hurricane, > 118 km/h).
- anemometer: an instrument that measures wind speed.
- revolution: one complete turn of something that spins.
- drag: the force with which air (or water) pushes on an object.
- Beaufort scale: a table from 0 to 12 that describes the wind by its effects (leaves, branches, waves).
- calibrate: compare your instrument with a reliable one to adjust its numbers.
By age
- 5–7 years: The adult cuts the strips, assembles the pivot and pushes in the pin. The child colours the red cup, tapes on the cups (the adult checks the direction) and counts the turns in 10 s. Use words: «a little wind / a lot of wind».
- 8–10 years: They do everything except using the craft knife and setting the anemometer up outdoors. They count for 30 s, divide by 5 and use the Beaufort table.
- 11–12 years: Have them work out the conversion factor from the radius (2πR) and compare it with their calibration against the official station. Challenge: build a turn counter with a card that flicks a piece of paper, or a magnet and a phone sensor.
In a group or in class
Pairs, one anemometer per pair (8 pre-cut cardboard strips and 4 identical cups per team, pins and beads handed out by the adult). 50 min session: 10 min explanation with a cup and a hairdryer (which side pushes more?), 25 min building, 15 min testing in the playground. Set up measuring stations (door, middle of the playground, next to the wall) and have every pair measure at all of them; pool the data in a table on the board.
Challenges
- Make a 3-cup anemometer and compare it with the 4-cup one: does it start sooner? Does it turn more steadily?
- Add a cardboard wind vane on another pencil so you also know where the wind is coming from.
- Build a counter: a strip of paper on the pencil that the red cup touches on each turn, and record the sound on a phone to count the «clicks».
- Improve the pivot with a marble bearing inside a bottle cap and measure how much lower the starting speed gets.