Solar oven in a box
A 33 cm pizza box turned into a solar oven: a foil-lined flap reflects the sun into a double cling-film window, and a black base insulated with newspaper tubes reaches 55–80 °C on a sunny day, enough to melt chocolate, cheese or marshmallows in 15–40 minutes.
What they will learn
- That dark colours absorb more solar radiation and get hotter than light ones (a comparison you can measure with a thermometer).
- What the greenhouse effect is: light comes in through the film, turns into heat on the black base and the hot air can’t escape.
- That a mirror (the foil) adds extra light: with the flap well angled, almost twice as much energy comes in through the window.
- Why insulation (still air, newspaper) slows down heat loss.
- To measure and record temperature against time, and to relate the height of the sun to the angle of the reflector.
Prepare beforehand
- Get a clean pizza box (ask for an empty one at a pizzeria). If there is grease on the bottom, cover it with newspaper before the card.
- Check the forecast: you need direct sun and little wind, and it's best in the 2 hours either side of solar noon (in Spain, roughly between 12:00 and 16:00 in summer and between 11:00 and 15:00 in winter). It doesn't work when it is cloudy.
- Print the template sheet at 100 % (piece B, margin ruler, and piece E, orientation indicator).
- Make the 4 newspaper tubes before the session if the children are young (rolling them is tricky).
- Choose the spot: ground or a table in the sun, away from moving shadows, with a stone or book so the wind doesn’t knock the flap over.
Materials and tools
- Pizza box — 1
corrugated cardboard, about 33 × 33 × 4 cm (medium pizza), clean and with no grease on the bottom - Aluminium foil — 1 square of 30 × 30 cm + 4 strips of 30 × 4 cm
ordinary kitchen foil; use it with the shiny side outwards - Cling film — 2 pieces of 35 × 35 cm
polyethylene, with no wrinkles - Black card — 1 sheet of 30 × 30 cm (or 2 A4 sheets)
matt black (not glossy) - Newspaper — 8–10 sheets
to make 4 insulating tubes about 2 cm in diameter - Sticky tape — 1 roll
clear or wide parcel tape (copes better with heat) - Glue stick — 1
to stick down the foil and the card without wrinkles - Wooden skewer — 1
about 30 cm, Ø 3 mm (flap prop) - Cocktail stick — 1
for the orientation indicator (piece E): it must stick out 15 mm - Small dark plate — 1
dark metal or ceramic, less than 22 cm in diameter - Food to test — 2 squares of chocolate, 2 biscuits, 2 marshmallows
or a slice of toast with a slice of cheese - Kitchen thermometer — 1 (optional)
probe or oven type, range 0–120 °C
Tools
- Craft knife and cutting mat (or thick cardboard underneath) — cutting the three sides of the flap adult
- 30 cm ruler and pencil — marking the 25 mm margin and the folds
- Scissors — cutting foil, cling film and card
- Empty ballpoint pen — scoring the hinge fold so it bends straight
- Oven gloves — taking out the hot plate adult
Pieces and templates
- A · Box lid: marking out the flap ×1 — the pizza box lid itself (3 mm corrugated cardboard)
- B · 25 mm margin ruler ×1 — card (200 gsm)
- C · Black base ×1 — black card
- D · Newspaper insulating tubes ×4 — rolled-up newspaper
- E · Sun orientation indicator ×1 — card (200 gsm)
- F · Flap prop ×1 — wooden skewer Ø 3 mm
Step by step
Clean and position the box
Open the pizza box and remove any food scraps. Close it and place it with the hinge (the side where the lid folds) at the back. Write “BACK” in pencil on the lid, next to the hinge.
1 Open the box and remove all the food scraps 2 Close it with the hinge at the back and write “BACK” next to it 3 The lid has to close flat with no big gaps Check: The lid should close flat with no big gaps at the sides.Mark out the flap
Cut out margin ruler B. Rest it against each of the four edges of the lid and draw a line 25 mm in. You are left with a 280 × 280 mm square drawn on the lid.
1 Cut out margin ruler B, 25 × 150 mm 2 Rest B on each edge and draw the line along its other side 3 You get a 280 × 280 mm square: check the diagonals match Check: Measure the two diagonals of the square: they should be equal (about 396 mm) to within 3 mm.Cut three sides adult
With a craft knife and ruler, cut the front side and the two side edges of the square, going through the lid only. DON’T cut the back side: it is the flap’s hinge. Make two or three gentle passes rather than one hard one.
1 Cut only the front and the two sides; the back side is the hinge 2 With something hard under the lid, cut in 2 or 3 gentle passes 3 The three lines cut from corner to corner, without overshooting Tip: Slide a board or thick piece of cardboard inside the box, under the lid, so you don’t slit the bottom.Score the fold
Run an empty ballpoint pen along the back line, against the ruler, pressing hard. Lift the flap and fold it back to 90° several times so the hinge becomes soft.
1 Go over the back line with a ruler and an empty ballpoint pen 2 Lift the flap to 90° several times to soften the hinge 3 The flap opens straight and only bends at the hinge Check: The flap should open straight, without bending anywhere else.Line the flap with foil
Cut a 30 × 30 cm piece of foil. Spread glue stick over the inner face of the flap (the one facing the box when it is closed). Stick the foil on with the shinier side outwards and smooth it from the centre to the edges with a cloth. On the three free sides, fold the spare 10 mm round the back and fix it with tape; on the hinge side, trim the excess flush with the fold.
1 Cut a 30 × 30 cm square of foil 2 Spread glue stick over the inner face of the flap 3 Stick the foil shiny side out and smooth from the centre to the edges Check: Look at yourself in the flap: you should see your blurry outline.Tip: The fewer wrinkles, the more light is reflected. If it wrinkles a lot, it is better to start again with another piece.Stick on the first layer of film
Open the box fully. On the INSIDE of the lid, stick a 35 × 35 cm piece of cling film over the window opening. First fix one side with tape, stretch it to the opposite side and stick that down, then do the other two.
1 Tape one side of the 35 × 35 cm film and stretch it to the opposite side 2 Stick the opposite side and then the other two, always pulling tight 3 Give it a tap: tight as a drum, no sagging Check: The film should be as tight as a drum: if you tap it, it sounds and doesn’t sag.Stick on the second layer of film
Close the box and stick another 35 × 35 cm piece of cling film on the OUTSIDE, over the 25 mm frame, just as tight. Between the two layers there is an air gap as thick as the cardboard (about 3 mm) that insulates like double glazing.
1 Close the box and stick another film on the outside, over the frame 2 Between the two films there is an air gap, like double glazing Check: When you look through the window, you see the inside with no big wrinkles and no holes.Line the walls and the base
Stick 4 strips of foil of 30 × 4 cm (4 cm is the height of the wall) on the four inside walls, shiny side inwards. Cut black card C to the size of the base (about 300 × 300 mm) and stick it down with glue stick.
1 Line the four walls on the inside, shiny side inwards 2 Put black card C, about 300 × 300 mm, on the base 3 Stick it with glue stick and smooth it with your hand Tip: The foil on the walls sends light that comes in at an angle back down to the base.Fit the insulation
Roll 4 newspaper tubes about 20 mm thick (D) and cut them to the inside length of the wall minus 20 mm (about 285 mm). Tape them next to the walls, on top of the card, in a pinwheel: each tube starts at a corner and its end touches the side of the next one, making a frame. Leave the centre clear for the plate.
1 Roll 2 sheets of newspaper tightly around a skewer 2 Stick the 4 tubes D in a pinwheel next to the walls, like a frame 3 Close it: the lid mustn’t squash the tubes Check: The lid has to close without squashing the tubes; if it won’t close, flatten them a little.Fit the orientation indicator
Cut out disc E (Ø 24 mm), stick it on a front corner of the lid’s 25 mm frame, without touching the film, and push a piece of cocktail stick into the centre, perfectly upright, so it sticks out 15 mm. It will tell you whether the box is facing the sun.
1 Cut out the 24 mm disc E 2 Stick E on a corner of the frame and push the stick into the centre 3 The stick has to be perfectly upright Set up the prop
Tape one end of the 30 cm skewer (F) to a free corner of the flap. Open the flap to about 70° and rest the other end on the side edge of the lid, about 20 cm from the hinge. Fix it with a piece of tape you can peel off.
1 Tape one end of skewer F to a free corner of the flap 2 Rest the other end on the side edge, 20 cm from the hinge 3 Blow hard at the flap: it shouldn’t move Check: Blow hard at the flap: it shouldn’t move.Put the food in
On the dark plate, put two biscuits with a square of chocolate and a marshmallow on top. Open the box, place the plate in the centre of the black base and close the lid carefully so you don’t tear the film.
1 Put two biscuits, a square of chocolate and a marshmallow on the plate 2 Place it in the centre of the black base 3 Close the lid slowly so you don’t tear the film Put it in the sun
Take the oven out into direct sun, on the ground or a table with no shadows, with the hinge on the side away from the sun. Turn the box until the stick’s shadow points straight at the hinge. If the sun is low (winter or before 11:00), prop up the back edge with a 4–6 cm book.
1 Hinge on the side away from the sun; turn the box to aim it 2 Turn it until the stick’s shadow points straight at the hinge 3 With a low sun, prop up the back edge with a 4–6 cm book Check: Look through the window: the bright reflection from the flap should fall inside, on the plate.Adjust the flap angle
Slide the loose end of the skewer until the patch of reflected light covers the whole window. As a guide: 60° in winter, 70° in spring and autumn, 80° in summer at midday. Readjust every 15–20 minutes because the sun moves.
1 Slide the end of the skewer until the light covers the window 2 Guide: 60° in winter, 70° in spring and autumn, 80° in summer 3 Readjust the flap every 15–20 minutes: the sun moves Wait and take the food out adult
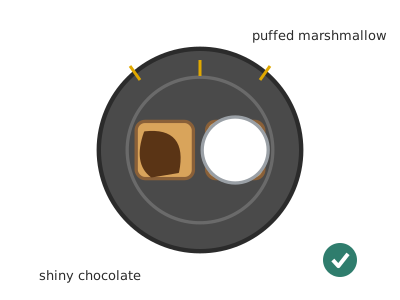
Wait 15–40 minutes without opening the box (every time you open it you lose the hot air). When the chocolate goes shiny and the marshmallow puffs up, open the box and take the plate out with oven gloves.
1 Wait 15–40 minutes without opening; note the temperature every 10 2 It’s ready when the chocolate shines and the marshmallow puffs up 3 An adult takes the plate out with oven gloves: it may be at 70 °C Check: If you have a thermometer, note the temperature at the start and every 10 minutes.
Does it work? The test
With the oven empty and the thermometer inside (or a square of chocolate on the plate), put it in the sun at midday with the flap well angled. Read the temperature through the film every 5 minutes for 30 minutes without opening it.
What should happen: On a sunny spring or summer day (25–30 °C outside), the inside goes from the outdoor temperature to 55–80 °C in 20–30 minutes. The chocolate (melts at 30–35 °C) goes shiny and soft in 10–15 minutes; the marshmallow puffs up in 25–40 minutes. In winter, with sunshine, it reaches 40–55 °C: enough for the chocolate.
If something goes wrong
- It won’t go above 35–40 °C — Not enough light (clouds, low sun) or the flap isn’t reflecting inside. Solution: Try between 12:00 and 15:00, prop the box up towards the sun and adjust the flap until the reflection falls inside the window.
- It heats up and cools down straight away — Air is getting in: loose film, splits in the corners of the box or wind. Solution: Tighten the film and seal the corners and the box’s closing slot with tape. Put it somewhere sheltered from the wind.
- The film mists up on the inside — The food gives off water vapour that condenses on the cold film. Solution: It’s normal with moist food. Use dry food (biscuits, chocolate) or leave a 5 mm gap for 2 minutes to let the steam out.
- The flap falls or moves in the wind — The skewer is only resting in place. Solution: Tape both ends of the skewer and put a stone on the box. If it is very windy, tie a piece of string from the corner of the flap to the box as a second support.
- The base hardly heats up even though the sun is getting in — The black card is glossy or is covered by a white plate. Solution: Use matt black card and a dark plate. A white plate reflects the light and heats up much less.
- The food takes more than an hour — Too much food or food with a lot of water in it (fruit, sauce). Solution: Use small, thin portions. Water needs a lot of energy to heat up; chocolate and cheese need little.
Safety
- Only an adult uses the craft knife, with a ruler and something hard under the lid.
- It can be 70–80 °C inside: the plate and the foil can burn. Always take the plate out with oven gloves.
- Don’t look at the sun or at the foil flap while it is reflecting: it is dazzling. Wear sunglasses and look at the window from the side.
- Only ready-to-eat food that just needs warming or melting. Never raw meat, fish, egg or rice: the oven can’t guarantee 75 °C in the middle.
- Use a clean box: if it has grease, mould or scraps on it, replace it.
- If the inside gets very hot (from 70–80 °C upwards), the film can soften: if you see it sagging inwards, open the flap a little less.
The science behind it
For children
Sunlight is energy. When it lands on something black, the black “eats” it and gets hot, like a black T-shirt in summer. The foil on the flap is a mirror that sends more light inside, as if there were two suns. The clear plastic lets light in, but doesn’t let the warm air out, just like a closed car in the sun. That’s why it gets hotter and hotter inside the box and the chocolate melts.
For the adult
In full sun, about 1000 W/m² of irradiance arrives. A 0.28 × 0.28 m window (0.078 m²) receives about 70–80 W directly if the sun hits it head-on (with the box flat and the sun 30–70° high, about 40–75 W); the reflecting flap, well angled, adds another 40–60 W (kitchen foil reflects ≈ 85 %, but with wrinkles some of it is scattered). Matt black card absorbs ≈ 90 % of visible light and heats up. Polyethylene film is transparent to visible light, and its main job is not to block infrared (PE is fairly transparent to IR) but to prevent convection: the hot air stays trapped; this is the «greenhouse effect» in the everyday sense. The temperature rises until the losses (conduction through the walls, convection and radiation through the window) equal the energy absorbed. That is why the double layer of film (3 mm of still air, conductivity ≈ 0.025 W/m·K), the newspaper insulation and sealing the gaps all improve the oven. Even so, a cardboard oven reaches 55–80 °C; commercial solar ovens reach 120–150 °C with glass, more reflectors and better insulation. Reflector angle: for a ray at solar height h to be reflected vertically, the mirror must make 45° + h/2 with the horizontal.
- absorption: when a material keeps the light that reaches it and turns it into heat.
- reflection: when light bounces off a surface, as in a mirror.
- greenhouse effect: light comes in through something transparent, warms the inside and the heat can’t get out.
- insulator: a material that lets heat through very slowly (still air, paper, cork).
- irradiance: the amount of light energy falling on each square metre.
By age
- 5–7 years: The adult marks and cuts the flap. The child sticks on the foil and the card, helps stretch the film and, above all, compares: chocolate on black and on white. Focus on “black absorbs, foil bounces, plastic keeps the heat in”.
- 8–10 years: They do all the steps except the craft-knife cutting. Have them measure the temperature every 5 minutes and write it in a table, and find the best flap angle themselves by watching the reflection.
- 11–12 years: Have them draw the temperature–time graph and compare versions (1 or 2 layers of film, with or without newspaper). Challenge: work out the flap angle with the formula 45° + h/2, measuring the height of the sun from the shadow of a stick.
In a group or in class
Teams of 3–4 children, one oven per team (pizza boxes requested from a pizzeria in advance). Per team: 1 box, 1 m of foil, 1 m of cling film, 1 sheet of black card, 1 newspaper, 1 skewer, tape. The adult brings the flaps already cut. 90-minute session: 10 min explanation, 40 min building, 40 min testing in the sun in the playground with a square of chocolate per team and a shared thermometer that goes round. The winner is the oven that melts the chocolate first or reaches the highest temperature at 20 min.
Challenges
- Reach 80 °C inside the oven without changing the box.
- Add reflecting flaps on the other three sides (with cardboard and foil) and measure how much higher it goes.
- Design an oven that works with the winter sun by tilting the box: which angle is best?
- Make a melted chocolate and marshmallow biscuit (s'more) in under 30 minutes.
- Make a funnel solar oven with an umbrella or a bowl lined with foil and compare.