String telephone
Two cups joined by 5–10 m of taut string: when you speak into one, its base vibrates, the vibration travels along the string and makes the base of the other cup vibrate, which plays back the voice quietly but clearly next to the ear.
What they will learn
- That sound is a vibration and needs a medium (air, string, wood) to travel through.
- That a taut string carries vibrations much better than air over the same distance, and a slack one, or one that rubs against something, loses them.
- That the base of the cup works like a membrane: it turns vibrations in the air into vibrations in the string and back again (just like a microphone and a loudspeaker).
- How to compare materials in an orderly way: changing only one thing at a time (string, cup, distance).
Prepare beforehand
- Print piece A (centring guide) at 100 %, or draw round the base of the cup on paper and find the centre by folding it into quarters.
- If the children are under 7, make the holes yourself before the session.
- Find a space of at least 6 m in a straight line with no obstacles (long corridor, playground, park).
- If you use cotton string, wax it by running it 3–4 times over a cold candle: it transmits better and doesn't fray.
Materials and tools
- Cups — 2
rigid plastic or waxed paper, about 200 ml (Ø 7 cm rim, Ø 5 cm base, 9 cm tall); both the same - String — 5 m (up to 15 m)
kitchen string, thin twine or 0.3–0.5 mm nylon fishing line - Toothpick — 1
2 pieces of 15 mm are used - Sticky tape — 2 pieces of 2 cm
to reinforce the hole on the inside - Modelling clay — 1 ball of 2 cm
support inside the base while piercing; removed afterwards - Candle or wax stick (optional) — 1
to wax cotton string so it transmits better - Stickers or felt-tip pens — as you like
to decorate the outside of the cups
Tools
- Drawing pin or thick needle — pierce the centre of the base (1–1.5 mm), with modelling clay inside as support adult
- Scissors — cut the string and snap the toothpick
- Tape measure or metre rule — measure the string and the test distances
- Darning needle or a bent piece of wire (optional) — thread the string through the hole if it is tricky
Pieces and templates
- A · Cup base centring guide ×2 — paper
- B · Toothpick stoppers ×2 — toothpick
- C · String ×1 — waxed kitchen string or 0.3–0.5 mm fishing line
Step by step
Choose and prepare the cups
Take two identical cups of about 200 ml. Press the base gently with a finger: it must be firm and flat, with no cracks. Decorate the outside now with stickers or felt-tip pens (it's harder later).
1 Take two identical cups of about 200 ml 2 Press the base with a finger: it must be firm and flat 3 Decorate the outside now with stickers or felt-tip pens Check: Both cups have a smooth base that doesn't dent when you press it.Mark the centre
Cut out centring guide A to the size of your base (50, 40 or 30 mm) and tape it under the base of each cup. The centre point marks where the hole goes.
1 Cut out centring guide A along the circle for your base 2 Tape it under the base: the dot marks the hole Make the hole adult
Squash a ball of modelling clay of about 2 cm inside the cup, against the centre of the base, and stand the cup upside down on the table: the clay supports the base so it doesn't cave in. Push a drawing pin or thick needle through the centre, from the outside in, until it sticks into the clay. Remove the clay. The hole should be 1–1.5 mm, only slightly thicker than the string.
1 Cup upside down with modelling clay inside, pressed against the base 2 Push the drawing pin through the centre, from the outside in 3 A 1–1.5 mm hole, right in the centre Tip: If the cup is paper, first stick a small piece of tape inside the base: the hole won't tear when you pull.Prepare the stoppers
Snap a toothpick with the scissors into two 15 mm pieces (B), removing the points. Cut 5.2 m of string (C), measuring it on the floor with the tape measure.
1 Remove the toothpick points and cut two 15 mm pieces 2 You now have the two stoppers B, without points 3 Measure 5.2 m of string C on the floor with the tape measure and cut it Thread the string through the first cup
Push one end of the string through the hole from the outside, through the base, and pull about 10 cm out of the mouth of the cup. If the string frays, twist the end with a little tape or use a darning needle.
1 Push the string through the hole from outside and pull 10 cm out of the mouth 2 If it frays, twist the end with a little tape Tie the first stopper
Tie the end of the string to the middle of a piece of toothpick with a tight double knot. Pull the string from the outside until the toothpick lies flat against the base, on the inside. Trim the excess 5 mm from the knot.
1 Tie the end of the string to the middle of the toothpick with a double knot 2 Pull from outside until the toothpick lies flat against the base 3 Trim the excess 5 mm from the knot and pull hard to test Check: Pull hard on the string: the toothpick must not slip through the hole or turn on end.Fit the second cup
Repeat with the other cup at the other end of the string: thread the string through the base from the outside, tie it to the second toothpick and pull until the toothpick rests against the base.
1 Thread the other end through the base of the second cup and tie the toothpick 2 Mouths facing outwards, one at each end of the string Check: The two cups end up with their mouths facing outwards, one at each end of the string.Move apart until it's taut
Each person takes a cup and you walk in opposite directions until the string is straight, 5 m apart. Pull just enough so it doesn't sag, without stretching it so much that the base bends out of shape.
1 Each with a cup, walk in opposite directions 2 Stop when the string is straight: taut, but not overstretched 3 Make sure the string doesn't touch the ground, corners, trees or people Check: The string forms a straight line and doesn't touch the ground, trees, corners or people.Talk and listen
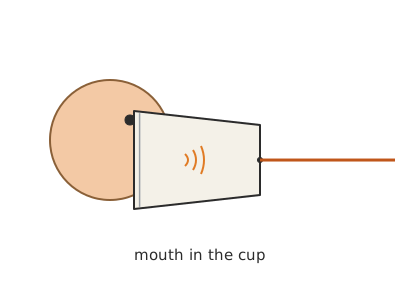
One person puts the rim of the cup around their mouth and speaks in a normal, clear voice. The other holds the rim of their cup around their ear (without pushing it in) and covers their other ear with their hand. Then swap.
1 Speak into the cup in a normal, clear voice 2 Hold the rim around your ear and cover the other one with your hand 3 Say «over» at the end of each sentence and swap roles Tip: Take turns by saying «over» at the end of each sentence, like radio hams: if you both talk at once, you can't understand a thing.Check the difference
Repeat the same sentence with the string slack (move 50 cm closer) and then with the string taut but touched in the middle by a third person with two fingers. Compare what you hear each time.
1 Move 50 cm closer: with the string slack the voice almost disappears 2 Have a third person pinch the string: the voice fades 3 Let go and pull it taut again: the voice comes back Check: With the string slack or pinched the voice almost disappears; when you let go and pull it taut again it comes back.
Does it work? The test
At 5 m apart, with the string taut, one person whispers a secret word into the cup. The other listens with the cup and then without it (through the air only).
What should happen: With the cup, the whispered word can be understood clearly; without it, at 5 m, a whisper can't be heard. With good string and rigid cups it works up to 15–20 m.
If something goes wrong
- You can't hear anything — The string is slack or rubbing against something (floor, corner, hand). Solution: Move further apart until it's straight and find a line with no obstacles.
- The toothpick slips out through the hole — The hole is too big or the toothpick piece is too short. Solution: Use a 15–20 mm piece of toothpick tied in the middle, or use a button. Cover a big hole with tape and make a new one.
- It sounds very faint — Thick, fluffy string or a soft plastic cup. Solution: Switch to thin fishing line or waxed string, and to rigid plastic cups or yoghurt pots.
- The base of the cup breaks when you pull — Paper cup with no reinforcement or too much tension. Solution: Reinforce the base on the inside with a piece of tape and pull less hard: the string just needs to not sag.
- You hear a scratching or buzzing noise — Fingers are touching the string or the toothpick is rattling against the base. Solution: Hold the cup by its side only. If the toothpick rattles, stick it to the base with a small piece of tape.
- You can hear sound but can't make out the words — Speaking too loudly or too fast, and the cup gets overloaded. Solution: Speak in a normal voice, slowly and clearly. Shouting doesn't help.
Safety
- With under-7s, an adult handles the drawing pin or needle; support the base from inside with modelling clay and hold the cup by its side, never with your hand under the point you are piercing.
- The toothpick pieces are small parts: keep them out of reach of children under 3.
- Don't stretch the string across walkways, stairs or cycle paths: someone could trip or get it caught round their neck.
- Don't shout into the cup while the other person has it at their ear, and don't yank the string while they are listening.
- If you use tins, file the edges and cover them with electrical tape: they cut.
The science behind it
For children
When you talk, your voice makes the air shake, and that shaking makes the base of the cup shake like the skin of a drum. The base pulls and lets go of the string very, very fast, and the shaking runs along the string to the other cup. There the base shakes again and moves the air next to your friend's ear, so they hear your voice. If the string is slack, the shaking gets lost, like when you try to push someone with a floppy rope.
For the adult
Sound is a mechanical pressure wave. When you speak, the air pressure inside the cup oscillates (≈ 100–4000 Hz for the voice) and makes the base vibrate; the base acts as a diaphragm coupled to the string. The taut string transmits the disturbance as a longitudinal (and partly transverse) wave at a speed that depends on its stiffness and tension: several hundred to thousands of m/s in nylon, compared with 343 m/s in air. What matters is not the speed but the attenuation: in air the energy spreads out over a sphere and falls with the square of the distance, whereas the string guides it in a single direction with little loss. The second diaphragm turns the string's vibration back into pressure waves next to the ear. If the string is slack, it can't transmit a longitudinal force and the energy is dissipated; if it rubs against an object, the vibration is transferred to that object (damping). That is why smooth, low-stretch, light strings (fishing line, waxed string) and rigid, light diaphragms (rigid plastic) work best. It is the same transduction principle used by a microphone and an earpiece, although there the signal travels as an electric current.
- vibration: a fast back-and-forth movement; sound is vibration.
- tension: how stretched the string is; it's needed for the string to carry the vibration.
- diaphragm: a thin sheet that vibrates with sound (here, the base of the cup).
- medium: material that sound travels through: air, water, string, wood...
- damping: slowing a vibration down until it dies away.
By age
- 5–7 years: The adult makes the holes and ties the toothpicks. The child decorates the cups, measures the string with the tape measure and plays at saying secret words. Focus on «if it shakes, it sounds» by putting a hand on the throat while talking.
- 8–10 years: They build the whole telephone (with help only for piercing). They compare strings and cups with the 0-to-3 table and discover what happens when the string is pinched.
- 11–12 years: They design a controlled experiment (a single variable) and look for the maximum distance. Challenge: build a 3–4-cup switchboard and work out why it's best for the strings not to cross.
In a group or in class
Pairs: one telephone per pair (2 cups, 5.2 m of string, 1 toothpick). The adult pierces all the cups beforehand. 45-minute session in the playground: 15 min building, 15 min free testing, 15 min «distance contest» and the Y network with several pairs. Mark lines at 5, 10 and 15 m with chalk and keep pairs at least 2 m apart so the strings don't cross.
Challenges
- Get a whole sentence to be heard at 20 m.
- Set up a 4-cup switchboard (an X with a central knot) and organise a conversation in turns.
- Improve the telephone by replacing the base of the cup with a stretched balloon or baking paper, and compare.
- Make a telephone that works round a corner without losing the voice.
- Find out how Bell's telephone (1876) worked and draw how it is similar to yours.