Mechanical hand with tendons
A 16 × 18 cm cardboard hand with fingers jointed by folds and five threads that act as tendons: pulling each thread bends its finger, and a control bar closes the whole hand, just as the tendons in your forearm move your fingers.
What they will learn
- That fingers have no muscles: they move because tendons, like strings, pull on them from the forearm.
- What a joint (hinge) is and why in the model each finger has three and the thumb two (your real thumb has two phalanges and a third joint next to the wrist).
- That a thread running at a distance from the hinge (inside the straw) creates a lever arm that makes the finger turn.
- That another tendon or a spring is needed to straighten the finger: muscles only pull, they do not push.
- How 3D-printed mechanical prosthetic hands work.
Prepare beforehand
- Print template A at 100 % (not fit to page) and check that the middle finger is 22 mm wide.
- Choose flat cardboard and position the template with the corrugations running across the width of the fingers (left to right).
- Cut and prepare the lengths of straw: one 20 cm straw gives about 7 pieces.
- Cut the 5 threads of 40 cm and put a small piece of tape on one end of each so it does not fray (it works as a needle).
- For young children, cut the gaps between the fingers yourself with a craft knife before the session.
Materials and tools
- Corrugated cardboard — 1 sheet of 25 × 25 cm
single-wall, 3 mm, flat and uncreased (delivery box) - Straws — 2–3
straight, Ø 5–6 mm (you need about 34 cm in total) - Strong thread — 5 lengths of 40 cm (2 m)
kitchen string, thin ≈ 1 mm twine or doubled sewing thread - Clear sticky tape — 1 roll
to fix the straws - Glue stick — 1
to stick on the template and the palm reinforcement - Thin rubber bands — 3 (optional)
office ones, cut into strips to make the fingers spring back - Toothpick — 1
to make 8 mm stoppers at the ends of the threads
Tools
- Scissors — cut out the outline, the straws and the gaps between the fingers
- Craft knife with metal ruler — cut the 6 mm gaps between the fingers adult
- Empty ballpoint pen and ruler — score the folds
- Felt-tip pen — mark lines and decorate
- Awl or wooden skewer — pierce the 2 mm holes in the fingertips adult
- Large wool needle — thread the string through the straws (optional)
Pieces and templates
- A · Hand (seen from the palm) ×1 — corrugated cardboard 3 mm
- B · Palm reinforcement ×1 — corrugated cardboard 3 mm
- C · Control bar ×3 — corrugated cardboard 3 mm
- D · Finger rings ×5 — card
- E · Straw pieces ×14 — straw Ø 5–6 mm
- F · Tendons ×5 — kitchen string or thin twine
Step by step
Stick on the template
Stick template A onto the cardboard with a glue stick, with the corrugations running from left to right (across the width of the fingers). Smooth it down with your hand so there are no bubbles.
1 Put glue stick on the cardboard, with the corrugations lying sideways 2 Place template A on top and smooth it down with your hand 3 The corrugations cross the fingers from side to side, with no bubbles Cut out the outline adult
Cut out the outer outline of the hand with scissors. For the 6 mm gaps between the fingers, make the two straight cuts of each gap with a craft knife and ruler and finish with scissors.
1 Cut out the outer outline of the hand with scissors 2 Cut the two straight sides of each gap with a craft knife and ruler 3 Finish with scissors: each 22 mm finger moves freely Check: Each finger is 22 mm wide and moves freely, without catching on the one next to it.Score the folds
Run an empty ballpoint pen along the ruler, pressing hard, over the 14 fold lines: 3 on each finger (the knuckle, 90 mm from the top edge of the palm, and two more) and 2 on the thumb.
1 Find the 14 lines: 3 on each finger and 2 on the thumb 2 Go over each line with a ruler and an empty ballpoint pen, pressing hard 3 Score on the template side: that is the palm Tip: Score on the palm side, the one with the template: the groove helps it fold towards that side.Fold the joints
Fold each fold towards the palm to about 90° and straighten it out again. Repeat 3 times on each fold so the hinge becomes soft.
1 Fold each fold towards the palm to about 90° 2 Straighten it out again and repeat 3 times on each fold 3 With a touch, each finger section bends on its own Check: Each finger section bends on its own with a touch of a finger and the cardboard has not split on the back.Reinforce the palm
Glue reinforcement B (100 × 75 mm) to the back of the palm, lined up with the wrist and below the knuckle fold, with its corrugations running the opposite way to the hand's.
1 Turn the hand over and put glue on the palm 2 Glue B below the knuckles, with the corrugations the other way 3 Press the centre: the palm no longer curves Check: The palm no longer curves when you press its centre.Cut the straws
Cut the 14 straw pieces E with scissors, measuring with the ruler: little finger 11, 21 and 30 mm; ring and index fingers 16, 28 and 30 mm; middle finger 19, 32 and 30 mm; thumb 14 and 27 mm.
1 Measure each piece with the ruler and mark it with the felt-tip pen 2 Cut along the mark with scissors: 14 pieces in total 3 Leave each group of pieces on top of its finger Tip: Leave each group of pieces on top of its finger as you go so you do not mix them up.Stick on the straws
Place each piece on its guide line, centred on the finger, and fix it with two crossed strips of tape (or a line of glue). Always leave about 4 mm free on each side of every fold.
1 Fix each piece on its line with two crossed strips of tape 2 Stick on all 14 pieces without covering any fold 3 Bend it to check: the straws do not touch Check: When you bend each joint, the straws do not bump into each other.Pierce the fingertips adult
Pierce the 2 mm hole in the tip of each finger and the thumb with an awl or a wooden skewer, resting the cardboard on an eraser or a piece of cork.
1 Rest the tip on an eraser and pierce it with the awl 2 Make a 2 mm hole in the tip of all 5 fingers Thread the tendons
Push a 40 cm thread through the hole in the tip from the back, tie a triple knot (or tie on half a toothpick as a stopper) so it does not pull out, and thread it through all the straws on that finger and the palm until it comes out at the wrist. Repeat with all 5 fingers.
1 Push the thread through from the back and tie a triple knot 2 Thread it through all the straws on the finger and the palm 3 Repeat with all 5 fingers: 5 threads come out at the wrist Tip: The small piece of tape on the end of the thread works as a needle. If it is difficult, use a wool needle.Test each finger
Hold the palm with one hand and slowly pull each thread, one at a time, about 3–4 cm. The finger should bend at all three joints and close towards the palm.
1 Hold the palm and slowly pull a thread, about 3–4 cm 2 The finger closes towards the palm at all three joints 3 If a finger section does not bend, go over its fold and bend it more Check: If a finger section does not bend, go over its fold again with the pen and bend it a few more times.Fit the control bar
Glue together the 3 layers of bar C. Pass each thread through its hole (looking at the hand from the palm, the thumb is on the right: use the right-hand hole for the thumb so the threads do not cross) and, with all the fingers straight and the threads taut without pulling, tie a knot in each one just below the bar (on the side away from the hand), so that when you pull, the knot cannot slip through the hole.
1 Glue together the 3 layers of bar C, alternating the corrugations 2 Pass each thread through its hole and tie a knot underneath 3 Pull the bar 4 cm downwards: all 5 fingers close Check: When you pull the bar 4 cm downwards, all 5 fingers close at once.Adjust the lengths
If one finger closes before the others, undo its knot and tie it again 5–10 mm lower down; if it closes late, tie it higher up. Aim for all the fingers to start moving at the same time.
1 Find the finger that closes before the others 2 Untie its knot and tie it again 5–10 mm lower down 3 Repeat until all the fingers start at the same time Return springs (optional)
Cut 5 strips of rubber band 12 cm long. On the back of each finger, tape one end to the tip and the other to the palm, stretching the rubber a little (1 cm). When you let go of the threads, the fingers will open on their own.
1 Cut 5 strips of rubber band 12 cm long 2 On the back, tape each strip from the tip to the palm 3 When you let go of the thread, the rubber opens the finger on its own Tip: If the rubber is too strong and the finger is hard to close, stick it on less stretched.Grab objects
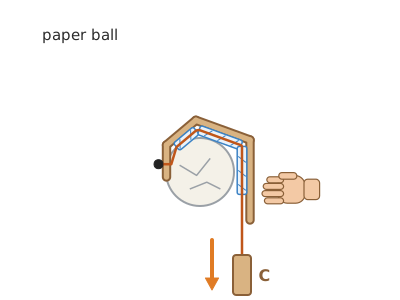
Hold the hand by the palm with one hand and pull the bar with the other to grab an empty plastic cup, a paper ball or a roll of sticky tape.
1 Hold the palm, pull the bar and grab a paper ball 2 Also try a roll of tape or an empty cup
Does it work? The test
Hold the palm and pull the control bar 4–5 cm. Then try picking up an empty plastic cup and a paper ball 5 cm in diameter.
What should happen: The five fingers close at the same time to form a fist with about 4–5 cm of thread travel. The hand holds an empty plastic cup (≈ 10 g) or a paper ball; a cup with water in it slips.
If something goes wrong
- The finger does not bend, or only bends at the base — Folds not scored deeply enough, or cardboard with the corrugations running along the finger. Solution: Go over the folds with the pen again and bend them several times. If the corrugations run along the finger, make a shallow cut (top layer only) at each fold on the palm side.
- The thread pulls out of the tip when you pull — A small knot that slips through the hole. Solution: Tie a triple knot or tie on an 8 mm piece of toothpick as a stopper at the back.
- The palm bends instead of the fingers closing — Palm without reinforcement, or threads pulling too far to one side. Solution: Glue on reinforcement B and pull the threads straight, in the direction of the wrist.
- The straws come unstuck — Tape not sticking well to dusty cardboard, or smooth straws. Solution: Use a drop of hot glue (adult) or PVA glue and leave to dry for 10 minutes.
- The fingers do not open when you let go — The cardboard stays bent; there is no extensor tendon. Solution: Fit the rubber-band return springs on the back of each finger.
- Some fingers close before others when using the bar — Threads with different tension. Solution: Retie the threads on the bar with all the fingers straight and the threads just taut.
Safety
- The craft knife for the gaps between the fingers is used by an adult, with a metal ruler and a cutting mat.
- Piercing with an awl or skewer: always on cork or an eraser, with the point away from your other hand.
- Do not tie the threads around your fingers or your neck: use the card rings, which slip off on their own.
- If you use hot glue for the straws, an adult applies it: it burns.
The science behind it
For children
Move your fingers and look at your wrist: you will see some strings moving under your skin. Those are tendons. The muscles that move your fingers are in your arm, and they pull on the tendons just as you pull on the thread. The straws are like the rings your fingers have to keep the tendon close to the bone. And because muscles can only pull, opening the hand needs another tendon on the back: our rubber bands.
For the adult
The model reproduces the flexor tendons of the hand: the muscle bellies of the finger flexors are in the forearm and transmit the force through tendons that run along the palmar side, held against the phalanges by the annular pulleys (here, the straw pieces). Each fold is a hinge-type joint (one degree of freedom): metacarpophalangeal, proximal and distal interphalangeal in the fingers; the model's thumb has two. The thread runs at a distance d (≈ 3–4 mm, the radius of the straw plus the thickness of the cardboard) from the hinge axis; the tension T produces a torque T·d at each joint. Since the tension is the same all along the thread, the softest joint bends first: that is why all the folds must be worked equally. The thread travel needed to close a finger is roughly the sum of d·θ at each joint (3 joints × 4 mm × 1.57 rad ≈ 2 cm, plus slack). Muscles can only contract, so extension needs another tendon (the extensors, on the back of the hand) or an elastic element, which is what the rubber bands do. The 3D-printed prosthetic hands of many charity projects use exactly this principle, with tensioning threads and return elastics, operated by bending the wrist.
- tendon: a strong cord that joins muscle to bone and transmits its force.
- joint: the connection between two bones that allows movement; here, each fold.
- phalanx: each of the finger bones; three in each finger and two in the thumb.
- flexion: the movement of bending a joint.
- prosthesis: an artificial part that replaces a part of the body.
By age
- 5–7 years: The adult cuts out the hand, scores the folds and pierces the holes. The child folds the folds, tapes on the straws (already cut) and threads the strings with help. Use the control bar so it closes the whole hand.
- 8–10 years: Full build with help only with the craft knife and the awl. Let them adjust the length of the threads on the bar themselves until all the fingers close at the same time.
- 11–12 years: Have them design their own hand from the outline of theirs, keeping fingers at least 20 mm wide, and add extensor tendons with rubber bands. Challenge: measure the thread travel per finger and compare it with the d × angle calculation.
In a group or in class
Individually or in pairs (one hand per child is the most motivating; the materials are recycled). Beforehand: print and cut out the hands for the youngest, cut the gaps between the fingers with a craft knife and prepare bags with 14 straw pieces and 5 threads. 70-minute session: 10 min observing the tendons in their own wrists, 45 min building, 15 min of challenges (picking up objects from a shared table). Keep the hot glue at a station supervised by an adult.
Challenges
- Pick up an empty plastic cup and carry it from one side of the table to the other without dropping it.
- Add extensor tendons with thread on the back and a second bar to open the hand by pulling.
- Mount the hand on a forearm made from a kitchen roll tube and run the threads inside it to a bar at the end.
- Make the hand count from 1 to 5 using the rings.
- Stick rubber or craft foam fingertips on the tips and measure how much more weight it holds.